Note
Access to this page requires authorization. You can try signing in or changing directories.
Access to this page requires authorization. You can try changing directories.
In Exchange 2013 you have the ability to add additional alias addresses to a mailbox. A user might ask you to create another alias perhaps with a shorter name and surname. This can be done from the Exchange Admin Center and the Exchange Management Shell.
Add an alias using the Exchange Admin Center:
https://collaborationpro.com/wp-content/uploads/2015/04/FAccess1-300x178.png
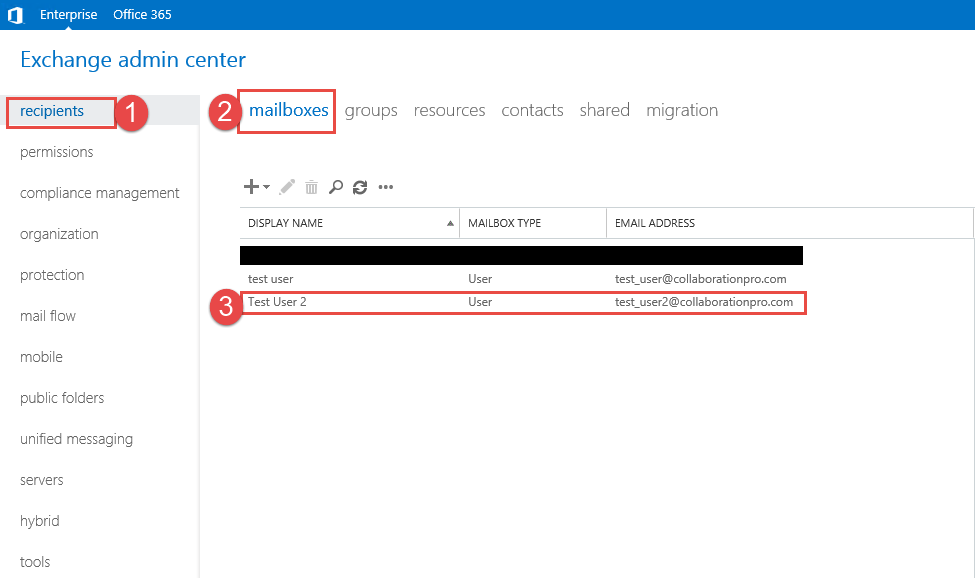
- Step 1 -> Click on Recipients on the left.
- Step 2 -> Click on Mailboxes on the top left.
- Step 3 -> Click on the mailbox where you want to add an alias to.
Once you have located the mailbox you can double click it or click on the pencil.
https://collaborationpro.com/wp-content/uploads/2015/04/alias1-300x259.png
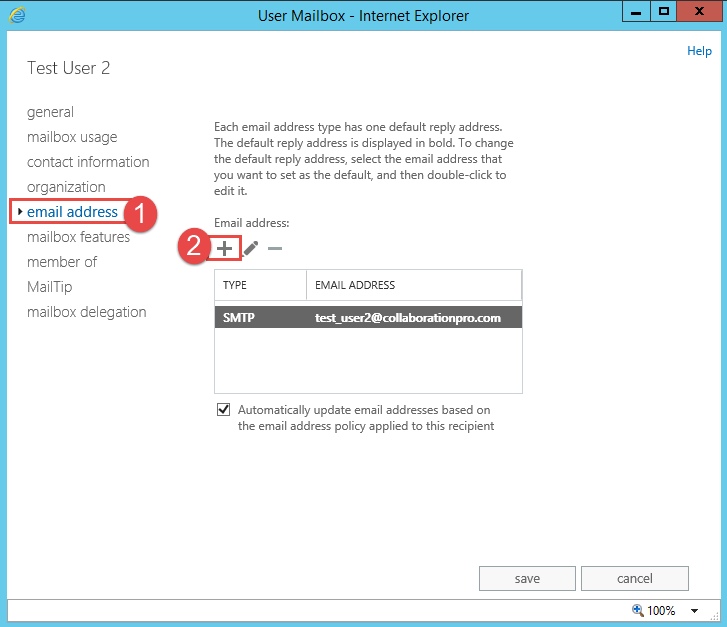
- Once the properties for the user mailbox show, click on the email address on the left.
- Now click on the + button as shown above to create an alias address.
https://collaborationpro.com/wp-content/uploads/2015/04/alias2-300x278.png
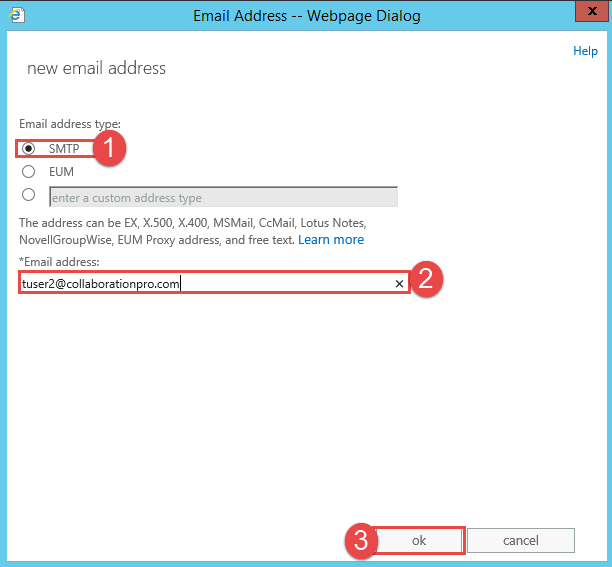
- In this exercise we are going to use SMTP. That is the default radio button, no need to change it.
- Step 2 -> Enter in the alias email address.
- Step 3-> Click on OK.
https://collaborationpro.com/wp-content/uploads/2015/04/alias3-300x259.png
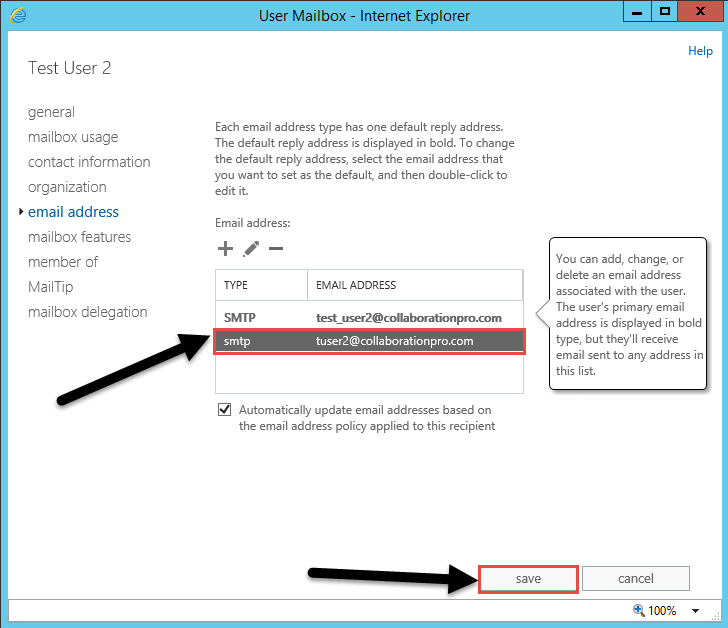
- As shown above, the email alias we created in the previous step now shows as one of the SMTP addresses for the user.
- Click the save button.
Add an alias using the Exchange Management Shell:
- Set-Mailbox "Test_User2" -EmailAddresses @{add="tuser2@collaborationpro.com"}