Note
Access to this page requires authorization. You can try signing in or changing directories.
Access to this page requires authorization. You can try changing directories.
You can decide and configure which models are available for inference in your Azure AI Foundry resource. When you configure a model, you can generate predictions from it by specifying its model name or deployment name in your requests. You don't need to make any other changes in your code to use the model.
In this article, you learn how to add a new model to an Azure AI Foundry Models endpoint.
Prerequisites
To complete this article, you need:
An Azure subscription. If you're using GitHub Models, you can upgrade your experience and create an Azure subscription in the process. Read Upgrade from GitHub Models to Azure AI Foundry Models if that's your case.
An Azure AI Foundry project. This kind of project is managed under an Azure AI Foundry resource (formerly known as Azure AI Services resource). If you don't have a Foundry project, see Create a project for Azure AI Foundry (Foundry projects).
Foundry Models from partners and community require access to Azure Marketplace. Ensure you have the permissions required to subscribe to model offerings. Foundry Models sold directly by Azure don't have this requirement.
Add a model
Add models to the Foundry Models endpoint by following these steps:
Go to the Model catalog section in Azure AI Foundry portal.
Select the model you want. This article uses Mistral-Large-2411 for illustration.
Review the details of the model in the model card.
Select Use this model.
For Foundry Models from partners and community, you need to subscribe to Azure Marketplace. This requirement applies to Mistral-Large-2411, for example. Select Agree and Proceed to accept the terms.

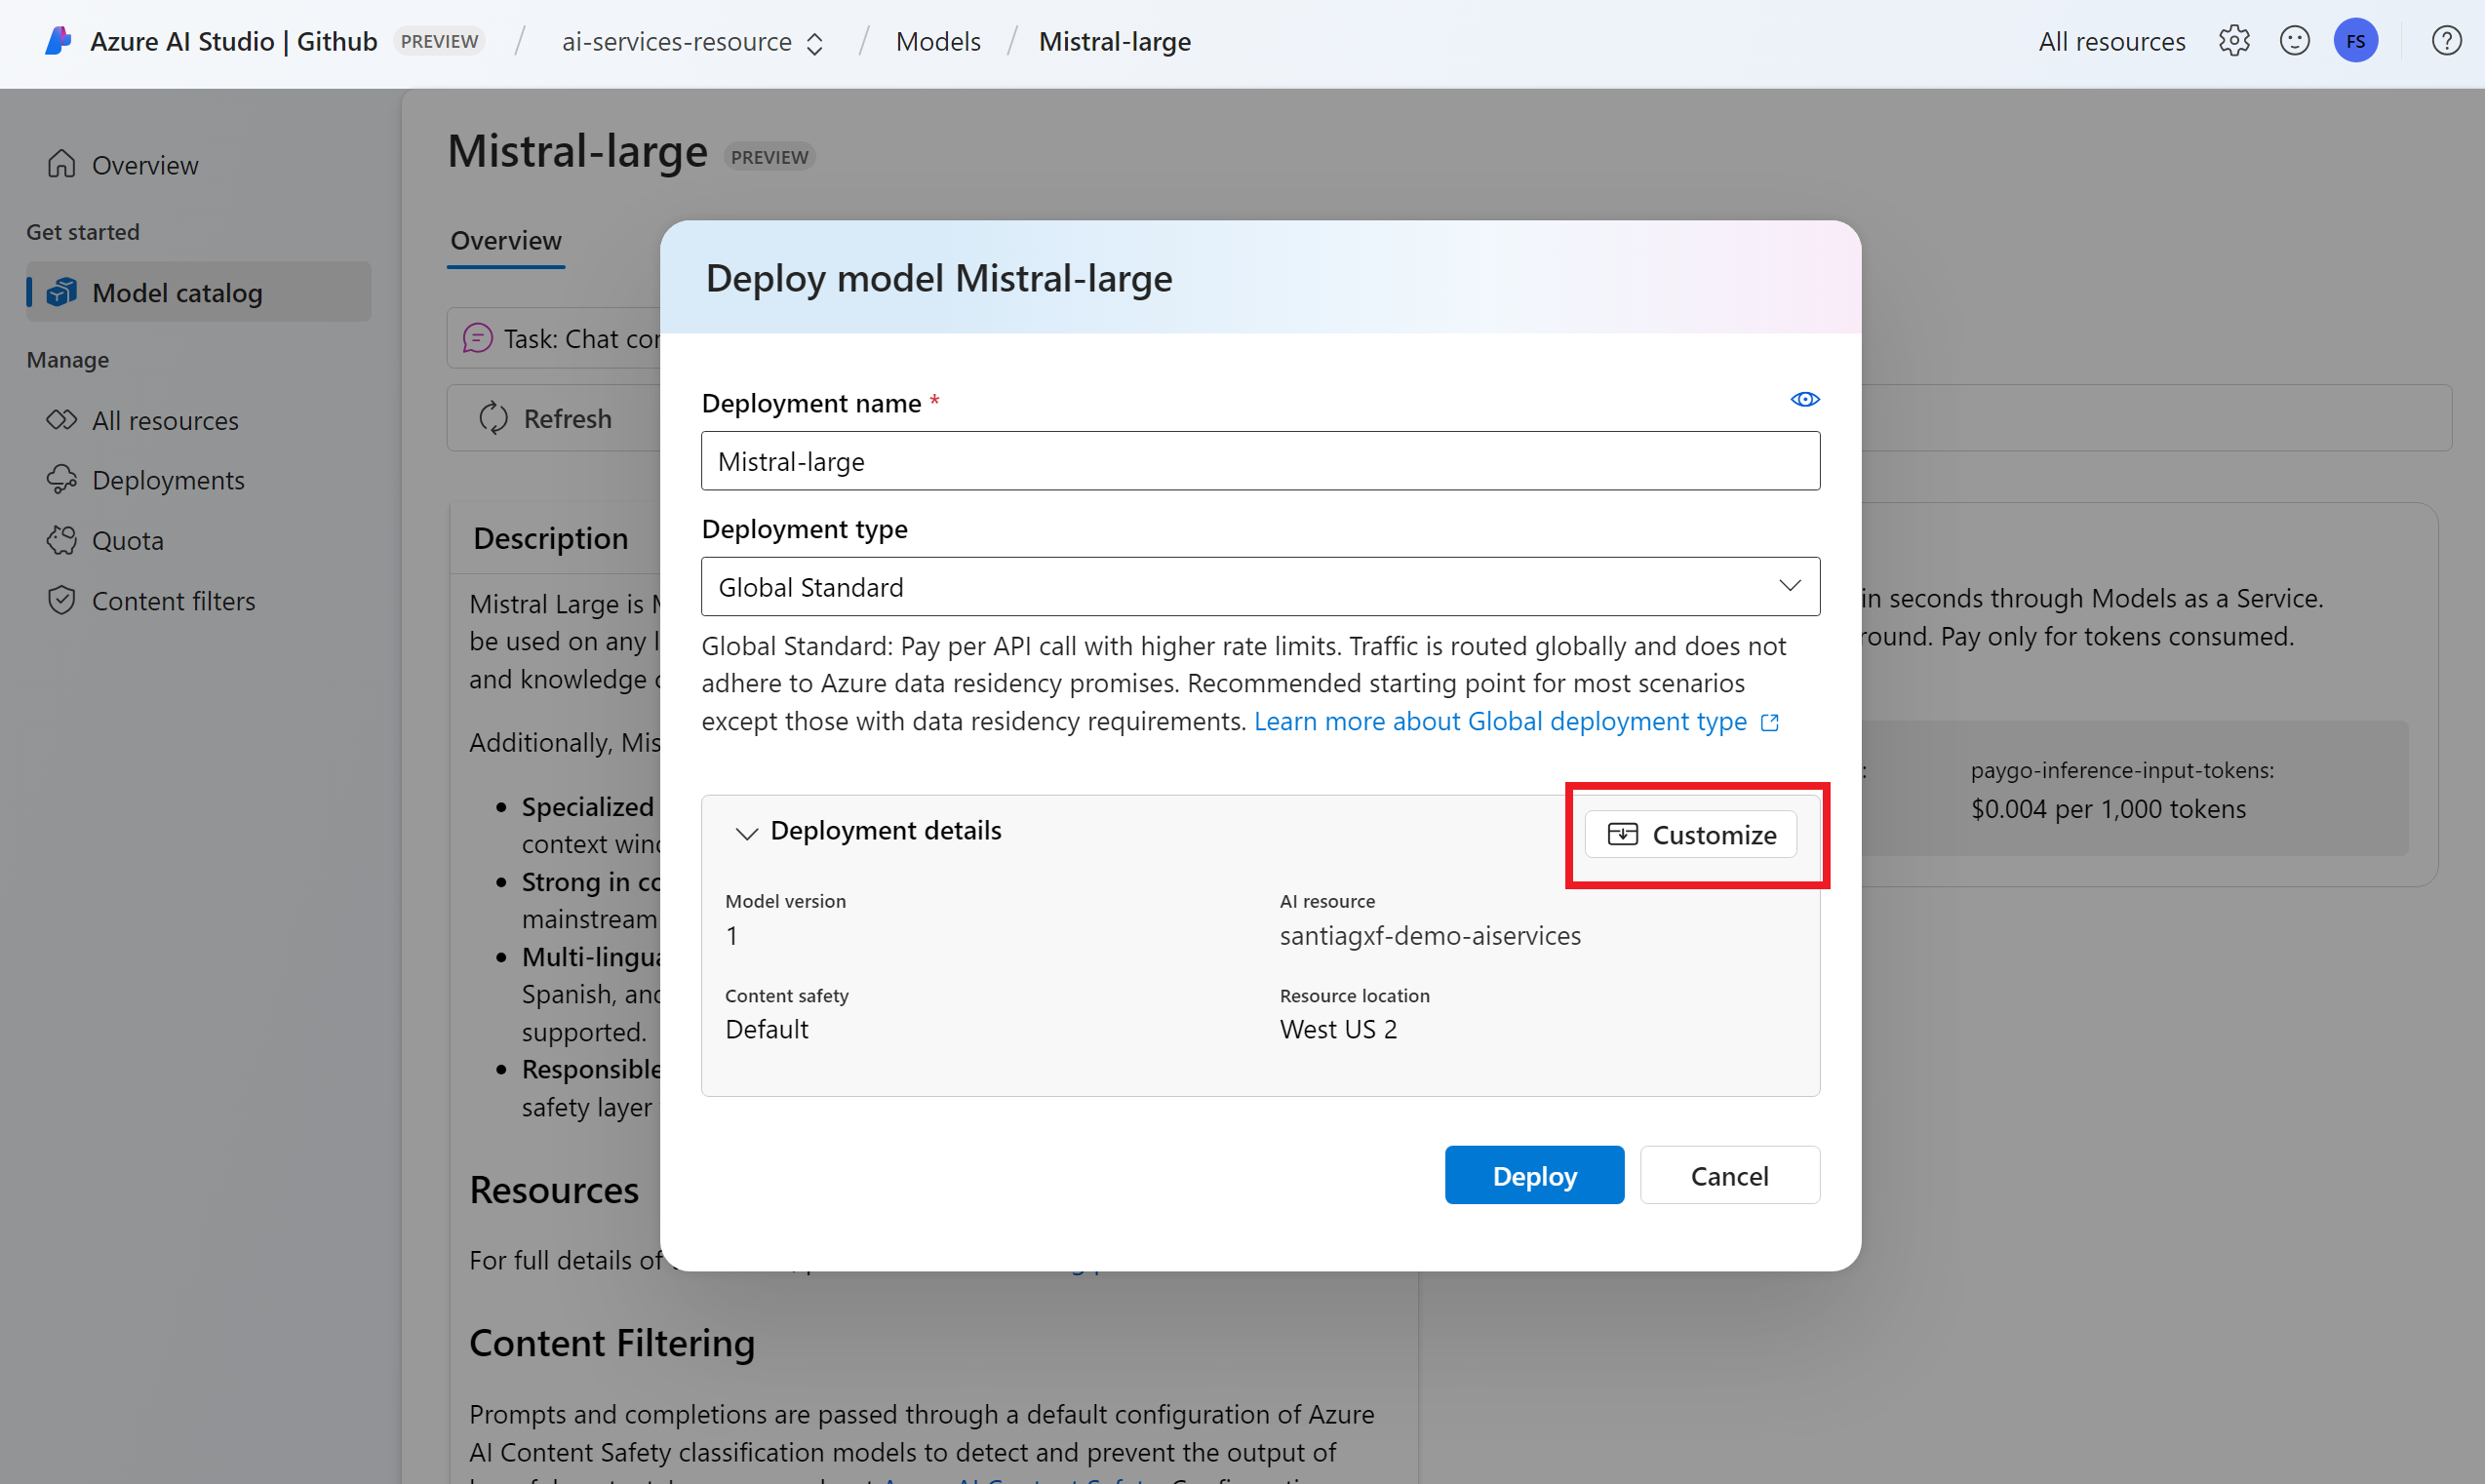
Configure the deployment settings. By default, the deployment receives the name of the model you're deploying. The deployment name is used in the
modelparameter for request to route to this particular model deployment. This naming convention allows you to configure specific names for your models when you attach specific configurations. For instance, useo1-preview-safefor a model with a strict content filter.Tip
Each model supports different deployment types, providing different data residency or throughput guarantees. See deployment types for more details.
The portal automatically selects an Azure AI Foundry connection depending on your project. Use the Customize option to change the connection based on your needs. If you're deploying under the Serverless API deployment type, the models need to be available in the region of the Azure AI Foundry resource.
Tip
If the desired resource isn't listed, you might need to create a connection to it. See Configure Azure AI Foundry Models in my project in Azure AI Foundry portal.
Select Deploy.
When the deployment completes, the new model is listed in the page and it's ready to use.


Manage models
You can manage the existing model deployments in the resource by using the Azure AI Foundry portal.
Go to the Models + Endpoints section in Azure AI Foundry portal.
The portal groups and displays model deployments per connection. Select the Mistral-Large-2411 model deployment from the section for your Azure AI Foundry resource. This action opens the model's deployment page.


Test the deployment in the playground
You can interact with the new model in Azure AI Foundry portal by using the playground:
From the model's deployment page, select Open in playground. This action opens the chat playground with the name of your deployment already selected.
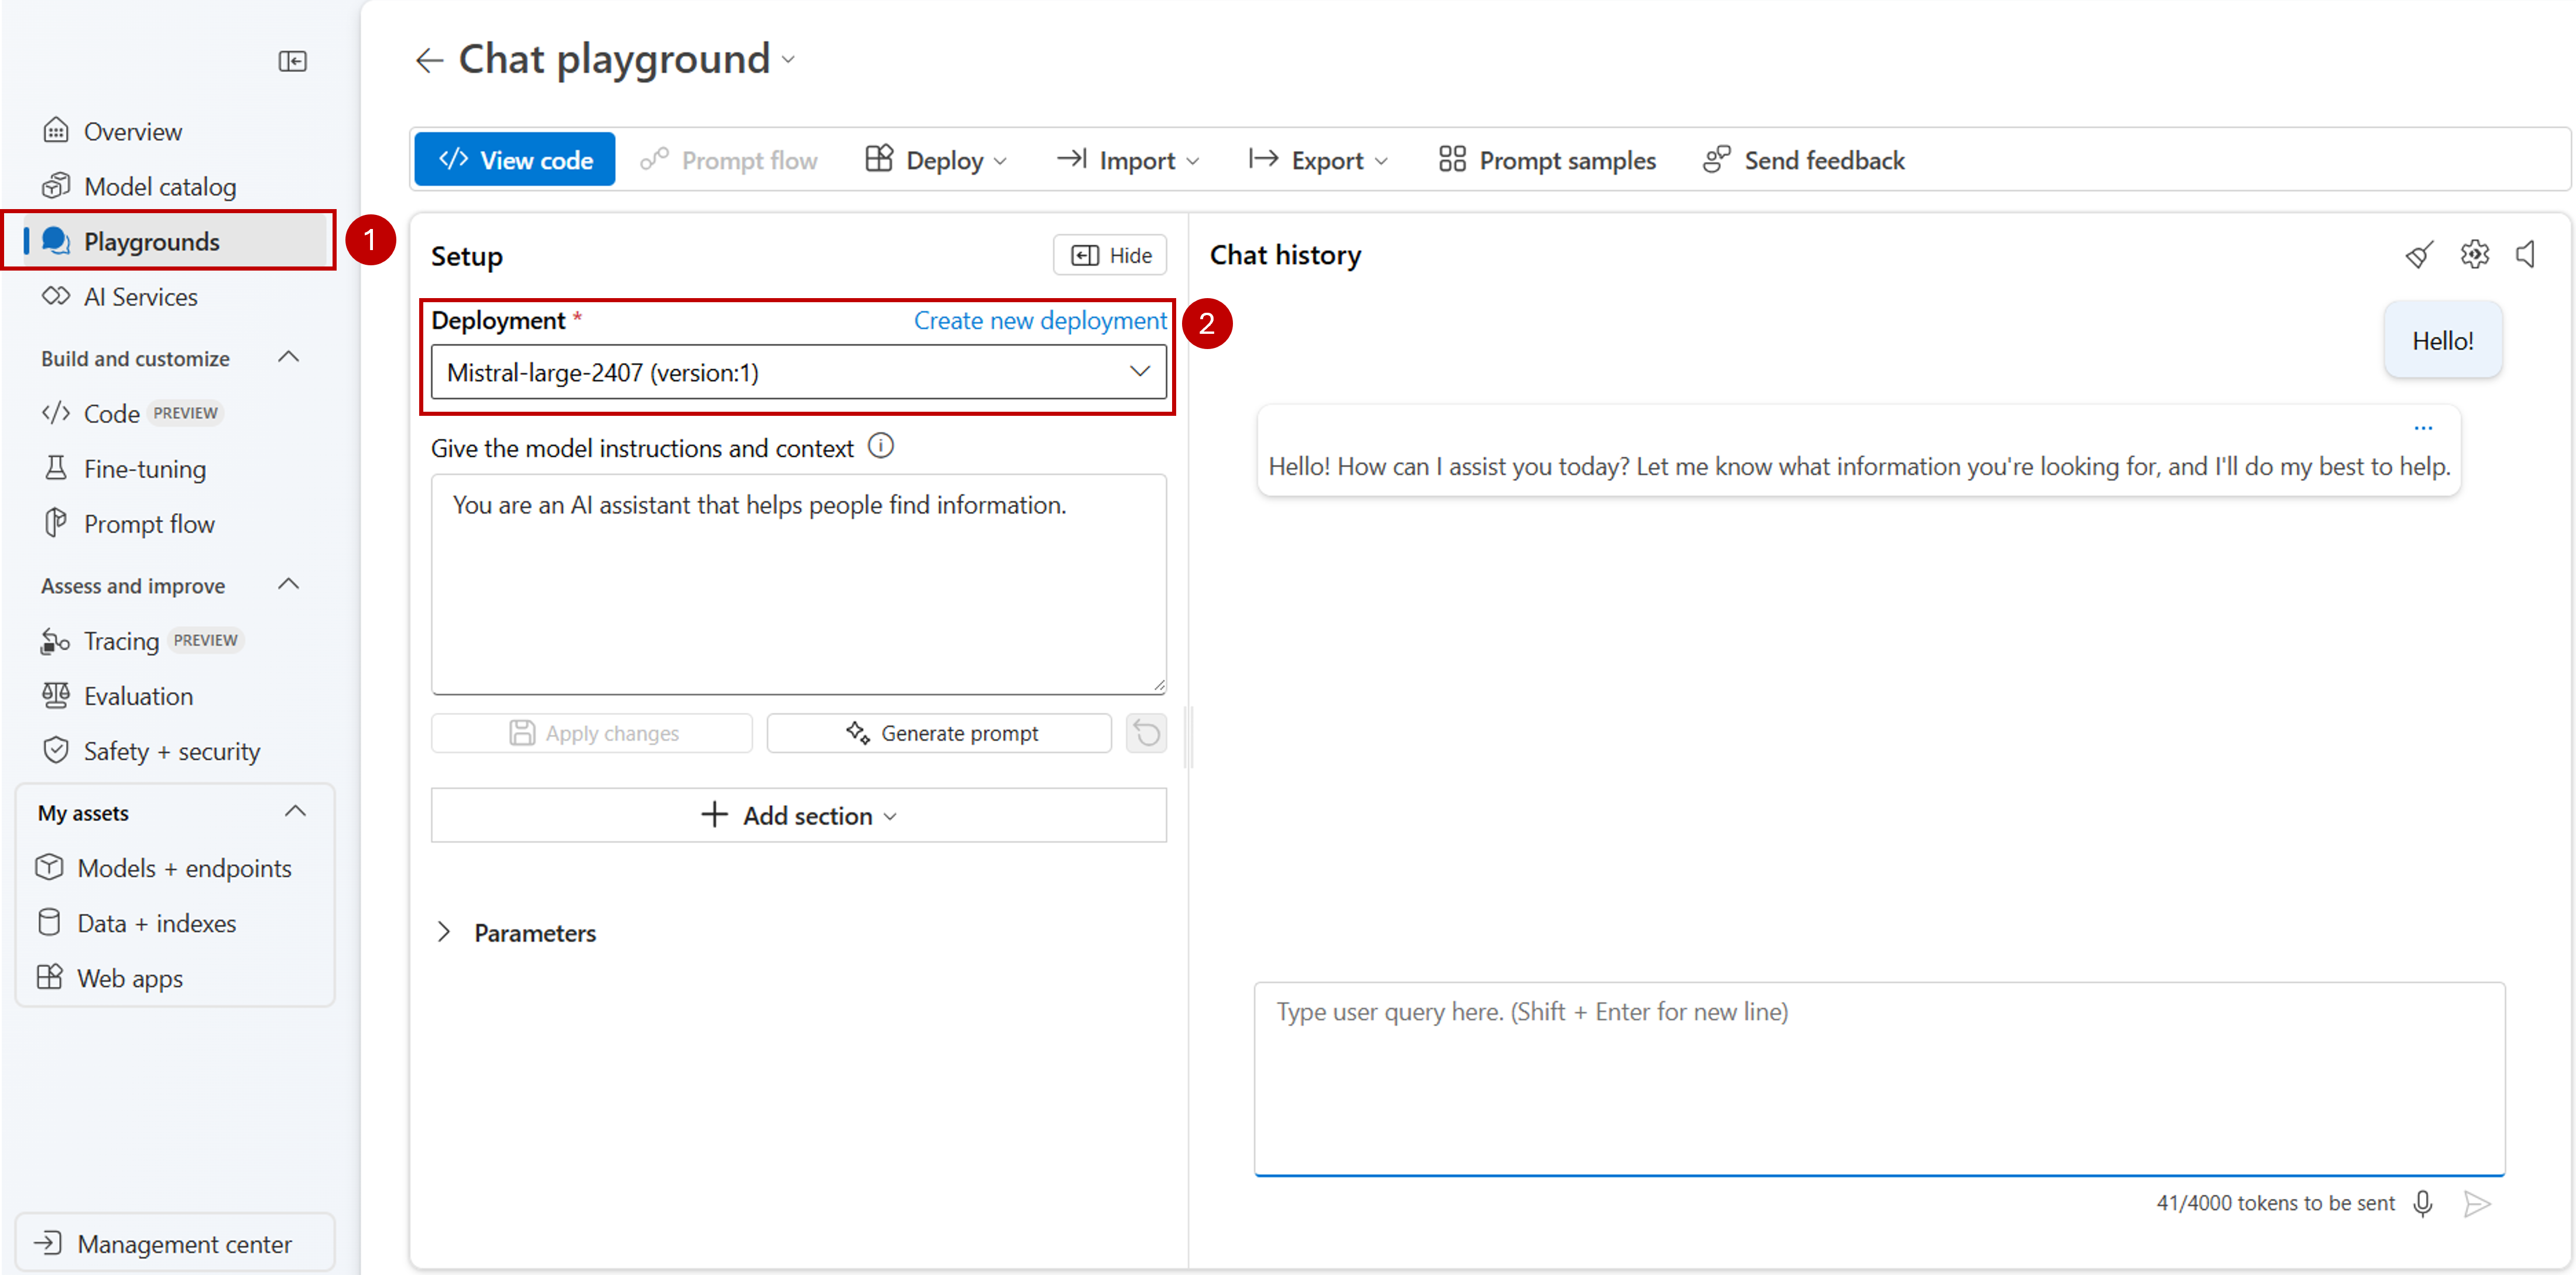
Type your prompt and see the outputs.
Use View code to see details about how to access the model deployment programmatically.

You can decide and configure which models are available for inference in your Azure AI Foundry resource. When you configure a model, you can generate predictions from it by specifying its model name or deployment name in your requests. You don't need to make any other changes in your code to use the model.
In this article, you learn how to add a new model to an Azure AI Foundry Models endpoint.
Prerequisites
To complete this article, you need:
An Azure subscription. If you're using GitHub Models, you can upgrade your experience and create an Azure subscription in the process. Read Upgrade from GitHub Models to Azure AI Foundry Models if that's your case.
An Azure AI Foundry project. This kind of project is managed under an Azure AI Foundry resource (formerly known as Azure AI Services resource). If you don't have a Foundry project, see Create a project for Azure AI Foundry (Foundry projects).
Foundry Models from partners and community require access to Azure Marketplace. Ensure you have the permissions required to subscribe to model offerings. Foundry Models sold directly by Azure don't have this requirement.
Install the Azure CLI and the
cognitiveservicesextension for Azure AI Services.az extension add -n cognitiveservicesSome of the commands in this tutorial use the
jqtool, which might not be installed on your system. For installation instructions, see Downloadjq.Identify the following information:
Your Azure subscription ID.
Your Azure AI Services resource name.
The resource group where you deployed the Azure AI Services resource.
Add models
To add a model, first identify the model that you want to deploy. You can query the available models as follows:
Sign in to your Azure subscription.
az loginIf you have more than one subscription, select the subscription where your resource is located.
az account set --subscription $subscriptionIdSet the following environment variables with the name of the Azure AI Services resource you plan to use and resource group.
accountName="<ai-services-resource-name>"
resourceGroupName="<resource-group>"
___location="eastus2"
If you didn't create an Azure AI Services account yet, create one.
az cognitiveservices account create -n $accountName -g $resourceGroupName --custom-___domain $accountName --___location $___location --kind AIServices --sku S0Check which models are available to you and under which SKU. SKUs, also known as deployment types, define how Azure infrastructure is used to process requests. Models might offer different deployment types. The following command lists all the model definitions available:
az cognitiveservices account list-models \
    -n $accountName \
    -g $resourceGroupName \
| jq '.[] | { name: .name, format: .format, version: .version, sku: .skus[0].name, capacity: .skus[0].capacity.default }'
Outputs look as follows:
{
  "name": "Phi-3.5-vision-instruct",
  "format": "Microsoft",
  "version": "2",
  "sku": "GlobalStandard",
  "capacity": 1
}
Identify the model you want to deploy. You need the properties
name,format,version, andsku. The propertyformatindicates the provider offering the model. You might also need capacity depending on the type of deployment.Add the model deployment to the resource. The following example adds
Phi-3.5-vision-instruct:az cognitiveservices account deployment create \ -n $accountName \ -g $resourceGroupName \ --deployment-name Phi-3.5-vision-instruct \ --model-name Phi-3.5-vision-instruct \ --model-version 2 \ --model-format Microsoft \ --sku-capacity 1 \ --sku-name GlobalStandardThe model is ready to use.
You can deploy the same model multiple times if needed as long as it's under a different deployment name. This capability might be useful if you want to test different configurations for a given model, including content filters.
Use the model
Deployed models in can be consumed using the Azure AI model's inference endpoint for the resource. When constructing your request, indicate the parameter model and insert the model deployment name you have created. You can programmatically get the URI for the inference endpoint using the following code:
Inference endpoint
az cognitiveservices account show -n $accountName -g $resourceGroupName | jq '.properties.endpoints["Azure AI Model Inference API"]'
To make requests to the Azure AI Foundry Models endpoint, append the route models, for example https://<resource>.services.ai.azure.com/models. You can see the API reference for the endpoint at Azure AI Model Inference API reference page.
Inference keys
az cognitiveservices account keys list -n $accountName -g $resourceGroupName
Manage deployments
You can see all the deployments available using the CLI:
Run the following command to see all the active deployments:
az cognitiveservices account deployment list -n $accountName -g $resourceGroupNameYou can see the details of a given deployment:
az cognitiveservices account deployment show \
    --deployment-name "Phi-3.5-vision-instruct" \
    -n $accountName \
    -g $resourceGroupName
You can delete a given deployment as follows:
az cognitiveservices account deployment delete \
    --deployment-name "Phi-3.5-vision-instruct" \
    -n $accountName \
    -g $resourceGroupName
You can decide and configure which models are available for inference in your Azure AI Foundry resource. When you configure a model, you can generate predictions from it by specifying its model name or deployment name in your requests. You don't need to make any other changes in your code to use the model.
In this article, you learn how to add a new model to an Azure AI Foundry Models endpoint.
Prerequisites
To complete this article, you need:
An Azure subscription. If you're using GitHub Models, you can upgrade your experience and create an Azure subscription in the process. Read Upgrade from GitHub Models to Azure AI Foundry Models if that's your case.
An Azure AI Foundry project. This kind of project is managed under an Azure AI Foundry resource (formerly known as Azure AI Services resource). If you don't have a Foundry project, see Create a project for Azure AI Foundry (Foundry projects).
Foundry Models from partners and community require access to Azure Marketplace. Ensure you have the permissions required to subscribe to model offerings. Foundry Models sold directly by Azure don't have this requirement.
Install the Azure CLI.
Identify the following information:
Your Azure subscription ID.
Your Azure AI Foundry resource (formerly known as Azure AI Services resource) name.
The resource group where the Azure AI Foundry resource is deployed.
The model name, provider, version, and SKU you want to deploy. You can use the Azure AI Foundry portal or the Azure CLI to find this information. In this example, you deploy the following model:
- Model name::
Phi-3.5-vision-instruct - Provider:
Microsoft - Version:
2 - Deployment type: Global standard
- Model name::
About this tutorial
The example in this article is based on code samples contained in the Azure-Samples/azureai-model-inference-bicep repository. To run the commands locally without having to copy or paste file content, use the following commands to clone the repository and go to the folder for your coding language:
git clone https://github.com/Azure-Samples/azureai-model-inference-bicep
The files for this example are in:
cd azureai-model-inference-bicep/infra
Permissions required to subscribe to Models from Partners and Community
Foundry Models from partners and community available for deployment (for example, Cohere models) require Azure Marketplace. Model providers define the license terms and set the price for use of their models using Azure Marketplace.
When deploying third-party models, ensure you have the following permissions in your account:
- On the Azure subscription:
Microsoft.MarketplaceOrdering/agreements/offers/plans/readMicrosoft.MarketplaceOrdering/agreements/offers/plans/sign/actionMicrosoft.MarketplaceOrdering/offerTypes/publishers/offers/plans/agreements/readMicrosoft.Marketplace/offerTypes/publishers/offers/plans/agreements/readMicrosoft.SaaS/register/action
- On the resource group—to create and use the SaaS resource:
Microsoft.SaaS/resources/readMicrosoft.SaaS/resources/write
Add the model
Use the template
ai-services-deployment-template.bicepto describe model deployments:ai-services-deployment-template.bicep
@description('Name of the Azure AI services account')
param accountName string

@description('Name of the model to deploy')
param modelName string

@description('Version of the model to deploy')
param modelVersion string

@allowed([
  'AI21 Labs'
  'Cohere'
  'Core42'
  'DeepSeek'
  'xAI'
  'Meta'
  'Microsoft'
  'Mistral AI'
  'OpenAI'
])
@description('Model provider')
param modelPublisherFormat string

@allowed([
    'GlobalStandard'
    'DataZoneStandard'
    'Standard'
    'GlobalProvisioned'
    'Provisioned'
])
@description('Model deployment SKU name')
param skuName string = 'GlobalStandard'

@description('Content filter policy name')
param contentFilterPolicyName string = 'Microsoft.DefaultV2'

@description('Model deployment capacity')
param capacity int = 1

resource modelDeployment 'Microsoft.CognitiveServices/accounts/deployments@2024-04-01-preview' = {
  name: '${accountName}/${modelName}'
  sku: {
    name: skuName
    capacity: capacity
  }
  properties: {
    model: {
      format: modelPublisherFormat
      name: modelName
      version: modelVersion
    }
    raiPolicyName: contentFilterPolicyName == null ? 'Microsoft.Nill' : contentFilterPolicyName
  }
}
Run the deployment:
RESOURCE_GROUP="<resource-group-name>"
ACCOUNT_NAME="<azure-ai-model-inference-name>"
MODEL_NAME="Phi-3.5-vision-instruct"
PROVIDER="Microsoft"
VERSION=2

az deployment group create \
    --resource-group $RESOURCE_GROUP \
    --template-file ai-services-deployment-template.bicep \
    --parameters accountName=$ACCOUNT_NAME modelName=$MODEL_NAME modelVersion=$VERSION modelPublisherFormat=$PROVIDER
Use the model
Deployed models in can be consumed using the Azure AI model's inference endpoint for the resource. When constructing your request, indicate the parameter model and insert the model deployment name you have created. You can programmatically get the URI for the inference endpoint using the following code:
Inference endpoint
az cognitiveservices account show -n $accountName -g $resourceGroupName | jq '.properties.endpoints["Azure AI Model Inference API"]'
To make requests to the Azure AI Foundry Models endpoint, append the route models, for example https://<resource>.services.ai.azure.com/models. You can see the API reference for the endpoint at Azure AI Model Inference API reference page.
Inference keys
az cognitiveservices account keys list -n $accountName -g $resourceGroupName