Note
Access to this page requires authorization. You can try signing in or changing directories.
Access to this page requires authorization. You can try changing directories.
This article explains how to set up disconnected operations for Azure Local. Learn how to create a virtual appliance resource in the Azure portal, download installation files, and get support from Microsoft for your deployment.
Important
This feature is currently in PREVIEW. See the Supplemental Terms of Use for Microsoft Azure Previews.
Prerequisites
- An active Azure subscription.
- An approval for disconnected operations for Azure Local.
- An Azure account with role-based access control rights to create a disconnected operations instance.
When you finish these steps, you get:
- A disconnected operations instance in Azure that represents your on-premises virtual appliance.
- The files you need to deploy Azure Local disconnected operations.
Note
In this preview, Azure CLI isn't supported. Use the REST API if you need automation capabilities. For more information, see Azure Local REST API.
Create virtual appliance and download installation files
To create a virtual appliance and download the required files for your on-premises installation, follow these steps:
Sign in to the portal and navigate to Azure Local.
From the same browser session, click this link
Note
If your subscription isn't approved for Disconnected operations any action (such as create) fails.
From the Disconnected operations tab, select the Create button.

On the Basics tab, complete these required fields:
Field Description Subscription The subscription where you want to place the resource. Resource group The resource group where you want to place the resource. Virtual appliance name The name to identify your disconnected operations appliance. For example, no-site-1. Region The Azure region where you want to place the metadata. There's no metadata from the on-premises installation itself. This is used for billing and support purposes. Outbound connectivity Select how you intend to deploy your disconnected operations appliance:
Option 1: Limited connectivity
Use this option if you want the appliance to be connected to Azure. This option:
- Simplifies management and supportability, should you require it.
- Only requires that the appliance is able to connect.
- Allows Azure Local instances to use the local control plane provided by the appliance.
Option 2: Air-gapped
Use this option if you have no way of connecting to Azure. This option:
- Works air-gapped.
- Allows you to transfer necessary files in and out of the environment so you can get updates and send logs, if necessary.
Select Review + create, check that the validation succeeds, then select the Create button.

After the deployment finishes, go to your new resource. You see the resource details on the appliance page.
Note
For the next two steps, see the supplemental documentation for getting the appliance. During the first preview, special instructions are required for downloading the appliance. Steps 6 and 7 are subject to change during preview.
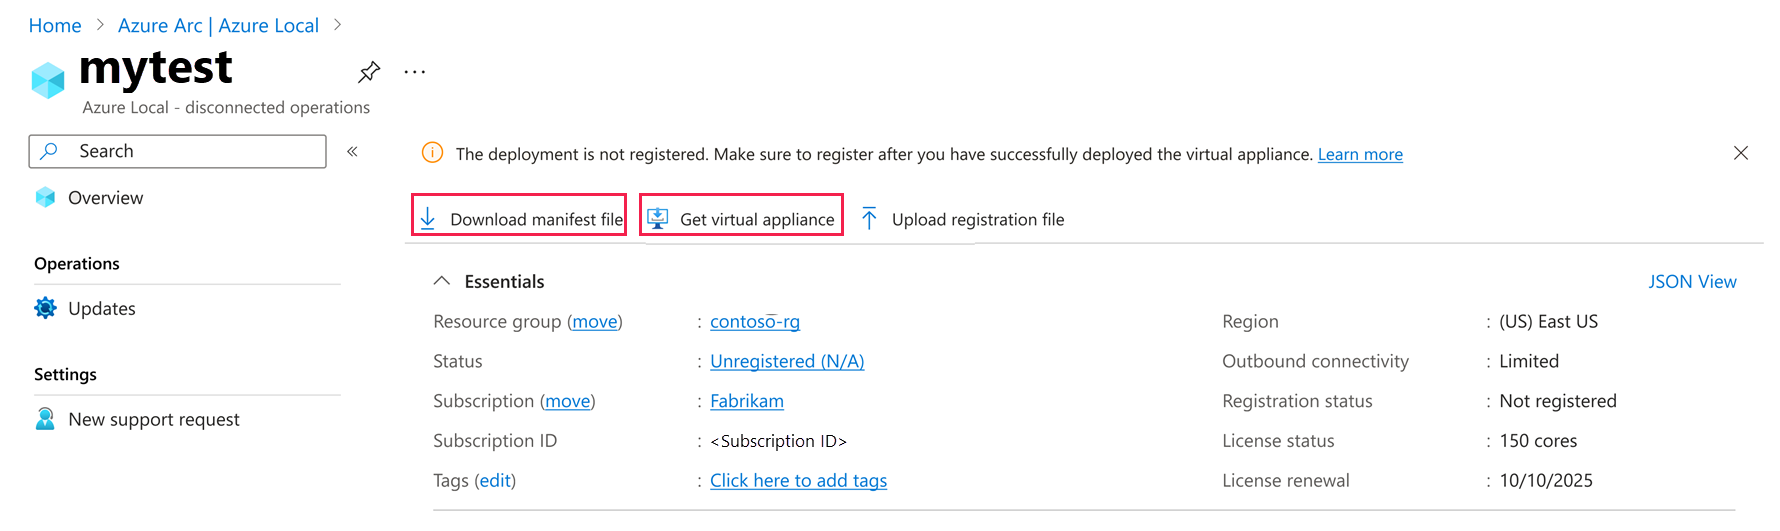
Look for the download manifest and get virtual appliance actions. You need these files for your on-premises installation.
Action Description Estimated download size Manifest file Identified as AzureLocal.DisconnectedOperations.Appliance.manifest. This file is needed for deployment and to activate the appliance. It contains the required licensing information and more.< 1 KB Appliance Shows a set of files you can download, identified as AzureLocal.disconnectedoperations.zip,ArcA_LocalData_A.vhdx,ArcA_SharedData_A.vhdx, andOSAndDocker_A.vhdx. These files contain the virtual hard disks and virtual machine together with the operations module required to deploy and configure the virtual appliance as a whole. You can download each file individually or run the script provided on the page to automate the download.70 GB+ Select download manifest.
Select get virtual appliance and download each file in the list. This can take several hours. When completed, move these files to a single folder. Unzip the
AzureLocal.disconnectedoperations.zipfile in that folder. After you extract the zip file, delete it. You should have the following files required for installation in the folder after this step:- manifest.xml
- OperationsModule
- IRVM.zip
- ArcA_LocalData_A.vhdx
- ArcA_SharedData_A.vhdx
- OSAndDocker_A.vhdx
- Storage.json
Note
To download files faster, select and run the script from the portal instead of downloading each file individually.
When the steps are complete, put all the files in a share or on portable media. You need these files during deployment.


Related content
This feature is available only in Azure Local 2506.