Note
Access to this page requires authorization. You can try signing in or changing directories.
Access to this page requires authorization. You can try changing directories.
Threat protection for AI services in Microsoft Defender for Cloud protects AI services on an Azure subscription by providing insights to threats that might affect your generative AI applications.
Prerequisites
Read the Overview - AI threat protection.
You need a Microsoft Azure subscription. If you don't have an Azure subscription, you can sign up for a free subscription.
Enable Defender for Cloud on your Azure subscription.
We recommend not opting out of prompt-based triggered alerts for Azure OpenAI content filtering. Opting out and removing that capability can affect Defender for Cloud's ability to monitor and detect such attacks.
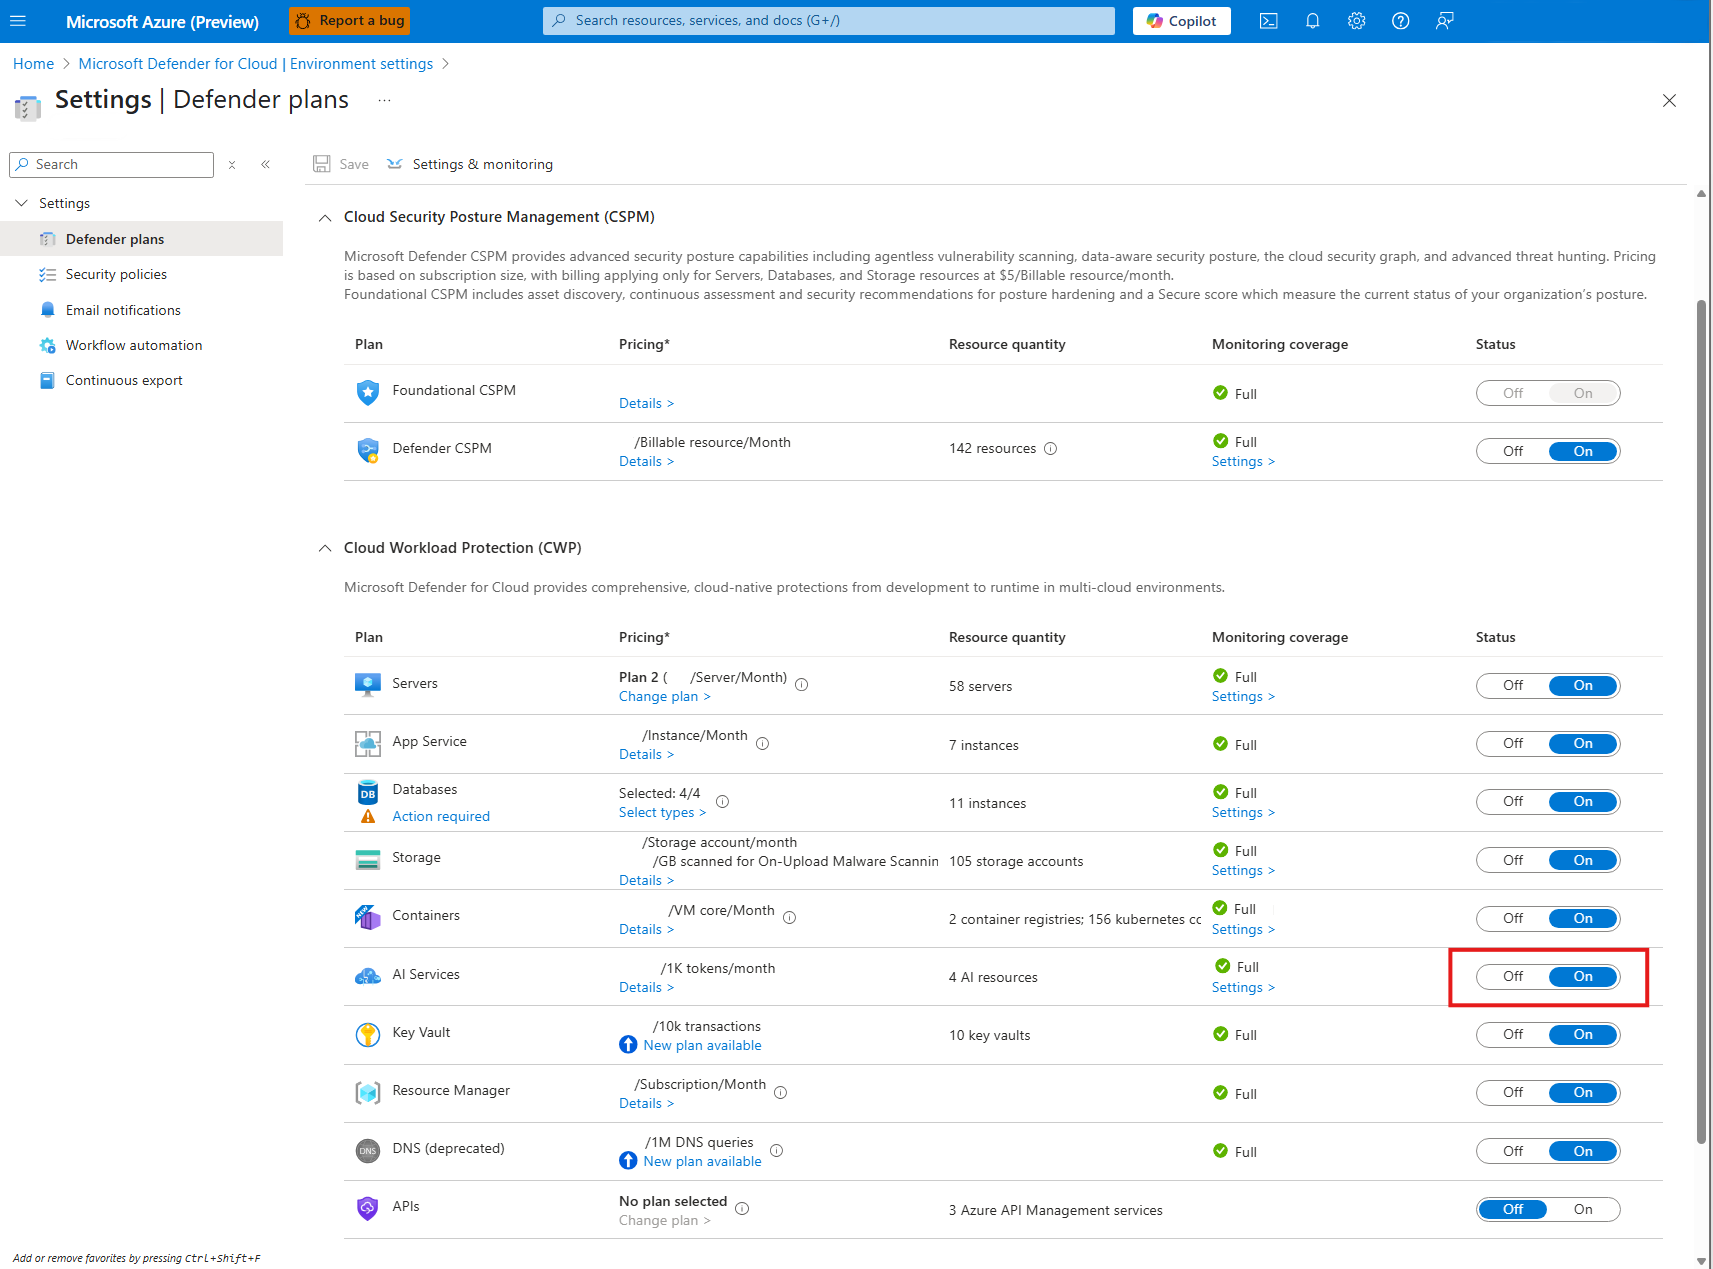
Enable threat protection for AI services
Enable threat protection for AI services.
Sign in to the Azure portal.
Search for and select Microsoft Defender for Cloud.
In the Defender for Cloud menu, select Environment settings.
Select the relevant Azure subscription.
On the Defender plans page, toggle the AI services to On.

Enable user prompt evidence
With the AI services threat protection plan enabled, you can control whether alerts include suspicious segments directly from your user's prompts, or the model responses from your AI applications or resources. Enabling user prompt evidence helps you triage, classify alerts and your user's intentions.
User prompt evidence consists of prompts and model responses. Both are considered your data. Evidence is available through the Azure portal, Defender portal, and any attached partners integrations.
Sign in to the Azure portal.
Search for and select Microsoft Defender for Cloud.
In the Defender for Cloud menu, select Environment settings.
Select the relevant Azure subscription.
Locate AI services and select Settings.

Toggle Enable user prompt evidence to On.
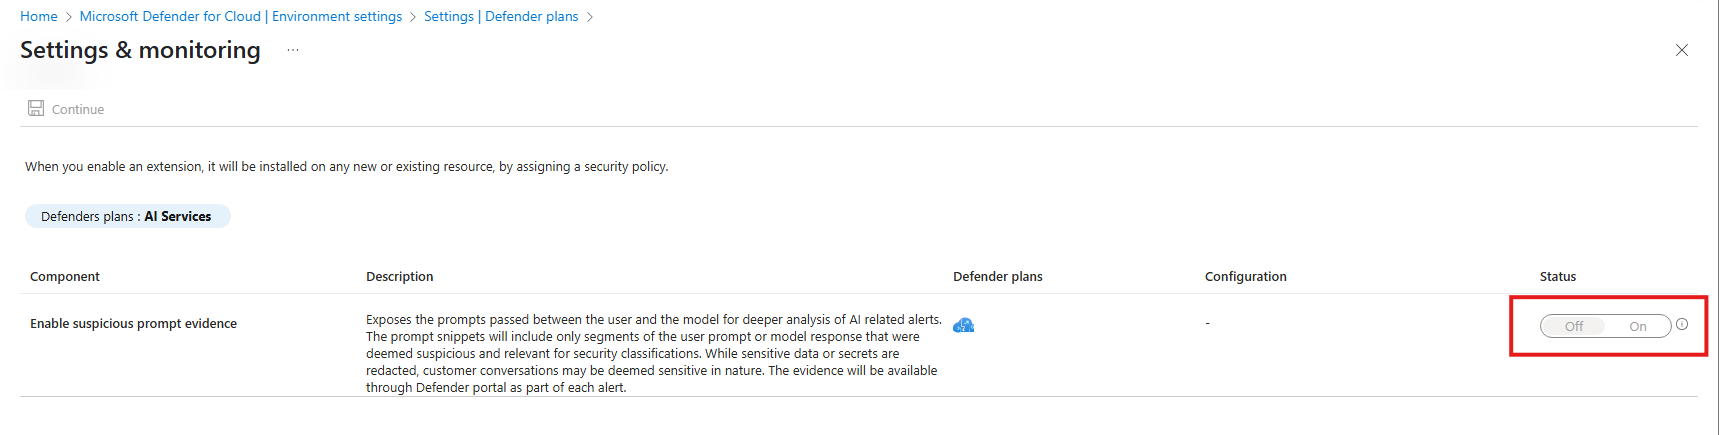
Select Continue.


Enable Data Security for Azure AI with Microsoft Purview
Note
This feature requires a Microsoft Purview license, which isn't included with Microsoft Defender for Cloud's Defender for AI Services plan.
To get started with Microsoft Purview DSPM for AI, see Set up Microsoft Purview DSPM for AI.
Enable Microsoft Purview to access, process, and store prompt and response data—including associated metadata—from Azure AI Services. This integration supports key data security and compliance scenarios such as:
Sensitive information type (SIT) classification
Analytics and Reporting through Microsoft Purview DSPM for AI
Insider Risk Management
Communication Compliance
Microsoft Purview Audit
Data Lifecycle Management
eDiscovery
This capability helps your organization manage and monitor AI-generated data in alignment with enterprise policies and regulatory requirements.
Note
Data Security Policies for Azure AI Services interactions are supported only for API calls that use Microsoft Entra ID authentication with a user-context token, or for API calls that explicitly include user context. To learn more, see Gain end-user context for Azure AI API calls. For all other authentication scenarios, user interactions captured in Purview show up only in Purview Audit and DSPM for AI Activity Explorer.
Sign in to the Azure portal.
Search for and select Microsoft Defender for Cloud.
In the Defender for Cloud menu, select Environment settings.
Select the relevant Azure subscription.
Locate AI services and select Settings.
Toggle Enable data security for AI interactions to On.

Select Continue.

Troubleshooting
If you don't see user interactions for Entra ID authenticated users in Microsoft Purview Activity Explorer after turning on the toggle, follow these steps to troubleshoot:
Run the following commands in Azure PowerShell
- Install the following Az modules (if needed):
Install-Module -Name Az -AllowClobber Import-Module Az.Accounts - Connect to Azure PowerShell as a tenant admin :
Connect-AzAccount -Tenant $yourTenantIdHere - On the web page that opens, sign in using your tenant admin credentials.
- Verify that the Microsoft Purview service principal is in your tenant:
Get-AzADServicePrincipal -ApplicationId "9ec59623-ce40-4dc8-a635-ed0275b5d58a" - If the service principal doesn't exist, add the Microsoft Purview app service principal to the tenant:
New-AzADServicePrincipal -ApplicationId "9ec59623-ce40-4dc8-a635-ed0275b5d58a"