Note
Access to this page requires authorization. You can try signing in or changing directories.
Access to this page requires authorization. You can try changing directories.
You should enable Microsoft Defender for Storage via a built-in policy. This method facilitates enablement at scale. It also ensures that a consistent security policy is applied across all existing and future storage accounts within the defined scope, such as entire management groups. This approach keeps the storage accounts protected with Defender for Storage according to your organization's defined configuration.
Tip
You can always configure specific storage accounts with custom settings that differ from the settings configured at the subscription level. That is, you can override subscription-level settings.
Azure built-in policy
To enable and configure Defender for Storage at scale by using an Azure built-in policy, follow these steps:
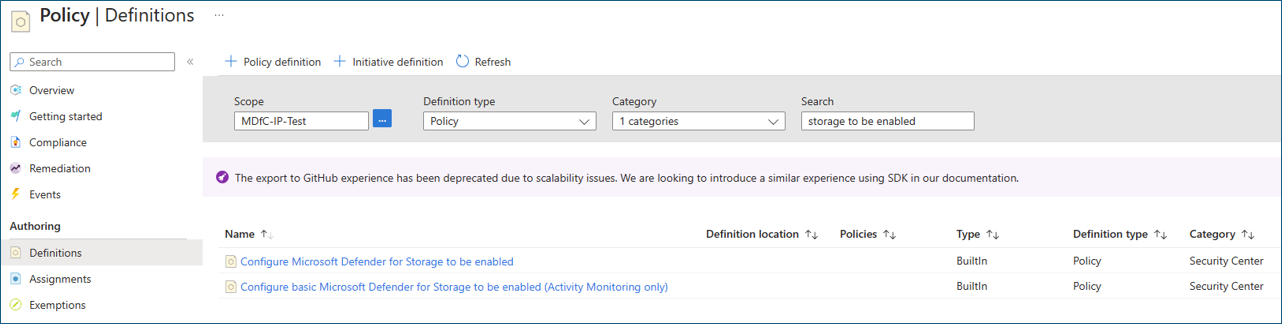
Sign in to the Azure portal and go to the Policy dashboard.
On the left menu, select Definitions.
In the Security Center category, search for and then select Configure Microsoft Defender for Storage to be enabled.
This policy enables all Defender for Storage capabilities: activity monitoring, malware scanning, and sensitive-data threat detection. You can also get it here: List of built-in policy definitions. If you want to enable a policy without the configurable features, use Configure basic Microsoft Defender for Storage to be enabled (Activity Monitoring only).
Select the policy and review it.
Select Assign. You can fine-tune, edit, and add custom rules to the policy.
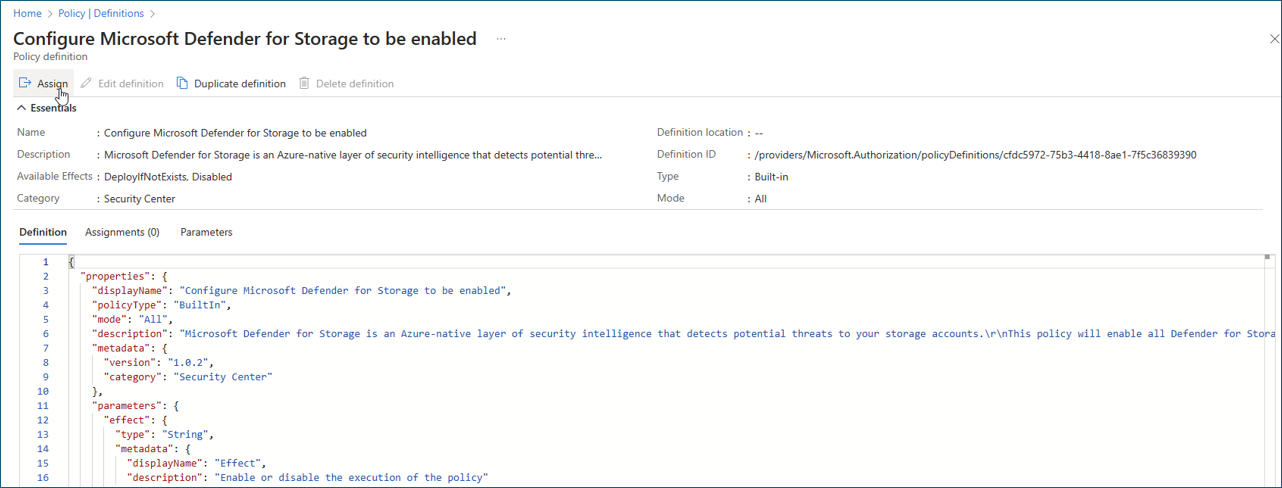
After you finish reviewing the policy details, select Review + create.
Select Create to assign the policy.


Tip
You can configure malware scanning to send scanning results to:
- Azure Event Grid custom topic: For near-real-time automatic response based on every scanning result.
- Log Analytics workspace: For storing every scan result in a centralized log repository for compliance and audit.
Learn more on how to set up a response for malware scanning results.