Note
Access to this page requires authorization. You can try signing in or changing directories.
Access to this page requires authorization. You can try changing directories.
You can personalize your Microsoft Dev Box by uploading a user customization file. User customization files let you configure your dev box with your preferred personal settings and apps, so you can start coding faster. This article explains how to create, test, and upload a user customization file from your local drive or repository using Visual Studio Code. You also learn how to validate your file and manage customization settings for projects.
Use customizations in Microsoft Dev Box in two ways: team customizations create a shared configuration for a team, and user customizations create a personal configuration for an individual developer. The following table shows the differences between the two types of customizations.
| Feature | Team customizations | User customizations |
|---|---|---|
| Set up on | Dev box pool | Dev box |
| Customizations apply to | All dev boxes in pool | Individual dev box |
| Easily shareable | Yes | No |
| Customizations file name | Imagedefinition.yaml | myfilename.yaml or workload.yaml |
| Source | Catalog | Upload or personal repository |
| Supports key vault secrets | Yes | Yes |
User customizations help ensure that developers comply with company guardrails; only tasks custom tasks preapproved through a catalog are available to developers to use in their customization files. Standard dev box users can't run built-in PowerShell and WinGet tasks in a system context, which prevents privilege escalation.
User customizations can be enabled or disabled at the project level. When you create a project, user customizations are on by default.
Prerequisites
To complete the steps in this article:
- Set up a dev center with a dev box definition, dev box pool, and dev box project so you can create a dev box.
- Join the Dev Box Users security group for at least one project.
- Attach a catalog to the dev center with tasks you use in your customization file. If you don't have a catalog, see Add and configure a catalog from GitHub or Azure Repos.
Permissions required to set up customizations
To create and apply customizations to a dev box, you need the following permissions:
| Action | Permission or role |
|---|---|
| Enable or disable user customizations on a project | Write permission on the project. |
| Create a customization file | None specified. Anyone can create a customization file. |
| Use the developer portal to upload and apply a YAML file during dev box creation | Dev Box User |
Create a user customization file
Create and manage customization files in VS Code. Use the Microsoft Dev Box extension in VS Code to discover tasks in the attached catalog and test the customization file.
Create a dev box for testing, or use an existing dev box.
On the test dev box, install VS Code, then install the Dev Box extension.
Download an example YAML customization file from the samples repository, then open it in VS Code.
Discover available tasks in the catalog by using the command palette. Select View > Command Palette > Dev Box: List Available Tasks For This Dev Box.

Test the customization in VS Code by using the command palette. Select View > Command Palette > Dev Box: Apply Customizations Tasks.

The customization file runs and applies the specified tasks to your test dev box. Inspect the changes, and check the VS Code terminal for any errors or warnings during task execution.
After the customization file runs successfully, upload it to your catalog.
Optional: Customize your dev box by using existing WinGet configuration files
WinGet configuration uses a config-as-code approach to define the unique sets of software and configuration settings needed to get your Windows environment ready to code. You can also use these configuration files to set up a dev box by using a WinGet task included in the Microsoft-provided quickstart catalog.
This example shows a dev box customization file that uses an existing WinGet Desired State Configuration (DSC) file.
tasks:
    - name: winget
      parameters:
          configure: "projectConfiguration.dsc.yaml"
To learn more, see WinGet configuration.
Create a dev box using a user customization file
Use an individual customization file by uploading it from a local drive when you create your dev box, or by downloading it from a repository. Customization files stored in a repository must be named workload.yaml. Customization files stored locally for upload should be named myfilename.yaml.
Upload a file
In the developer portal, select New > New dev box.
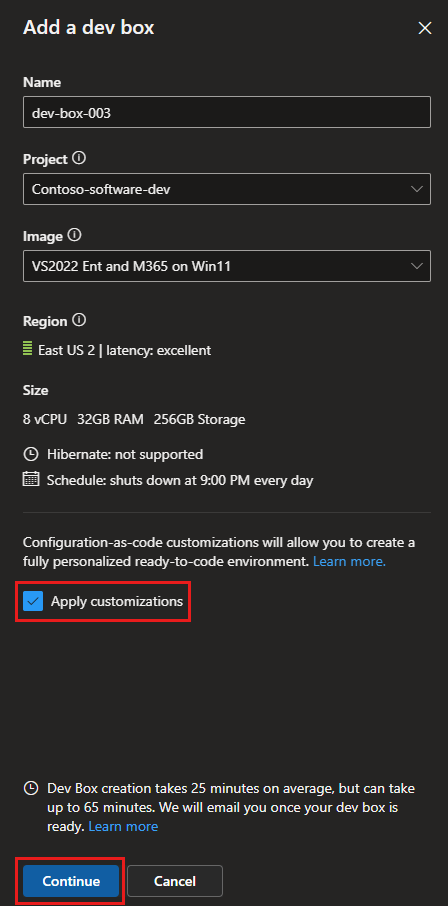
In the Add a dev box pane, add details for your dev box.
Select Apply customizations, and then select Continue.
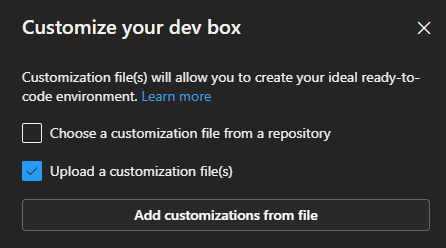
Select Upload a customization file(s), select Add customizations from file, then browse to and select your myfilename.yaml file.
To check that the tasks in your customizations file are applied correctly, validate them before you proceed. Select Validate.

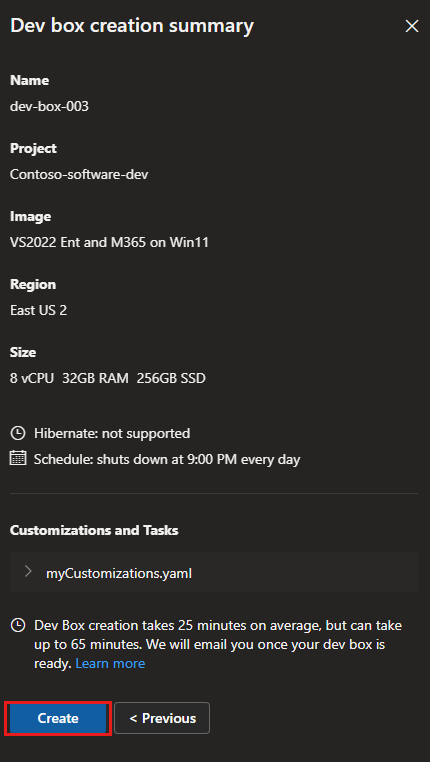
Review the dev box creation summary, then select Create.
Get a file from a repository
In the developer portal, select New > New dev box.
In the Add a dev box pane, add details for you dev box.
Select Apply customizations, and then select Continue.
Select Upload a customization file(s), select Choose a customization file from a repository, then enter the URL for the repository that stores your workload.yaml file.

To verify that the tasks in your customizations file will be applied correctly, validate them before you proceed. Select Validate.
Review the dev box creation summary, and then select Create.
Disable user customizations
User customizations are controlled at the project level and are enabled by default. You can disable them during or after project creation. When disabled, developers can't apply their own customization files to new dev boxes. Enabling user customizations doesn't bypass existing project guardrails; developers can only use tasks provided in the attached catalog and cannot run tasks with elevated privileges unless an administrator has explicitly included an administrative task in the catalog.

Currently, when you disable user customizations for a project, developers can still upload a user customization file during dev box creation. But the validation process fails, and the customizations aren't applied to the dev box.
If you create a dev box with user customizations in a project where user customizations are disabled, you see the following in the developer portal:
A message displays on the new dev box tile indicating that errors have been encountered while applying customizations.

The details advise you to contact your admin.

Your dev box is created without the user customizations.