Note
Access to this page requires authorization. You can try signing in or changing directories.
Access to this page requires authorization. You can try changing directories.
Azure DevOps Services | Azure DevOps Server | Azure DevOps Server 2022 | Azure DevOps Server 2020
Using Azure Pipelines, you can build, test, and automatically deploy your web app to an Azure App Service Web App container on Linux. In this article, you'll learn how to use YAML or Classic pipelines to:
- Build and publish a Docker image to Azure Container Registry.
- Create an Azure Web App.
- Deploy a container to Azure App Service.
- Deploy to deployment slots.
Prerequisites
| Product | Requirements |
|---|---|
| Azure DevOps | - An Azure DevOps organization and project. Create one for free. - Permissions: - To grant access to all pipelines in the project: You must be a member of the Project Administrators group. - To create service connections: You must have the Administrator or Creator role for service connections. - An ability to run pipelines on Microsoft-hosted agents. You can either purchase a parallel job or you can request a free tier. |
| GitHub | - A GitHub account. |
| Azure | - An Azure Container Registry. Create an Azure container registry if you don't have one already. |
Get the code
Fork the following sample app at GitHub.
https://github.com/spring-guides/gs-spring-boot-docker.git
Build and publish a Docker image to Azure Container Registry
To complete this section successfully, you must have an Azure Container Registry. Refer to the prerequisites section for details.
Sign in to your Azure DevOps organization and navigate to your project.
Select Pipelines, and then New Pipeline.
Select GitHub when prompted for the ___location of your source code, and then select your repository.
Select the Docker: build and push an image to Azure Container Registry pipeline template.

Select your Azure subscription, and then select Continue.
Select your Container registry from the drop-down menu, and then select Validate and configure.
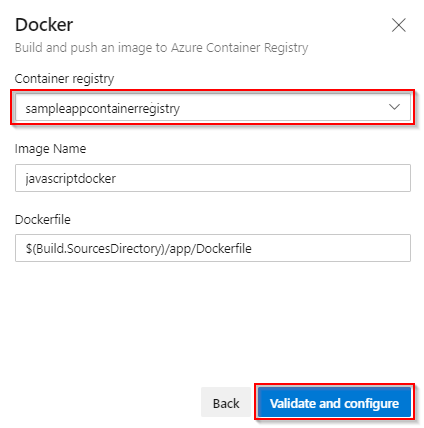
Review the pipeline YAML template, then select Save and run to build and publish the Docker image to Azure Container Registry.
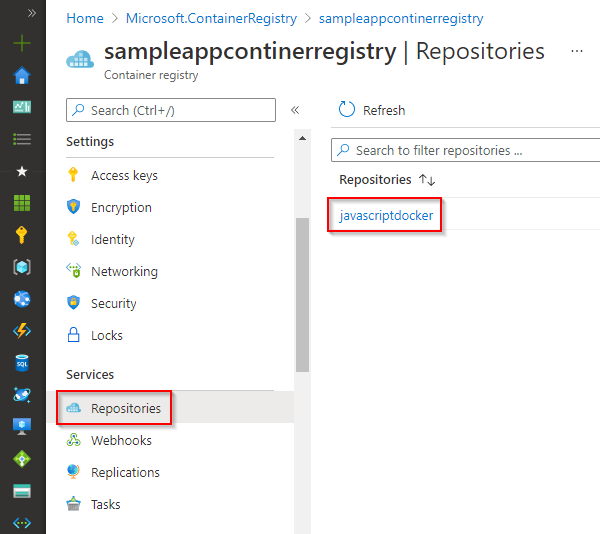
trigger:
- main

resources:
- repo: self

variables:
    # Container registry service connection established during pipeline creation
    dockerRegistryServiceConnection: '{{ containerRegistryConnection.Id }}'
    imageRepository: 'javascriptdocker'
    containerRegistry: 'sampleappcontainerregistry.azurecr.io'
    dockerfilePath: '$(Build.SourcesDirectory)/app/Dockerfile'
    tag: '$(Build.BuildId)'

    # Agent VM image name
    vmImageName: 'ubuntu-latest'

stages:
- stage: Build
    displayName: Build and push stage
    jobs:
    - job: Build
    displayName: Build
    pool:
        vmImage: $(vmImageName)
    steps:
    - task: Docker@2
        displayName: Build and push an image to container registry
        inputs:
        command: buildAndPush
        repository: $(imageRepository)
        dockerfile: $(dockerfilePath)
        containerRegistry: $(dockerRegistryServiceConnection)
        tags: |
            $(tag)
To view the published Docker image after the pipeline run is complete, go to the container registry in Azure portal, then select Repositories.
To deploy the image from the container registry, enable the admin user account. Go to the container registry in Azure portal, and select Access keys. Then, select the toggle button to Enable Admin user.
Create a Web App
Go to Azure portal.
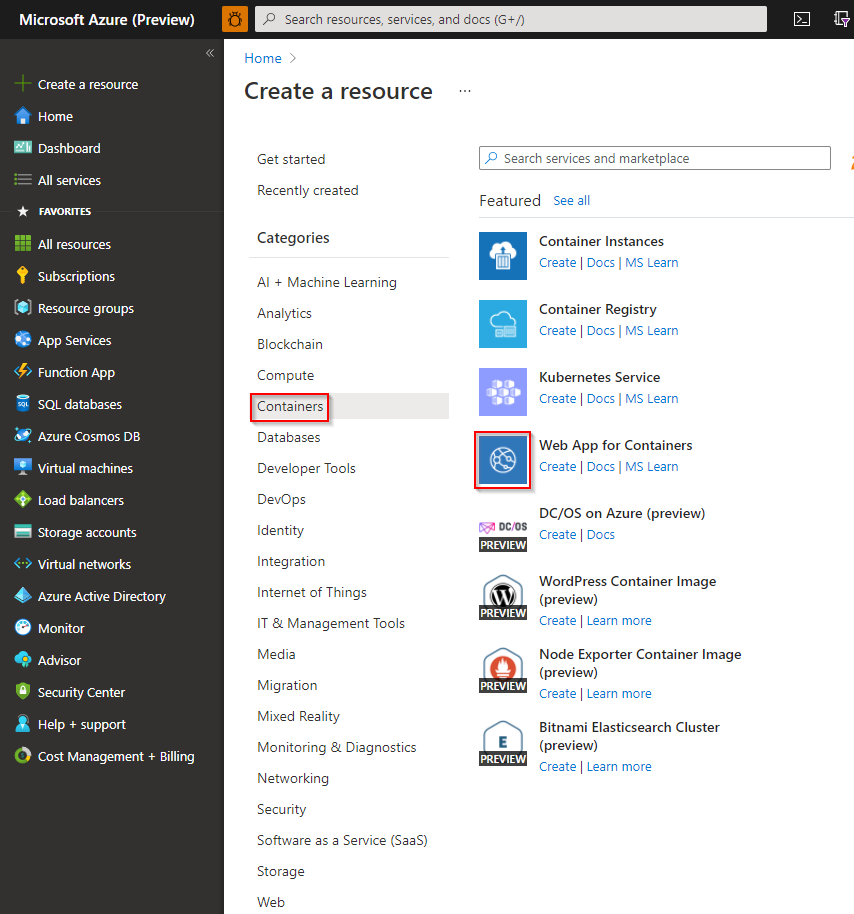
Select Create a resource > Containers, then choose Web App for Containers.
Enter a name for your new web app and create a new resource group. Select Linux for the Operating System.
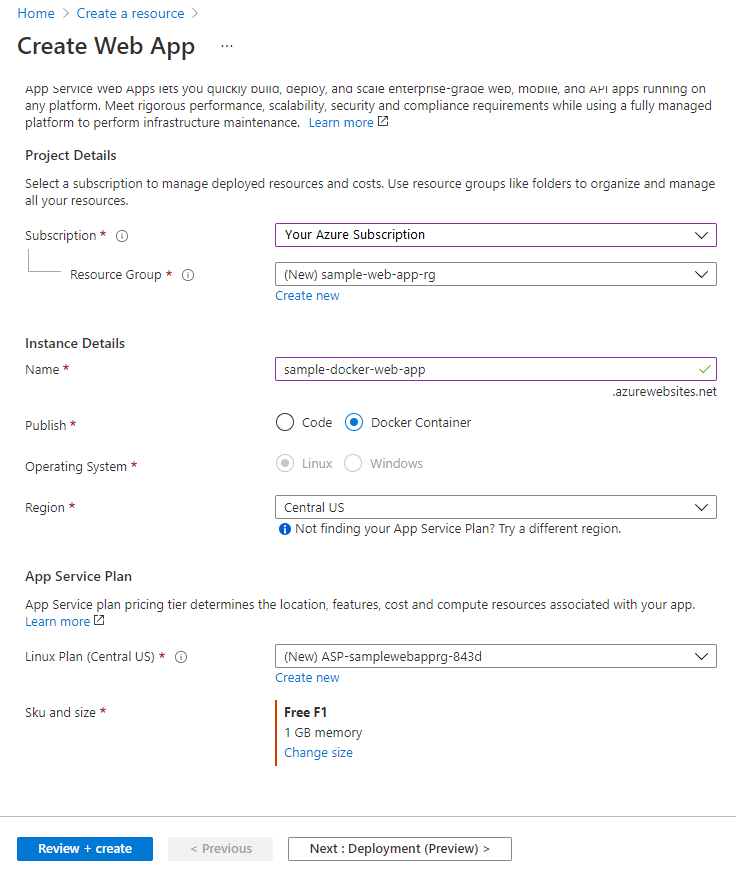
In the Pricing plans section, select the F1 Free plan.
Select Review and create. Review your configuration and select Create when you're done.
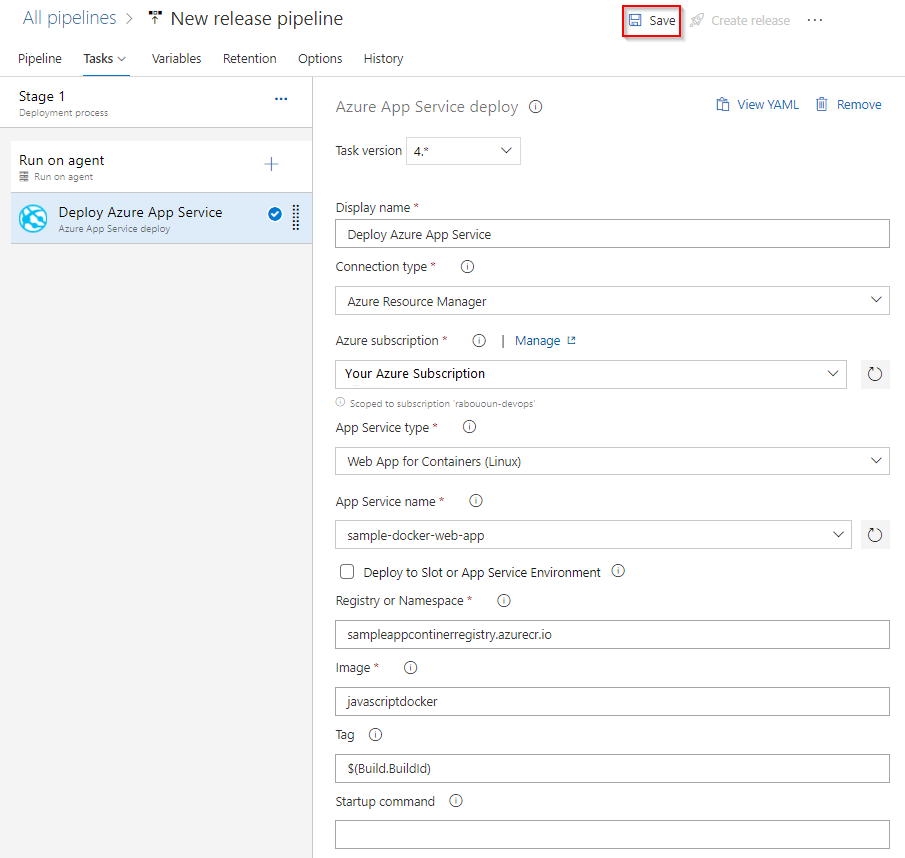
Deploy to Web App for Containers
In this YAML, you build and push a Docker image to a container registry and then deploy it to Azure Web App for Containers. In the Build stage, you build and push a Docker image to an Azure Container Registry with the Docker@2 task. The AzureWebAppContainer@1 task deploys the image to Web App for Containers.
trigger:
- main

resources:
- repo: self

variables:
  ## Add this under variables section in the pipeline
  azureSubscription: <Name of the Azure subscription>
  appName: <Name of the Web App>
  containerRegistry: <Name of the Azure container registry>
  dockerRegistryServiceConnection: '4fa4efbc-59af-4c0b-8637-1d5bf7f268fc'
  imageRepository: <Name of image repository>
  dockerfilePath: '$(Build.SourcesDirectory)/Dockerfile'
  tag: '$(Build.BuildId)'

  vmImageName: 'ubuntu-latest'

stages:
- stage: Build
  displayName: Build and push stage
  jobs:
  - job: Build
    displayName: Build
    pool:
      vmImage: $(vmImageName)
    steps:
    - task: Docker@2
      displayName: Build and push an image to container registry
      inputs:
        command: buildAndPush
        repository: $(imageRepository)
        dockerfile: $(dockerfilePath)
        containerRegistry: $(dockerRegistryServiceConnection)
        tags: |
          $(tag)


    ## Add the below snippet at the end of your pipeline
    - task: AzureWebAppContainer@1
      displayName: 'Azure Web App on Container Deploy'
      inputs:
        azureSubscription: $(azureSubscription)
        appName: $(appName)
        containers: $(containerRegistry)/$(imageRepository):$(tag)


Deploy to a deployment slot
Configure the Azure Web App container to have multiple slots. Slots let you safely deploy your app and test it before making it available to your customers. Learn more in Create staging environments.
The following YAML snippet shows how to deploy to a staging slot, and then swap to a production slot:
- task: AzureWebAppContainer@1
  inputs:
    azureSubscription: '<Azure service connection>'
    appName: '<Name of the web app>'
    containers: $(containerRegistry)/$(imageRepository):$(tag)
    deployToSlotOrASE: true
    resourceGroupName: '<Name of the resource group>'
    slotName: staging

- task: AzureAppServiceManage@0
  inputs:
    azureSubscription: '<Azure service connection>'
    WebAppName: '<name of web app>'
    ResourceGroupName: '<name of resource group>'
    SourceSlot: staging
    SwapWithProduction: true
FAQ
Q: How can I find my Docker registry credentials?
A: Go to Azure portal, and select your Web App for Containers. Select Configuration > Application settings, and then select to show the value.
