Note
Access to this page requires authorization. You can try signing in or changing directories.
Access to this page requires authorization. You can try changing directories.
Managed identities provide Azure services with an automatically managed identity in Microsoft Entra ID in a secure manner. This feature eliminates the need for developers having to manage credentials by providing an identity. There are two types of managed identities: system-assigned and user-assigned. IoT Hub supports both.
In IoT Hub, managed identities can be used to connect IoT Hub to other Azure services for features such as message routing, file upload, and bulk device import/export. In this article, you learn how to use system-assigned and user-assigned managed identities in your IoT hub for different functionalities.
Prerequisites
Understand the differences between system-assigned and user-assigned managed identity in What are managed identities for Azure resources?
An IoT hub in your Azure subscription. If you don't have a hub yet, you can follow the steps in Create an IoT hub.
System-assigned managed identity
You can enable or disable system-assigned managed identity in Azure portal
Sign in to the Azure portal and navigate to your IoT hub.
Select Identity from the Security settings section of the navigation menu.
Select the System-assigned tab.
Set the system-assigned managed identity Status to On or Off, then select Save.
Note
You can't turn off system-assigned managed identity while it's in use. Make sure that no custom endpoints are using system-assigned managed identity authentication before disabling the feature.

User-assigned managed identity
In this section, you learn how to add and remove a user-assigned managed identity from an IoT hub using Azure portal.
First you need to create a user-assigned managed identity as a standalone resource. To do so, you can follow the instructions in Manage user-assigned managed identities.
Go to your IoT hub, then select Identity under Security settings from the service menu in Azure portal.
Under the User-Assigned tab, select Associate a user-assigned managed identity. Choose the user-assigned managed identity you want to add to your hub and then select Add.

You can remove a user-assigned identity from an IoT hub. Choose the user-assigned identity you want to remove, and select Remove. You're removing it only from your IoT hub, and this removal doesn't delete the user-assigned identity as a resource. To delete the user-assigned identity as a resource, follow the instructions in Manage user-assigned managed identities.

Egress connectivity from IoT Hub to other Azure resources
Managed identities can be used for egress connectivity from IoT Hub to other Azure services. You can choose which managed identity to use for each IoT Hub egress connectivity to customer-owned endpoints including storage accounts, event hubs, and service bus endpoints.
Note
Only system-assigned managed identity gives IoT Hub access to private resources. If you want to use user-assigned managed identity, then the public access on those private resources needs to be enabled in order to allow connectivity.
Configure message routing with managed identities
In this section, we use the message routing to an Event Hubs custom endpoint as an example. The example applies to other routing custom endpoints, as well.
Go to your event hub in the Azure portal to assign the managed identity the right access.
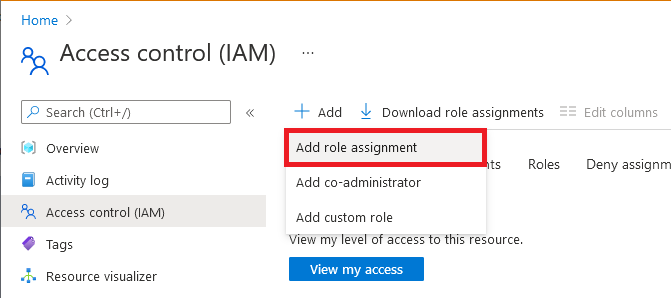
Select Access control (IAM).
Select Add > Add role assignment.
On the Role tab, select Azure Event Hubs Data Sender.
Note
For a storage account, select Storage Blob Data Contributor (not Contributor or Storage Account Contributor) as the role. For a service bus, select Azure Service Bus Data Sender.
On the Members tab, select Managed identity, and then select Select members.
For user-assigned managed identities, select your subscription, select User-assigned managed identity, and then select your user-assigned managed identity.
For system-assigned managed identities, select your subscription, select All system-assigned managed identities, and then select your IoT Hub's resource name.
On the Review + assign tab, select Review + assign to assign the role.
For more information about role assignments, see Assign Azure roles using the Azure portal.
If you need to restrict the connectivity to your custom endpoint through a virtual network, you need to turn on the trusted Microsoft first party exception, to give your IoT hub access to the specific endpoint. For example, if you're adding an event hub custom endpoint, navigate to the Firewalls and virtual networks tab in your event hub and enable Allow access from selected networks option. Under the Exceptions list, check the box for Allow trusted Microsoft services to access event hubs, then select Save. This requirement also applies to storage account and service bus. Learn more about IoT Hub support for virtual networks with Azure Private Link.
Note
You need to complete above steps to assign the managed identity the right access before adding the event hub as a custom endpoint in IoT Hub. Wait a few minutes for the role assignment to propagate.
Next, go to your IoT hub. In your hub, navigate to Message Routing, then select Add.
On the Endpoint tab, create an endpoint for your event hub by providing the following information:
Parameter Value Endpoint type Select Event Hubs. Endpoint name Provide a unique name for a new endpoint, or select Select existing to choose an existing Event Hubs endpoint. Event Hubs namespace Use the drop-down menu to select an existing Event Hubs namespace in your subscription. Event hub instance Use the drop-down menu to select an existing event hub in your namespace. Authentication type Select User-assigned, then use the drop-down menu to select the User assigned identity that you created in your event hub. 
Select Create + next. You can continue through the wizard to create a route that points to this endpoint, or you can close the wizard.
You can change the authentication type of an existing custom endpoint. Use the following steps to modify an endpoint:
In your IoT hub, select Message routing in the left navigation pane and then Custom endpoints.
Select the checkbox for the custom endpoint that you want to modify, and then select Change authentication type.
Choose the new authentication type for this endpoint, then select Save.
Configure file upload with managed identities
IoT Hub's file upload feature allows devices to upload files to a customer-owned storage account. To allow the file upload to function, IoT Hub needs to have connectivity to the storage account. Similar to message routing, you can pick the preferred authentication type and managed identity for IoT Hub egress connectivity to your Azure Storage account.
In the Azure portal, navigate to your storage account.
Select Access control (IAM).
Select Add > Add role assignment.
On the Role tab, select Storage Blob Data Contributor. (Don't select Contributor or Storage Account Contributor.)
On the Members tab, select Managed identity, and then select Select members.
For user-assigned managed identities, select your subscription, select User-assigned managed identity, and then select your user-assigned managed identity.
For system-assigned managed identities, select your subscription, select All system-assigned managed identities, and then select your IoT Hub's resource name.
On the Review + assign tab, select Review + assign to assign the role.
For more information about role assignments, see Assign Azure roles using the Azure portal.
If you need to restrict the connectivity to your storage account through a virtual network, you need to turn on the trusted Microsoft first party exception, to give your IoT hub access to the storage account. On your storage account resource page, navigate to the Firewalls and virtual networks tab and enable Allow access from selected networks option. Under the Exceptions list, check the box for Allow trusted Microsoft services to access this storage account, and then select Save. Learn more about IoT Hub support for virtual networks with Azure Private Link.
Note
You need to complete above steps to assign the managed identity the right access before saving the storage account in IoT Hub for file upload using the managed identity. Wait a few minutes for the role assignment to propagate.
On your IoT hub's resource page, navigate to File upload tab.
On the page that shows up, select the container that you intend to use in your blob storage, configure the File notification settings, SAS TTL, Default TTL, and Maximum delivery count as desired. Choose the preferred authentication type, and select Save. If you get an error at this step, temporarily set your storage account to allow access from All networks, then try again. You can configure firewall on the storage account once the File upload configuration is complete.

Note
In the file upload scenario, both hub and your device need to connect with your storage account. The previous steps are for connecting your IoT hub to your storage account with desired authentication type. You must connect your device to storage using the SAS URI. Currently, the SAS URI is generated using the connection string. Follow the steps in Upload files with IoT Hub.
Configure bulk device import/export with managed identities
IoT Hub supports the functionality to import and export device information in bulk from or to a customer-provided storage blob. This functionality requires connectivity from IoT Hub to the storage account.
In the Azure portal, navigate to your storage account.
Select Access control (IAM).
Select Add > Add role assignment.
On the Role tab, select Storage Blob Data Contributor. (Don't select Contributor or Storage Account Contributor.)
On the Members tab, select Managed identity, and then select Select members.
For user-assigned managed identities, select your subscription, select User-assigned managed identity, and then select your user-assigned managed identity.
For system-assigned managed identities, select your subscription, select All system-assigned managed identities, and then select your IoT Hub's resource name.
On the Review + assign tab, select Review + assign to assign the role.
For more information about role assignments, see Assign Azure roles using the Azure portal
Using REST API or SDK for import and export jobs
You can now use the Azure IoT REST APIs for creating import and export jobs. You need to provide the following properties in the request body:
- storageAuthenticationType: Set the value to identityBased.
- inputBlobContainerUri: Set this property only in the import job.
- outputBlobContainerUri: Set this property for both the import and export jobs.
- identity: Set the value to the managed identity to use.
Azure IoT Hub SDKs also support this functionality in the service client's registry manager. The following code snippet shows how to initiate an import job or export job in using the C# SDK.
C# code snippet
    // Create an export job

    JobProperties jobProperties = JobProperties.CreateForExportJob(
        outputBlobContainerUri: blobContainerUri,
        excludeKeysInExport: false,
        storageAuthenticationType: StorageAuthenticationType.IdentityBased,
        identity: new ManagedIdentity
        {
            userAssignedIdentity = userDefinedManagedIdentityResourceId
        });
    // Create an import job

    JobProperties jobProperties = JobProperties.CreateForImportJob(
        inputBlobContainerUri: blobContainerUri,
        outputBlobContainerUri: blobContainerUri,
        storageAuthenticationType: StorageAuthenticationType.IdentityBased,
        identity: new ManagedIdentity
        {
            userAssignedIdentity = userDefinedManagedIdentityResourceId
        });
Python code snippet
# see note below
iothub_job_manager = IoTHubJobManager("<IoT Hub connection information>")

# Create an import job
result = iothub_job_manager.create_import_export_job(JobProperties(
    type="import",
    input_blob_container_uri="<input container URI>",
    output_blob_container_uri="<output container URI>",
    storage_authentication_type="identityBased",
    identity=ManagedIdentity(
        user_assigned_identity="<resource ID of user assigned managed identity>"
    )
))

# Create an export job
result = iothub_job_manager.create_import_export_job(JobProperties(
    type="export",
    output_blob_container_uri="<output container URI>",
    storage_authentication_type="identityBased",
    exclude_keys_in_export=True,
    identity=ManagedIdentity(
        user_assigned_identity="<resource ID of user assigned managed identity>"
    )
))
Note
- If storageAuthenticationType is set to identityBased and userAssignedIdentity property isn't null, the jobs use the specified user-assigned managed identity.
- If the IoT hub isn't configured with the user-assigned managed identity specified in userAssignedIdentity, the job fails.
- If storageAuthenticationType is set to identityBased the userAssignedIdentity property is null, the jobs use system-assigned identity.
- If the IoT hub isn't configured with the user-assigned managed identity, the job fails.
- If storageAuthenticationType is set to identityBased and user-assigned or system-assigned managed identities aren't configured on the hub, the job fails.
SDK samples
Next steps
Use the following links to learn more about IoT Hub features: