Note
Access to this page requires authorization. You can try signing in or changing directories.
Access to this page requires authorization. You can try changing directories.
Note
Copilot Studio bot is renamed as Copilot agent (agent or AI agent). Human agent is now renamed as customer service representative (service representative or representative). You might come across references to the old and new terms while we update the product UI, documentation, and training content.
For Azure agents, you must install the bot SDK and instantiate the Omnichannel middleware before you configure agent context.
Install the bot SDK in your project
To open the NuGet Package Manager, right-click your project and then select Manage NuGet Packages.
In the NuGet Package Manager, select the package source as nuget.org and browse for "Microsoft.Xrm.Omnichannel.BotSDK". Select the package and then select Install. More information: Nuget page
Alternatively, you can use the following command in NuGet CLI.
Install-Package Microsoft.Xrm.Omnichannel.BotSDK
The bot SDK is now installed and the Omnichannel middleware is available in your project.
Use the Omnichannel middleware in your bot code
Use this procedure if you've created your agent using Visual Studio Azure Bot template or Azure portal.
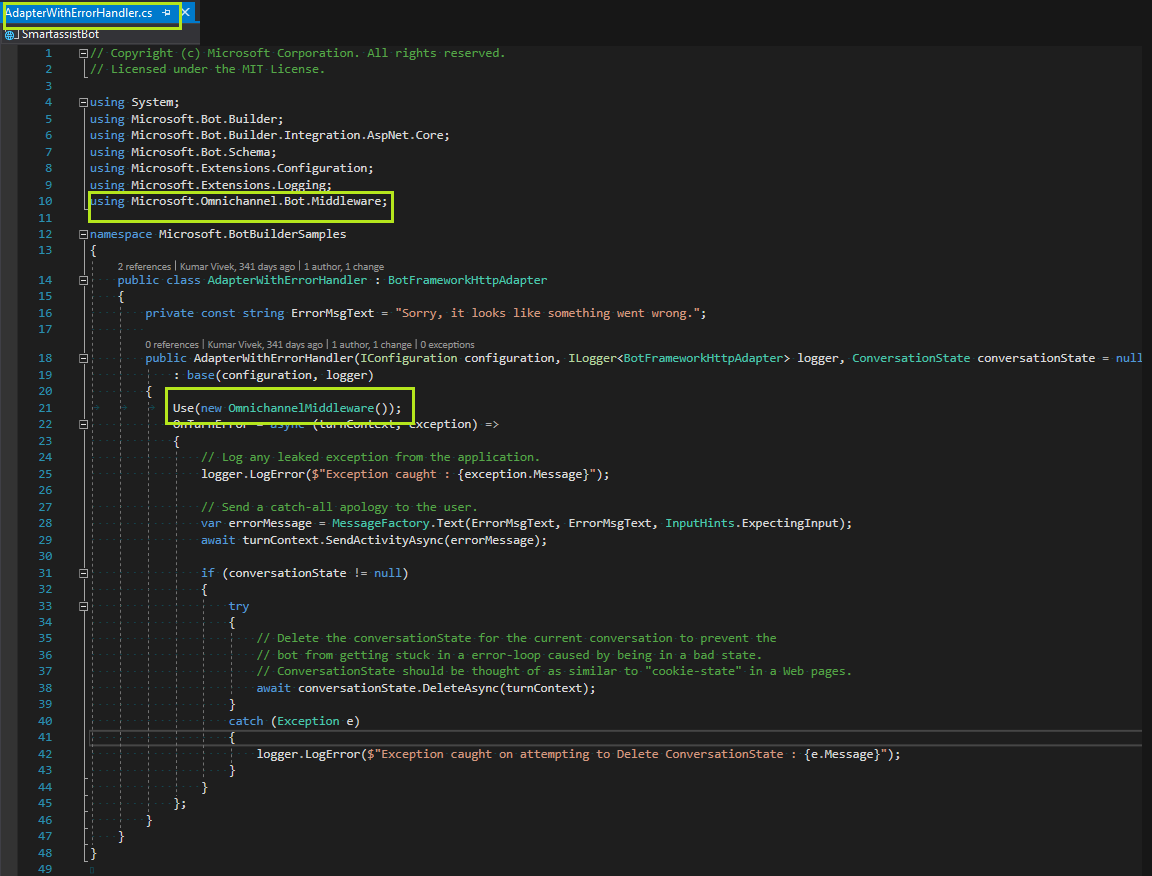
Open the AdapterWithErrorHandler.cs file.
Add the import statement and instantiate the Omnichannel middleware.
using Microsoft.Omnichannel.Bot.Middleware;
Use(new OmnichannelMiddleware());
Next steps
Parse activity JSON to get agent context
Related information
Send custom context
setContextProvider
Integrate an Azure agent