Note
Access to this page requires authorization. You can try signing in or changing directories.
Access to this page requires authorization. You can try changing directories.
Visual Studio (VS) Code for the web offers a free, browser-based experience with no installation required. It enables quick and secure browsing of code repositories and lightweight edits. To get started, visit the VS Code Dev site.
The Fabric Data Engineering VS Code extension can also be used in the VS Code for the Web experience. The extension supports the create, read, update, and delete (CRUD) notebook experience in Fabric. The changes from the VS Code for the Web experience are applied to the workspace immediately. The extension also supports running notebooks in the VS Code for the web experience.
Important
The Fabric Data Engineering VS Code extension is currently in preview.
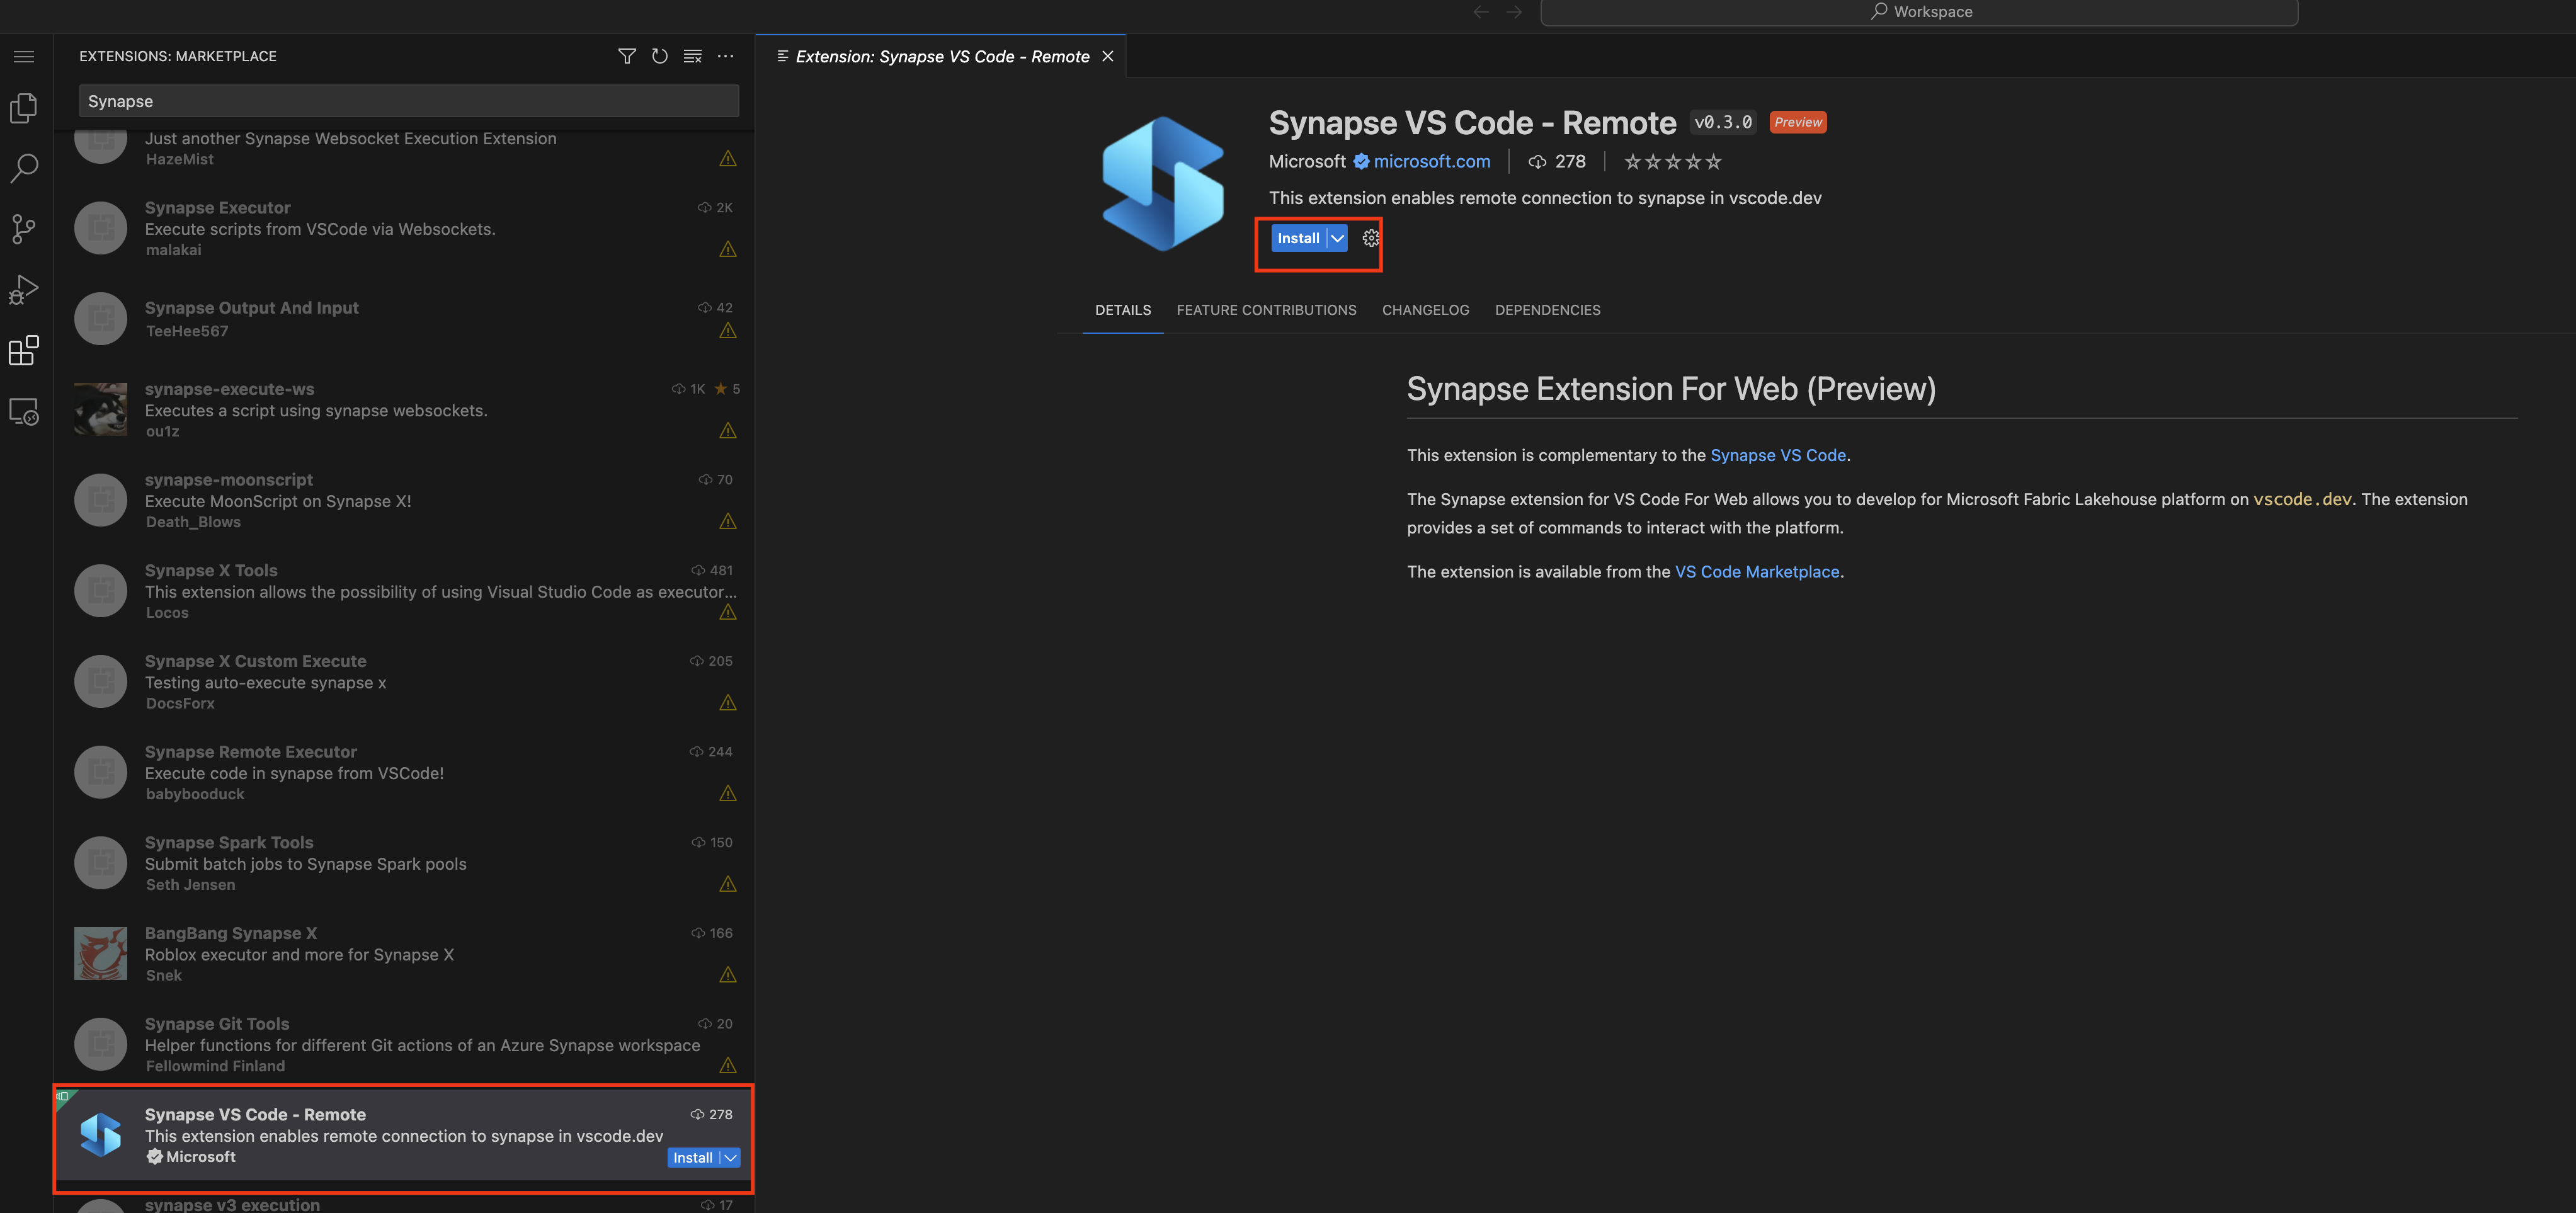
Install the Fabric Data Engineering VS Code extension for the Web
Go to https://insider.vscode.dev from your browser.
Select the Extensions icon in the left navigation bar.
Search for Fabric Data Engineering and select the Fabric Data Engineering VS Code - Remotes extension
Select Install.
Open a notebook with the Fabric Data Engineering VS Code extension for the Web
You can open a notebook in the VS Code for the Web experience by selecting the Open in VS Code (Web) button on the notebook authoring page in the Fabric portal. After you select the button, a separate browser tab is opened with the VS Code for the web experience. If you haven't already installed the extension, it is automatically installed, and activated, and the notebook is opened.

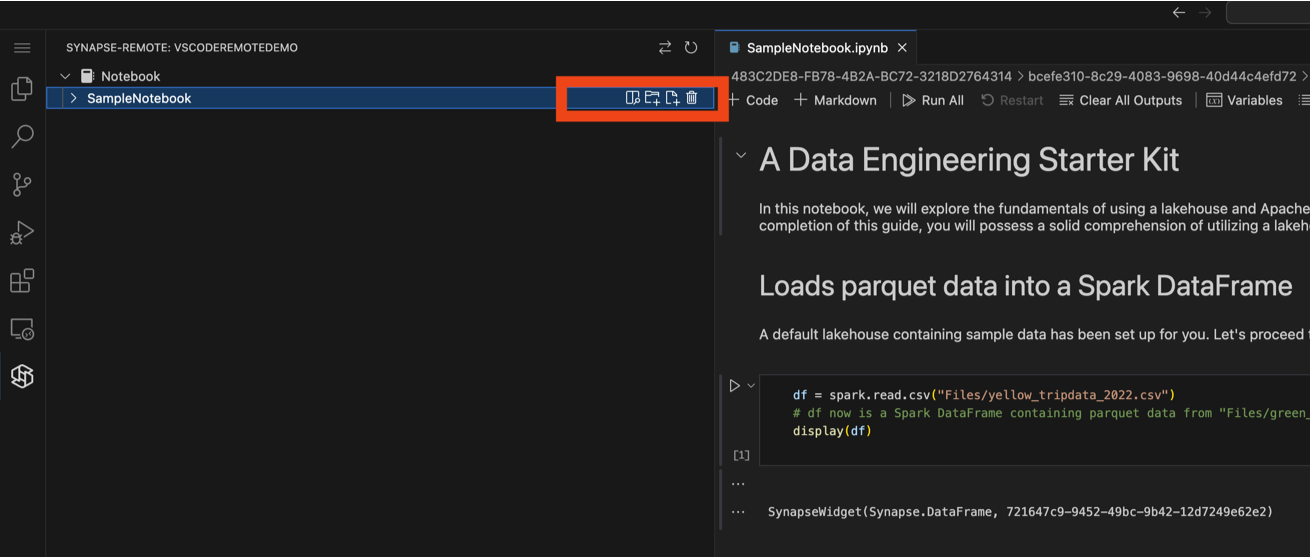
Manage notebooks and notebook file system
The notebook tree node lists all of the notebook items in the current workspace. For each notebook item, you can perform the following actions:
- Open a notebook
- Delete a notebook
- Add new resource file
- Add new resource folder
You can also delete any existing file/folder in the notebook file system.
Run and debug notebooks in the VS Code web experience
You can run a notebook in the VS Code for the web experience by selecting the Run button in the notebook editor. Before you run the notebook, make sure to select the Microsoft Fabric Runtime as the kernel. You can select it at the top right corner of the notebook editor.
Depending on the compute you are using, you can select the PySpark for Spark Notebook and Python for Python Notebook.


Besides running the notebook, you can also debug the notebook in the VS Code web experience. Before you start the debug session, run the following code in the notebook to enable this feature.
%%configure -f
{
    "conf": {
        "livy.rsc.repl.session.debug-notebook.enabled": "true"
    }
}
Note
- It might take 2-5 minutes to finish the configuration. For each live session, you only need to run this setup once. This feature only available for Spark notebooks.
After you run this configuration, you can set breakpoints in the notebook editor and run the notebook in debug mode. When the debug session starts, a notification is shown in bottom right corner of the editor to indicate that the debug session is initiated.

This debug session runs on the remote compute, requiring network traffic to sync debug information like breakpoint status. During the sync process, you can track the synchronization progress in the notebook editor's status bar.

Important
Wait for the synchronization to finish before you continue the debug operation.
Update Python Version from VS Code side
For Python Notebook, you can check and update the Python version from the VS Code side. You can find the python version in the bottom right corner of the status bar. If you want to update the Python version, you can click the version number in the status bar. You can pick the Python version from the list of available Python versions. The selected Python version is used for the following notebook run.

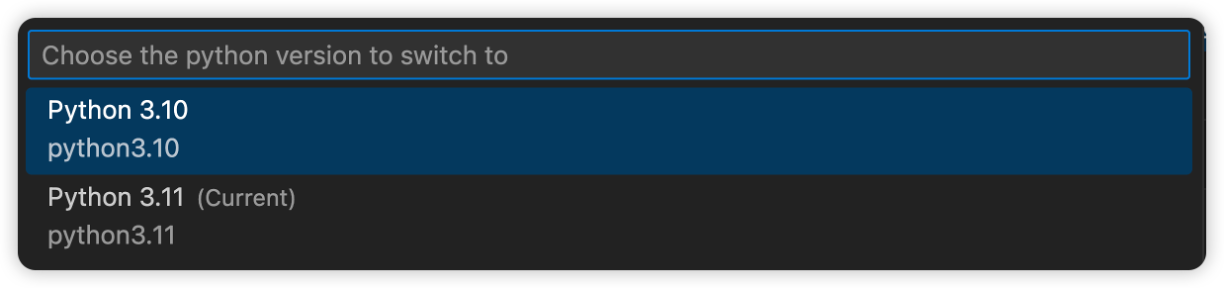
Important
To make sure the version you selected is saved in the remote workspace, save the notebook after you select the Python version.