Note
Access to this page requires authorization. You can try signing in or changing directories.
Access to this page requires authorization. You can try changing directories.
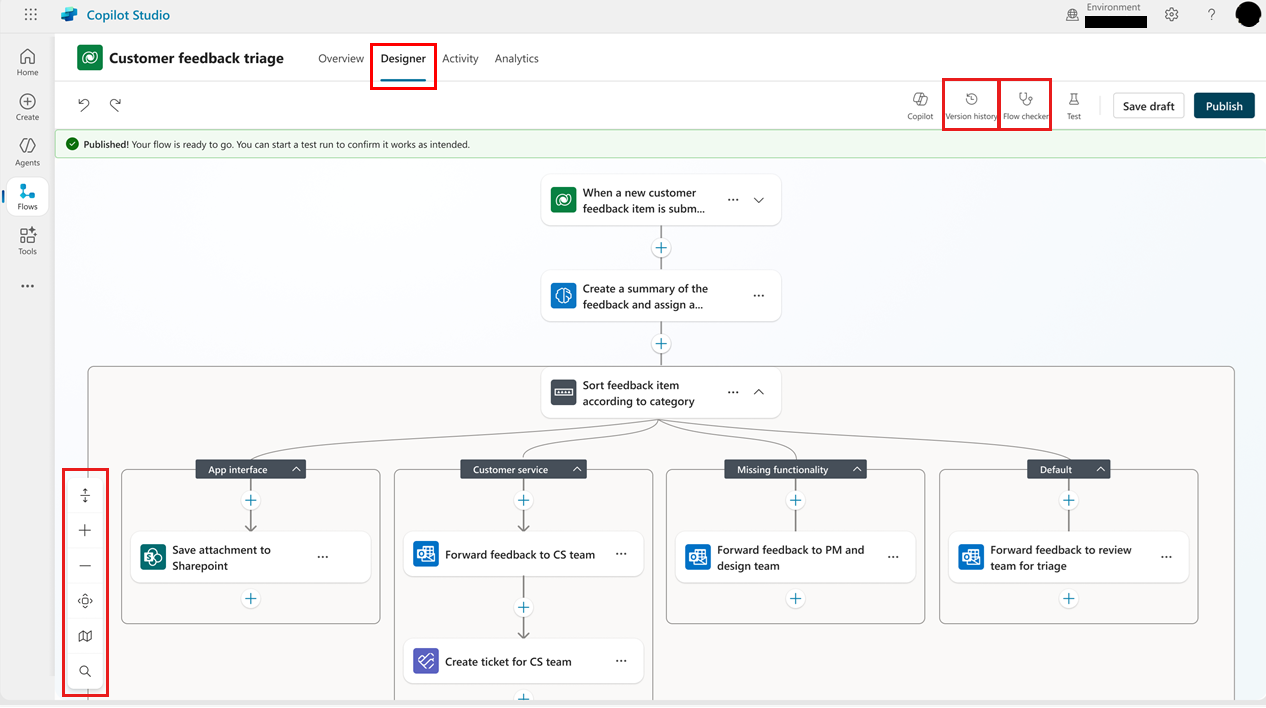
The visual designer in Copilot Studio is a canvas on which you can continue to build or edit an agent flow. Add and remove actions, check for errors, and publish your flow, all without leaving the designer. You can also adjust how your flow is displayed to allow you to focus on specific areas.
To display an agent flow in the designer, open Copilot Studio, select Flows, select the flow, and then select the Designer tab.
Change how your flow is displayed
Depending on the size and complexity of your agent flow, you might want to adjust how it's displayed to make it easier to work with. The toolbar at the bottom-left corner of the canvas controls the view.
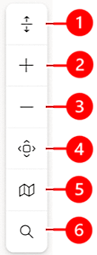
Legend:
- Expand/Collapse: Expand or collapse all action groups. For example, if an action has multiple conditions, select this icon to show the condition details.
- Zoom in: Increase the size of the flow on the canvas.
- Zoom out: Decrease the size of the flow on the canvas.
- Fit view: Resize the view to fit the entire flow on the canvas.
- Minimap: Navigate to a specific section of a large flow.
- Search: Look for an operation in your flow.
Add and remove actions
Below the card where you want to add the action, select the plus sign (+). The Add an action panel opens.
Under Add action, start typing the action you want your flow to perform, and then select it from the list. Depending on your selection, you might need to provide additional information to complete the action.
If you determine that an action isn't needed, select it in your flow, and then select More actions (⋮) > Delete. To confirm the deletion, select OK.
Check flow parameters
To view the parameters for a trigger or action in your agent flow, select its card. The configuration panel opens with the Parameters tab shown by default. To enter a value for a parameter, select an option in the dropdown list or enter an expression to set the value dynamically.
View version history
A version history is recorded in Microsoft Dataverse as you build or modify a flow. To understand how an agent flow evolved, review its version history. Flow versions are grouped by date, with indicators for latest version, published, and past published.
A flow's history is based on saved versions, so it's a good idea to save drafts before the flow is complete.
To use the version history panel, you must save your agent flow at least once.
On the menu at the top of the canvas, select Version history.
To view the recorded versions of the flow, expand an item in the list.
To display the version in the designer, select it in the list.
Check for errors
Errors in agent flow actions are indicated in red. To view details of an error in one action, select the error. To list all errors in the entire flow, on the menu at the top of the canvas, select Flow checker. To view the details of individual errors, select the error. Alternatively, select Open operation to open the operation in the Flow Checker panel and correct the error.
Important
You can't publish a flow if it contains errors. You must correct all the errors before you can publish your flow.
Publish your agent flow
If your agent flow has no errors, you can publish it. To publish your flow, on the menu at the top of the canvas, select Publish.
Test your agent flow
Just because your flow has no errors and can be published, it doesn't mean it's going to do what you want it to. After you publish it, test your flow to make sure that it works as expected.
You can run a test manually or automatically. After the test runs, you can check the output of each action to confirm that the flow is working.
Save and publish your flow.
On the menu at the top of the canvas, select Test. The Test Flow panel opens.
Select whether to run the test Manually or Automatically.
In the Run Flow panel, select Test > Run flow. A green checkmark indicates that the flow ran successfully.
Select Done.
Testing an agent flow in the designer doesn't consume Copilot Studio capacity for the agent flow actions that are directly executed by the test run. However, actions that call features such as AI Builder that have separate billing rates do incur usage of those features.
Related content
- Parameters in the action configuration pane
- Add multiple actions and advanced options to a cloud flow
- Drafts and versioning for cloud flows
- Perform bound actions or unbound actions
- Find and fix errors with Flow Checker
- Troubleshoot common issues with triggers
- FAQ for Copilot in cloud flows
- FAQ for Copilot expression assistant
- FAQ for generative actions in cloud flows