Note
Access to this page requires authorization. You can try signing in or changing directories.
Access to this page requires authorization. You can try changing directories.
Microsoft 365 Agents Toolkit (previously known as Teams Toolkit) project templates focus on getting started with an app that implements a single app capability. However, apps can have multiple capabilities. We've created a set of How-to guides with the steps needed to add different capabilities to a project created with Agents Toolkit.
How-to guides for adding capabilities
| Capability | How-to Guide |
|---|---|
| Configure Tab Capability | How to configure Tab capability within your Teams app |
| Configure Bot Capability | How to configure Bot capability within your Teams app |
| Configure Message Extension Capability | How to configure Message Extension capability within your Teams app |
| Configure Outlook add-in Capability | How to configure Outlook add-in capability within your Teams app |
Open the guides from Agents Toolkit
Use Agents Toolkit pane
Open your app project in Microsoft Visual Studio Code.
Select Microsoft 365 Agents Toolkit from the Visual Studio Code activity bar.
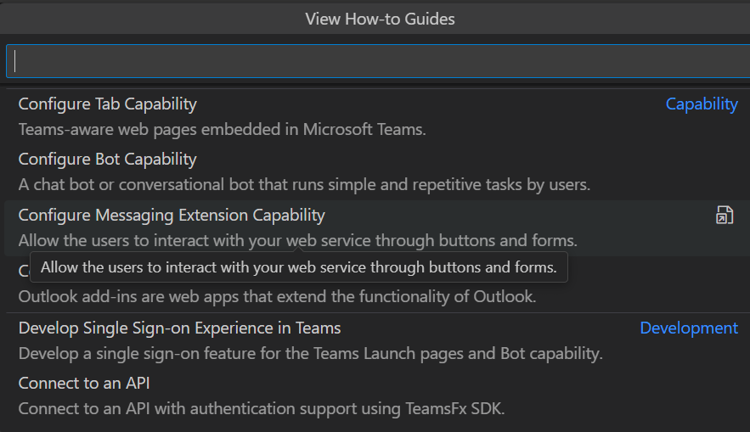
Select View How-to Guides in the DEVELOPMENT section.

From the dropdown list that appears, select the capability you want to add to your app. You'll be redirected to the respective How-to Guide.
Use the Command Palette
Open your app project in Visual Studio Code.
Select View > Command Palette... or Ctrl+Shift+P.
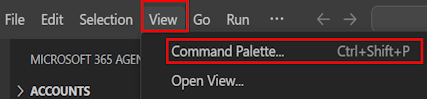
Select Microsoft 365 Agents: View How-to Guides.

From the dropdown list that appears, select the capability you want to add to your app. You'll be redirected to the respective How-to Guide.
See also
Collaborate with us on GitHub
The source for this content can be found on GitHub, where you can also create and review issues and pull requests. For more information, see our contributor guide.
Platform Docs