Note
Access to this page requires authorization. You can try signing in or changing directories.
Access to this page requires authorization. You can try changing directories.
This tutorial shows you how to connect two lists with a lookup column in a canvas app in Power Apps.
SharePoint provides two types of lookup columns:
- Lookup: Links to another list. For example, an Orders list might have a lookup column that links to customers in a Customer list.
- Choice: Selecting a column displays a menu of items you can choose.
Note
When you create or view a list in SharePoint, you're automatically redirected to Microsoft Lists. The list can always be found in both Microsoft Lists and SharePoint. Learn more in What is a list in Microsoft 365?
Prerequisites
A SharePoint site
To create a SharePoint site, see Guided walkthrough: Creating an organization site.
Why use a lookup column?
Data in an enterprise is large and complex. Data in one list often relates to data in another list. Lookup columns are the primary way such business data comes together.
For example, you might have an Orders list which has a lookup column that links to a Customers list, to show which customer placed the order. The lookup column in the Orders list lets you get other data from the Customers list as well.
You might also use a lookup column to connect the Orders list to a Product list, and bring in information you need about the product ordered, such as product pictures, specifications, or manufacturer details.
What are choice columns used for?
Choice columns are used for short lists. Instead of creating a separate list, you include the list values in a small menu. This menu appears when you select a Choice column, and then you can select one of the values from the menu.
Examples include data like Customer Status Code, Product Availability, State Codes—any fixed, relatively short list.
The choice data can stay as a separate list, if you use a Lookup column to link them. However, a Choice column implementation is easier and quicker than a Lookup column implementation.
Learn more in Integrate SharePoint Online into Power Apps overview.
Create the lists
In this tutorial, you link two lists together, Assets and RepairShop. The Assets list is used to track hardware equipment in a team. Since hardware breaks from time to time, we use the RepairShop list to track the local shops which can fix it.
The lookup column used in this example
The RepairShop list uses the ContactEmail column to identify the shop. This list is defined first so that each row in the Assets list points to something.
The Assets list has two lookup columns:
- RepairShop, of type Lookup, uses email addresses to point to entries in the RepairShop list.
- AssetType, of type Choice, lists the asset types for hardware.
You can define more columns, depending on the information you need to track.
Define the RepairShop list and add data
Create this list first, so when you add data to the Assets list, RepairShop entries are available from the Assets.RepairShop lookup column.
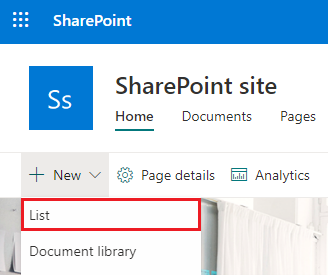
On any SharePoint site, create a new RepairShop list from a Blank list template.
Select Add a column of type Text and name it ContactEmail, then choose Save.
Select + Add new item to enter at least three rows with different ContactEmail sample values. When an asset needs to be repaired, you choose one of these repair shops.

Define the Assets list
On the same SharePoint site, create a new Assets list from a Blank list template.
Select + Add column and choose the Choice column type. Select Next and name it AssetType. Fill in the Choice values under the Choices section with sample assets such as Desktop, Laptop, Android phone, iPhone, and Windows tablet.

Select Save.
Select + Add column and choose the Lookup column type, then select Next.
In the Create a column pane, add RepairShop to the Name field. Go to Select a list as a source and choose RepairShop. Go to Select a column from the list above and choose ContactEmail.
Select Save.
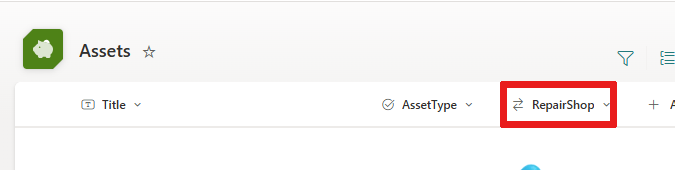
You see the column RepairShop has a two-arrows icon that indicates it's a lookup type column.
Create an app from the Assets list
Create a canvas app from the Assets list created earlier.
Add data to the Assets list
Let's preview the app and add items to your Assets list.
Press F5 or select Preview (
 ).
).Select the + symbol in the upper right corner of your app to add an entry.
Enter a Title for this asset, for example Micah's Laptop.
Select the AssetType dropdown arrow. The values displayed are values you entered when you created this column. Choose one of the entries.

Select the RepairShop dropdown arrow. Choose one of the entries.

Select the check mark to save the new entry.
(Optional) Add more items to the list.
Press
Escto return to the default workspace.Save and publish the app.