Note
Access to this page requires authorization. You can try signing in or changing directories.
Access to this page requires authorization. You can try changing directories.
 Microsoft Project for the web will soon become Microsoft Planner, which is currently rolling out to customers. To learn more about setting up the new Planner for your organization, see Microsoft Planner for admins.
This article describes how a Microsoft 365 tenant admin can export a specific user’s data from Project for the web. The admin can then choose to view the user’s data and decide what data they want to make available to the user. The task data from Project for the web is synchronized with Planner to populate the user’s "Assigned to Me" view in Planner. If you're solely interested in the project data, you can export it from Project for the web using the steps provided. If you also wish to export the Planner-specific data associated with those project tasks, you can do so by exporting the data from the "Assigned to Me" view in Planner.
Project for the web data is stored in Dataverse in Microsoft PowerApps. This article describes how you can:
- View a specific user's Project for the web data by using the Advanced Find function in Power Apps.
- Use a PowerShell script to export data about specific projects that your user was a part of.
Requirements
You need the following to look for data on a specific user through the Advanced Find search feature:
- You need the Microsoft Entra Object ID (Microsoft Entra ID) of the user. You can find it in the Microsoft Entra Admin Center.
- You need access the Power Apps Admin Center and for privileges to the Dataverse environment.
To export and view information on specific projects:
- You need access to open the project.
- You need to have an M365, Planner Plan 1, Planner and Project Plan 3, or Planner and Project Plan 5 license.
Methods for finding your user's data
Depending on the type of user data you need to find, there are two paths you can take in searching for and exporting your user's data.
- Find data about your user's project and roadmap objects in Dataverse - Use the Advanced Find feature in the Power Apps Admin Center to find all the user's data that is contained in Dataverse (for example, objects related to their projects and roadmaps).
- Find data about specific projects that your user was associated with - Use the project export PowerShell script to get details about specific projects the user was associated with which is not stored in the Dataverse table/column structure.
Find user data in Dataverse with the Advanced Find search feature
Project for the web user information that resides in Dataverse - such as roadmap and project objects and properties - are located in specific Power Apps solutions. The Advanced Find search feature in the Power Apps Admin center can query across entities in these solutions to find the information you need.
Understand Project for the web Dataverse data and where it resides
When looking for a specific user's Project for the web data in Power Apps Dataverse, it is located in these Power Apps solutions:
| Name | Display Name |
|---|---|
| PortfolioService |
Portfolio Service |
| msdyn_ProjectServiceCore |
Project |
| MicrosoftDynamicsScheduling |
Universal Resource Scheduling |
| msdynce_SchedulingPatch |
Scheduling Patch |
| mydynce_Scheduling |
Scheduling |
You can look specifically at any of these Power Apps solutions. Review these solutions as new entities can be added to them. Understanding the structure allows you to know what tables and columns to look at for user data.
To view entities for a Power Apps solution:
Note
These steps follow looking at the Default environment in your organization. Choose the named environment if that is where you are looking for data.
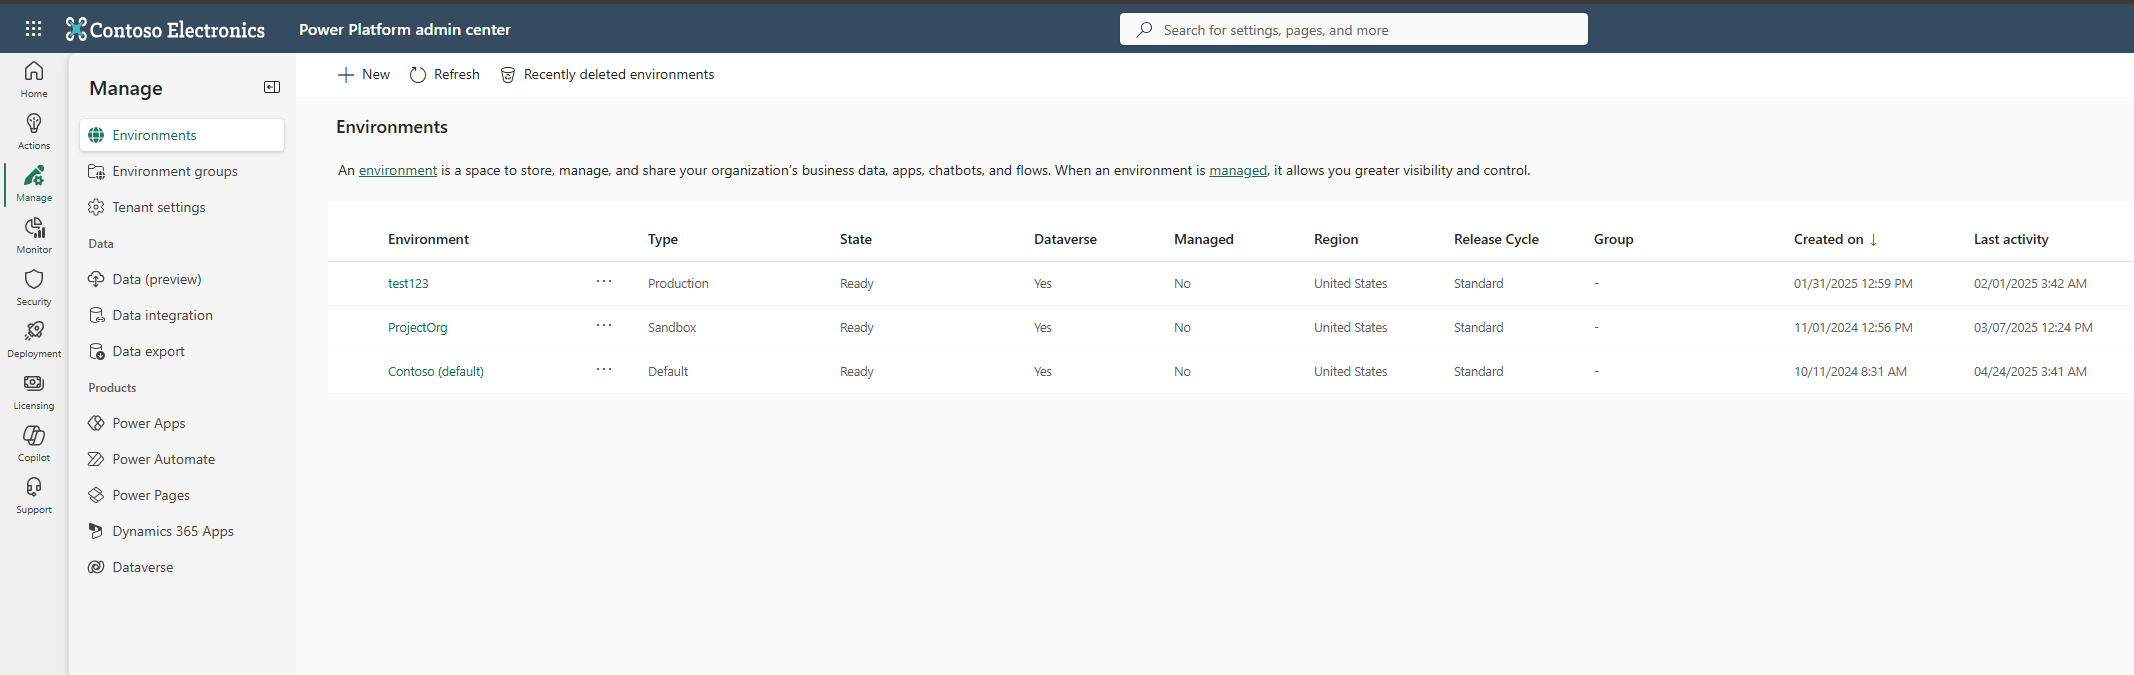
In the Microsoft 365 admin center, under Admin centers, select Power Platform.
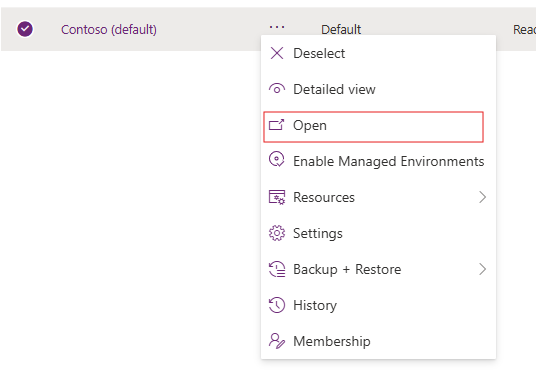
In the Power Platform Administration Center, select the Manage -> Environments, choose the environment that says "(default)", choose "...", and then select Open.
Select on the name at the top (in case an app is already chosen) and choose "Power Platform Environment Settings"
Under Customization section, select Solutions, choose All.
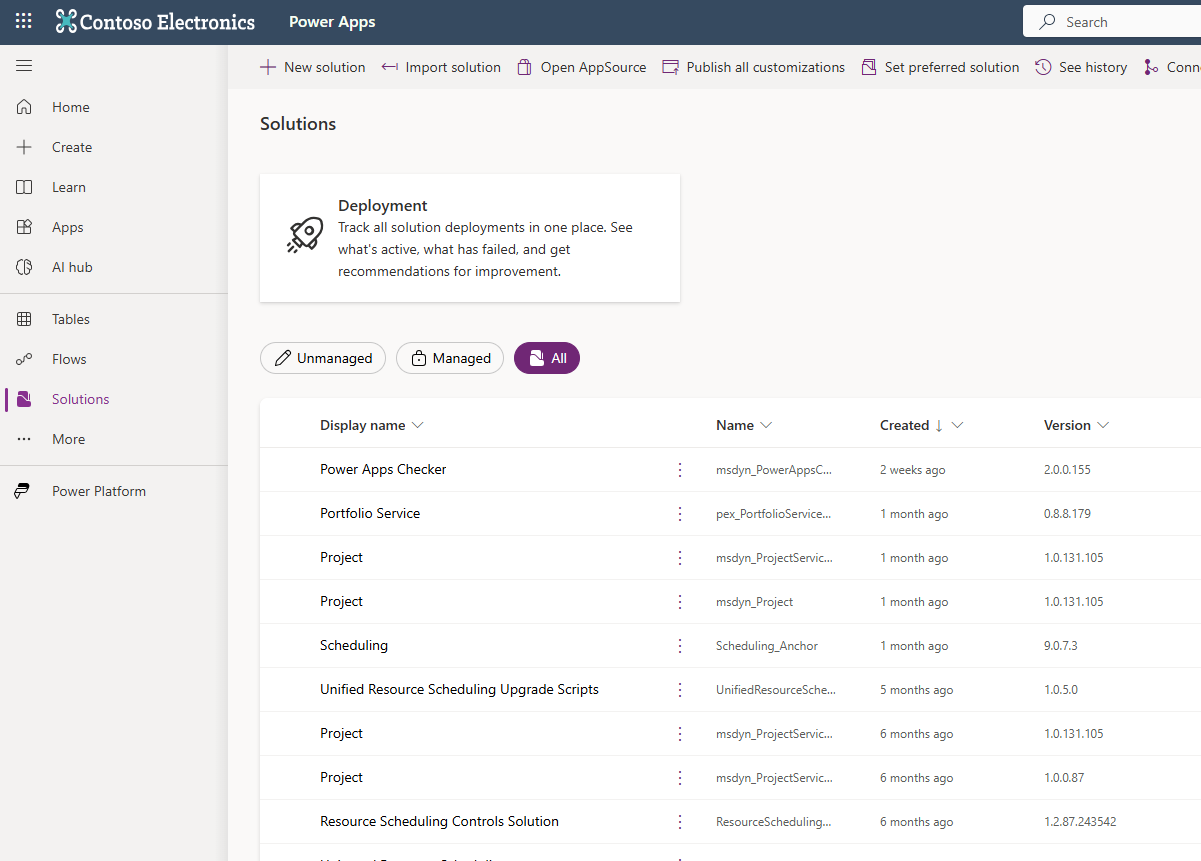
Open the solution by selecting on it.
Expand Tables.
Expand a table.
Select columns. The column names and their data types are visible.
Use Advanced Find to search for user data
In the Microsoft 365 admin center, under Admin centers, select Power Platform.
In the Power Platform Administration Center, select the Manage.
Select Environments.
Find the Default Environment. The name of the Environment contains "(default)".
Select "..." to the right of the Default environment.
Select Open.
Select on the name at the top and choose "Power Platform Environment Settings"
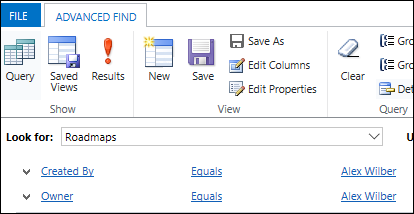
Select the Advance Find button.

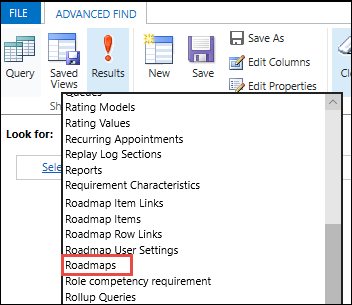
In Advanced Find, select a table to search. For Projects choose "Plans", for Roadmaps choose "Roadmaps"
For example, if you want to view all roadmaps your user was a part of, select Roadmaps.
- To begin building your query, select Select, and then select the fields you need to start searching for projects or roadmaps your user was a part of.
For example:
- To find all roadmaps owned by the user, select the Owner field, and then select Equals, and then enter the ID or account name for the user.
- To find all roadmaps created by the user, select the Created By field, and then select Equals, and then enter the ID or account name for the user.
When you’re done with selecting your search criteria, in the ribbon, select Edit Columns.
On the Edit columns page, select Add columns, and then select the columns you want to include in the query. When done, select OK.
Select Results to run your query.
After you receive your results, export them to Excel by selecting Export [entity name], and then select Static Worksheet.
Plans and Roadmaps owned by a user or group
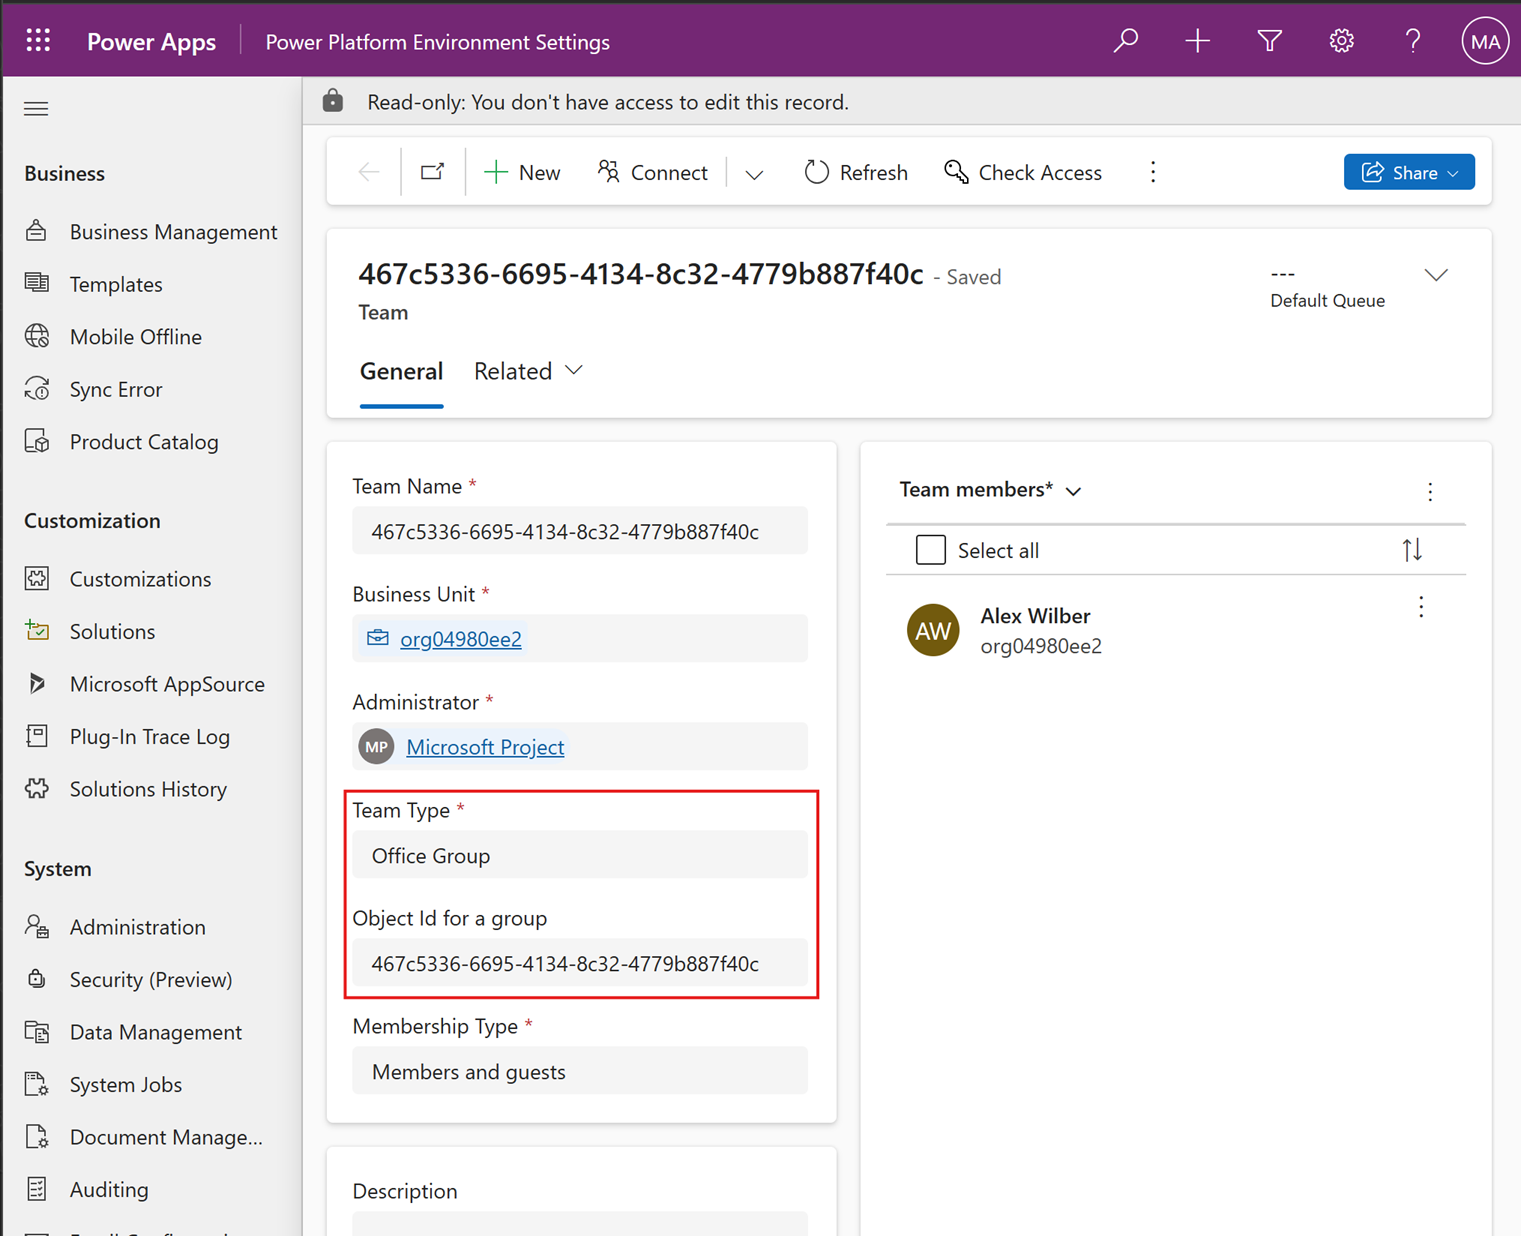
You may need to find plans or roadmaps by the Microsoft 365 Group who owns the record. Using the Advance Find flow, in the Add columns step, add the owner.
Records that a user owns show the user's name.
Records that a Microsoft Dataverse Team owns show an identifier. Selecting on the identifier brings up the details on the team. If the "Team Type" = "Office Group, then it is a Microsoft 365 group and the ID of the Microsoft 365 group is also provided. You can use this information to look up information on the group.
Use the export script to see details on specific projects
Use the ExportProjectContentUse export script to export details that contained in specific projects. With the script, you can get the following files for a specific project:
- Project files .mpp for the project. Add the parameter -mppexport $true to the cmdlet to generate .mpp files of the project plans.
- An XML file that contains project details and settings.
Get the Project IDs of a project
Before you run the script, you need to get the Project IDs of the projects you’re interested in.
Use Advance Find, find the projects that you are interested in.
Download them to an Excel file.
The Project ID column is the first column of the Excel spreadsheet, but it’s hidden by default. Unhiding the first column can be a bit tricky, so if you need help, see Unhide the first row or column in a worksheet.
After you unhide the columns in the spreadsheet, look for the name of the project, and then look for the corresponding value in the Project column to find the Project ID for the project.

Run the Export script
Now that you have the Project IDs of the projects you’re interested in looking at, use the ExportProjectContent Windows PowerShell function to get more information. The ExportProjectUserContent function is included in the ProjectExport Windows PowerShell module.
Download the Project Export Windows PowerShell module and first unblock the zip file and then unzip the files.
Note
After you unzip the script, run the following command in Windows PowerShell to import the modules:
Import-Module -Name ./projectexport
To run the ExportProjectContent function:
- In Windows PowerShell, after importing the model, run the following cmdlet:
ExportProjectContent -ProjectId (ProjectID of the project) -OutputDirectory (Location to put files) -InstanceId "(Dataverse instance name)"`
You need to configure the following parameters when running the script:
| Parameter | Description |
|---|---|
| ProjectId |
ID of the project within Dataverse. See Get the Project IDs of a project.. |
| OutputDirectory |
Location where the export files are put. |
| InstanceId |
The identifier of the Power Apps instance you’re using. |
To find your Instance ID:
- In the Power Apps Administration Center, select the default instance, and then select Open.
- On the PowerApps setting page, look at the first part of the URL to determine your Instance ID value. The Instance ID value would be
https://orgde6d15d8.crm.dynamics.com.

As an example of how to run the script, if the Project ID of the project is dd065460-02b8-e911-a989-000d3a170e10, you want the output files to go to C:\User1Project1, and the instance name of the Dataverse org is
https://orgde6d15d8.crm.dynamics.com, you would run the script like this:
ExportProjectContent -ProjectID dd065460-02b8-e911-a989-000d3a170e10 -OutputDirectory C:\User1Project1 -InstanceId `https://orgde6d15d8.crm.dynamics.com`"`
- When the script completes, go to the OutputDirectory ___location you specified to find the .json files for the project.
3a215ea2-c650-49db-8200-47bd4a7e2278_2023-02-13T21-29-13Z.json
If you have multiple projects, run the script again for each project, using its corresponding ProjectID value.
Note
You may receive multiple versions of your .json file, known as snapshots. These files are versions of your project prior to changes being made to it. Snapshot files include a timestamp to let you know when they were taken. The current version of the file is the one with the earliest timestamp, which would be the project creation date.
All snapshots currently stored for the project are exported. Snapshots can be periodically cleared out depending on how active the project is.
The field definitions are at Export Content Definition.
View and export Project History
Open the Advanced Find tool. In the Look for menu, select the Project History object.
If you want to filter on a particular project, choose Select, select the Project option from the drop-down dialog, and then add the project for which you’d like to see Project History items.
When you’re done with selecting your search criteria, in the ribbon, select Edit Columns.
On the Edit columns page, select Add columns, and then select the columns you want to include in the query. When done, select OK.
Select Results to run your query.
After you receive your results, you can export them to Excel. To do this, select Export, and then select Static Worksheet.
Use the Power Apps portal to view the descriptions of the different fields that are stored with the Project History data. Open the Project History table within the msdyn_ProjectServiceCore_Patch solution. The msdyn_project field is a reference to the related project. msdyn_projecttask is a reference to the associated task (if applicable). The msdyn_details field is a JSON object that describes the details of the history record. More information on what is contained in msdyn_details can be found in the Task History Definition.
View and export Status Reports
Status Reports are only available in projects that are shared with a group.
- Follow the instructions
- Get the Project IDs of a project to get the Project ID
- Run the Export script to get the Instance ID.
- Plans and Roadmaps owned by a user or group to get the group information
- Navigate to the SharePoint folder within the Microsoft 365 group. The folder path is /Microsoft Planner/<Environment URL>_<ProjectID>/Status Reports/<FileName> where the file name matches the name of the status report.
- View and export the file using existing export controls
See Also
Create, edit, or save an Advanced Find search
Delete user data from Project for the web