Note
Access to this page requires authorization. You can try signing in or changing directories.
Access to this page requires authorization. You can try changing directories.
The Restrict Known Folder Move from Office (Restrict KFM from Office) Group Policy allows administrators to control whether Office apps display prompts encouraging users to back up their files to Microsoft OneDrive.
When this policy is enabled and deployed, Office doesn't display the message bar, even if users are eligible for the Known Folder Move (KFM) feature. This policy applies only to Office apps and doesn't affect other OneDrive or KFM configurations. It's available in the Administrative Template files for Microsoft Office (version 5497.1000 or newer).
Tip
- Enable this policy if you don’t want users to see prompts to back up their files.
- If KFM is blocked in your organization, the message bar doesn't appear, even if users are eligible.
- Microsoft respects existing policies that block KFM and doesn't display prompts in those environments.
What users see when eligible
When the policy isn't enabled, eligible users might see a message bar in Microsoft Word, Excel, and PowerPoint (Windows desktop versions) prompting them to enroll in OneDrive Known Folder Move (KFM). The message bar allows users to select folders to back up to OneDrive.
Important
If users aren't enrolled in KFM, they might see the message:
"BACK UP THIS DOCUMENT: Share and work with others in this and other files using OneDrive."
Selecting Open OneDrive lets users choose which folders to back up.
By enabling and deploying the Restrict KFM from Office Group Policy, administrators can prevent these prompts and maintain control over KFM adoption.
When the Message Bar isn't displayed
The message bar doesn't appear under the following conditions:
- The user is already enrolled in KFM.
- OneDrive isn't provisioned, installed, or running.
- The policy Prevent users from moving their Windows known folders to OneDrive is enabled.
- The Restrict KFM from Office policy is enabled.
Deployment methods
Option 1: Deploy via Group Policy (Active Directory or hybrid environments)
If you're using Active Directory, Microsoft Entra, or a hybrid environment, you can deploy the policy using Group Policy Objects (GPOs).
- Download the Administrative Template files (ADMX/ADML) for Microsoft Office.
- Select Download, then choose the 32-bit (x86), 64-bit (x64), or both versions.
- Select Next, then choose a ___location to save the file.
- Run the downloaded admintemplates_XXXXXXX_en-us.exe and follow the prompts to extract the files.
- After extracting, you'll see admin and admx folders.
- On your Active Directory server:
- Copy the
.admxfiles into %SYSTEMROOT%\PolicyDefinitions - Copy the corresponding language
.admlfiles into %SYSTEMROOT%\PolicyDefinitions[Language-CountryRegion]- For example, copy U.S. English
.admlfiles into theen-usfolder.
- For example, copy U.S. English
- Copy the
- Open Group Policy Management.
- Under Domains, select the appropriate policy (for example, Default Domain Policy) and choose Edit.
- In the Group Policy Management Editor, go to:
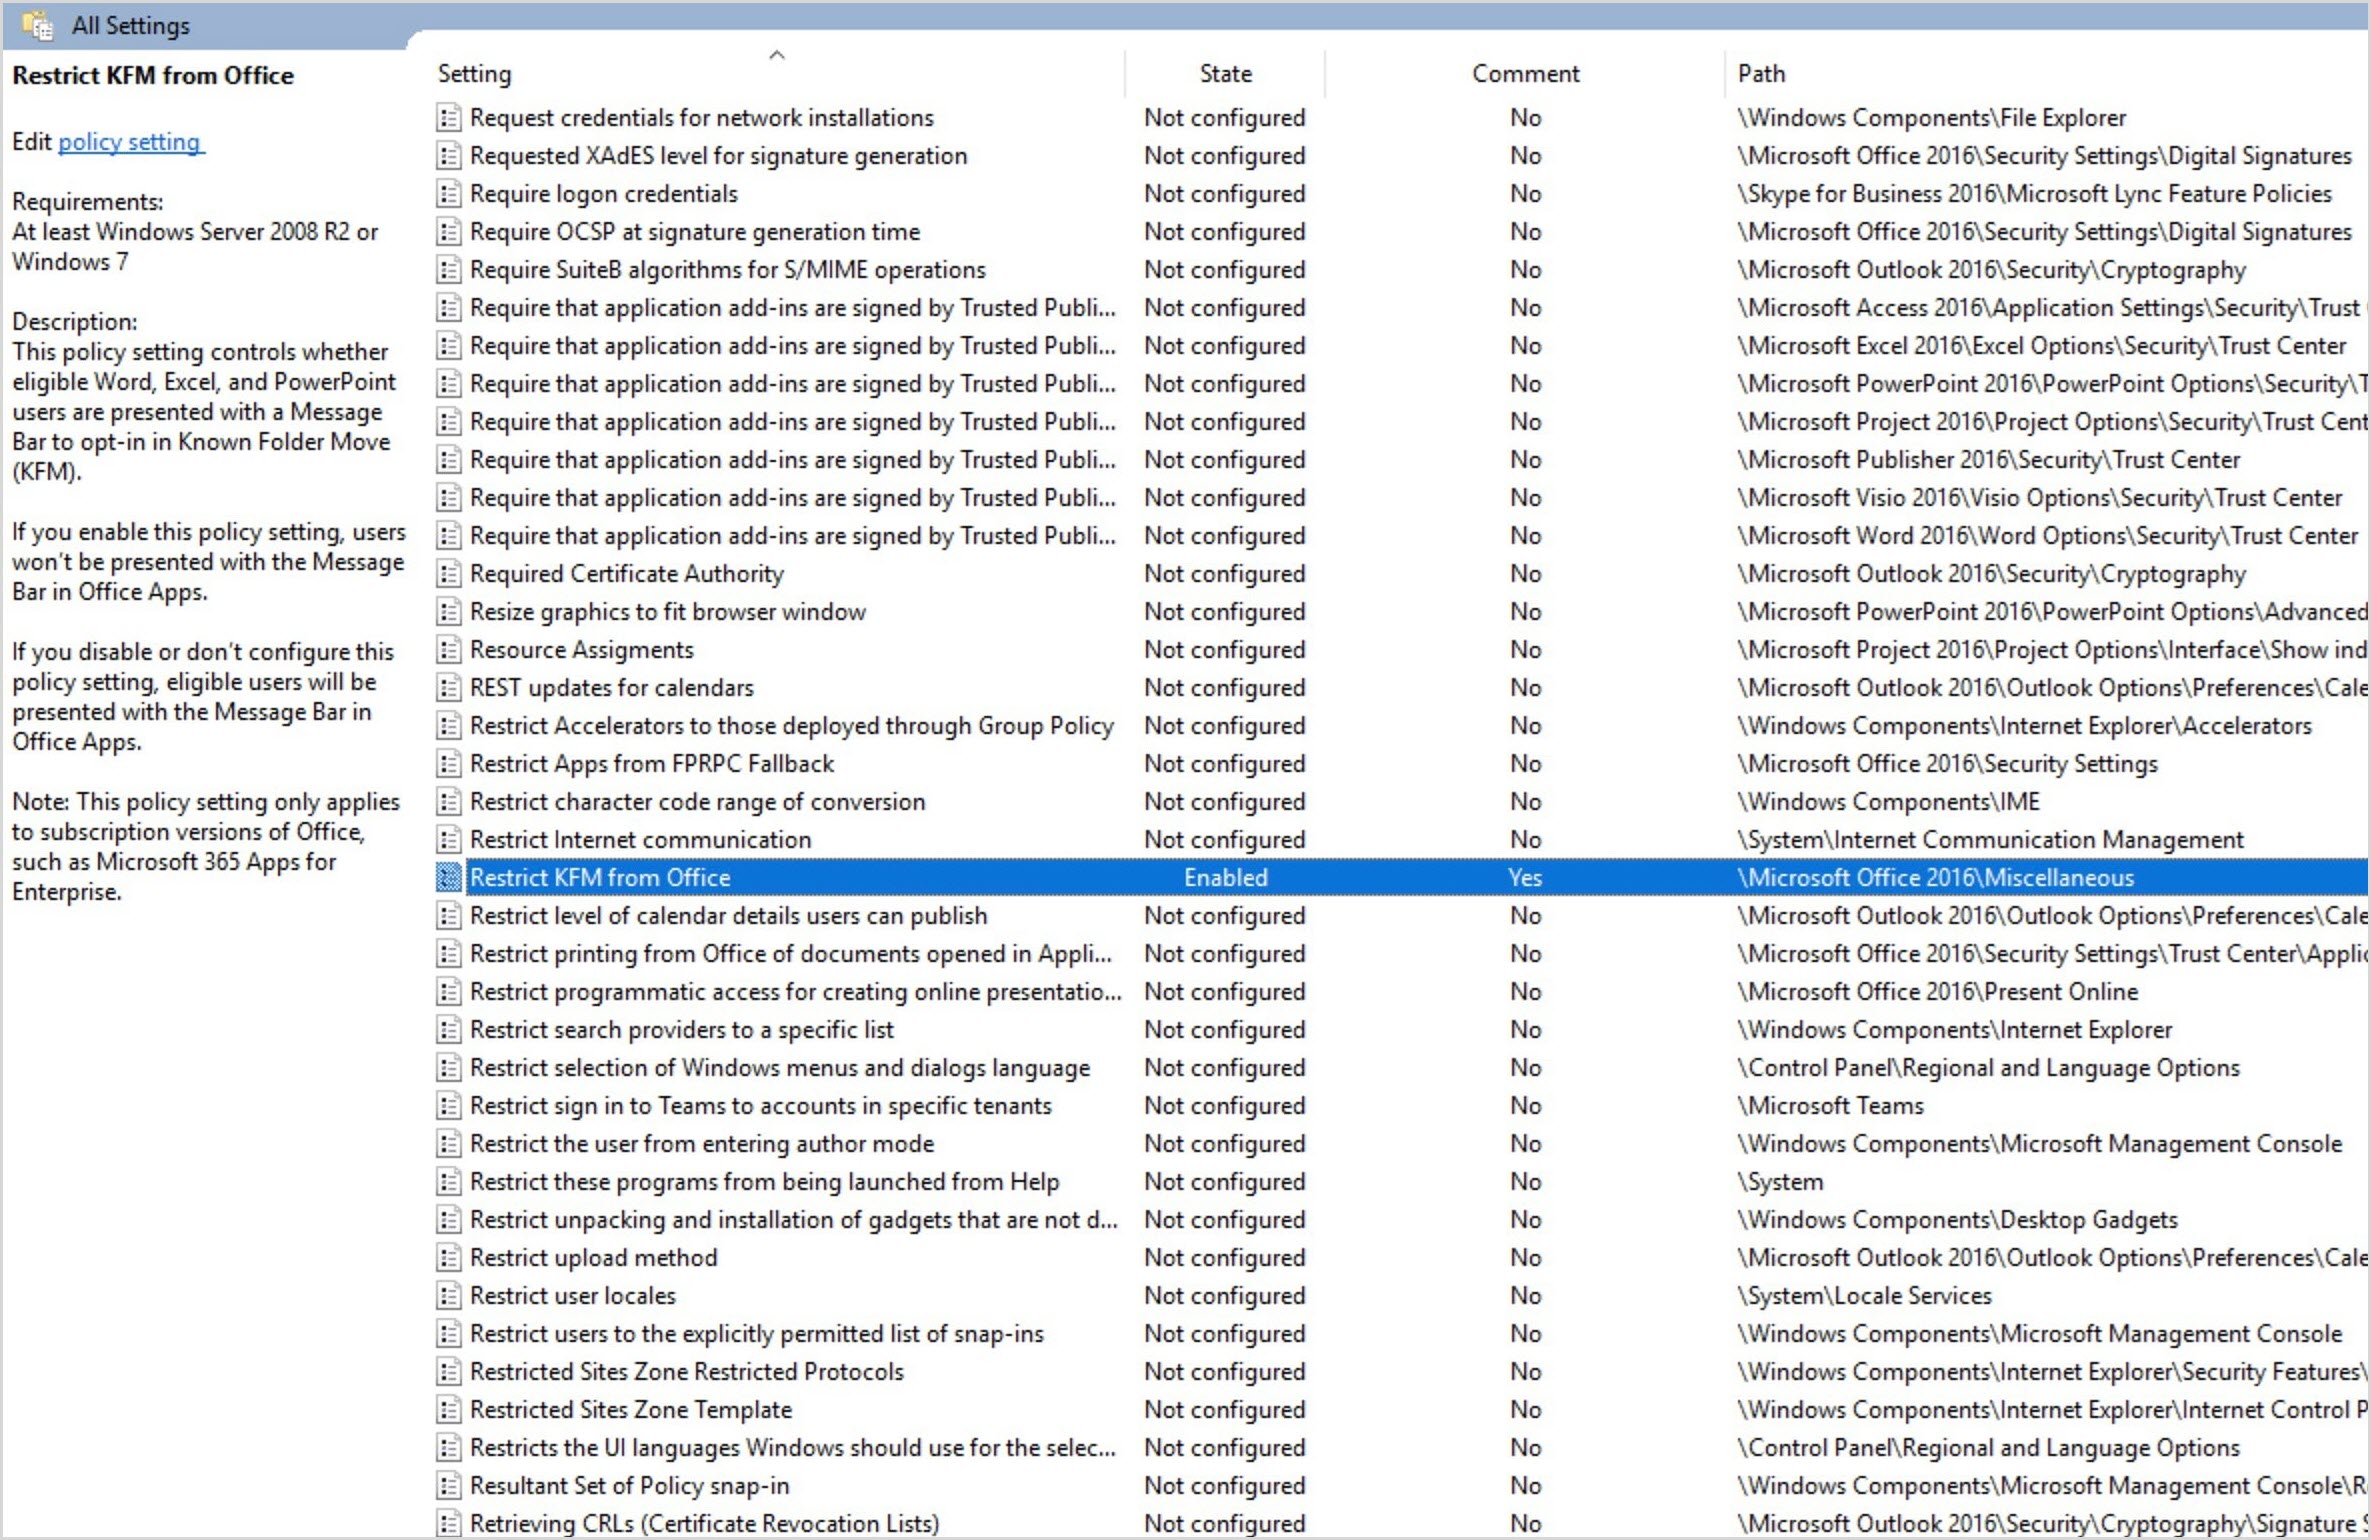
User Configuration > Policies > Administrative Templates: Policy Definitions > All Settings - Locate Restrict KFM from Office, right-click it, and select Edit.
- Change the setting from Not Configured to Enabled, then select Apply and OK.
- The policy setting should now display as Enabled.
Note
It might take up to 24 hours for the policy to take effect.
Option 2: Deploy via Cloud Policy service
You can also deploy this policy using the Cloud Policy service for Microsoft 365. This method works even if the device isn't ___domain-joined. When a user signs into Microsoft 365 Apps for Enterprise on a device, the policy settings roam to that device. See Overview of Cloud Policy to learn more about cloud policies for Microsoft 356 Apps.
To deploy the policy:
- Sign in to the Microsoft 365 Apps admin center with administrative credentials.
- Under Customization, select Policy Management.
- On the Policy configurations page, select Create.
- On the Start with the basics page, enter a Name (required) and Description (optional), then select Next.
- On the Choose the scope page, select whether the policy applies to:
- All users
- Specific groups
- Users accessing Office for the web anonymously
- If applying to specific groups, select Add Groups and choose the relevant groups.
Note
Adding multiple groups to a single policy configuration allows for the same group to be included in multiple policy configurations, facilitating a more streamlined and efficient policy management process.
- Select Next.
- On the Configure Settings page:
- Search for Restrict KFM from Office or use a filter.
- Set the configuration to Enabled, then select Apply.
- Review your selections and choose Create.
- Select Done.
Once configured, the policy will apply to eligible users the next time they sign in to Microsoft 365 Apps on any device.


