More ways to use the Navigate function
There are many ways to configure navigation in your app beyond using the OnSelect property of a button or icon control. This unit introduces three common techniques: the OnSuccess property of a Form control, the OnTimerEnd property of a Timer control, and the OnChange property of a Dropdown control.
OnSuccess navigation
To improve user experience, it's useful to provide feedback after a successful data submission. Power Apps offers tools to support this. For example, if you insert a Success screen into your app, you can configure navigation to display it only when data is successfully saved.
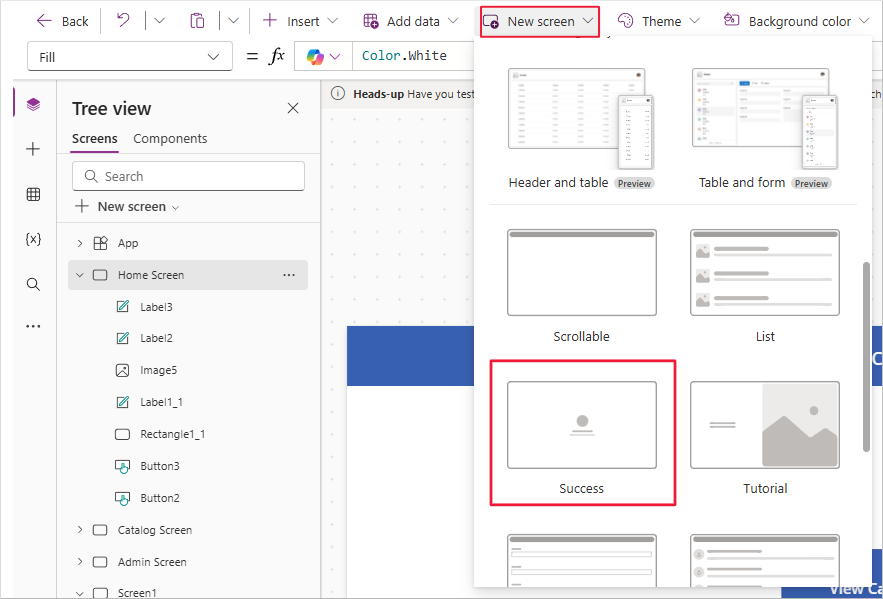
First, insert a Success screen using the New screen dropdown and rename it to Success Screen.
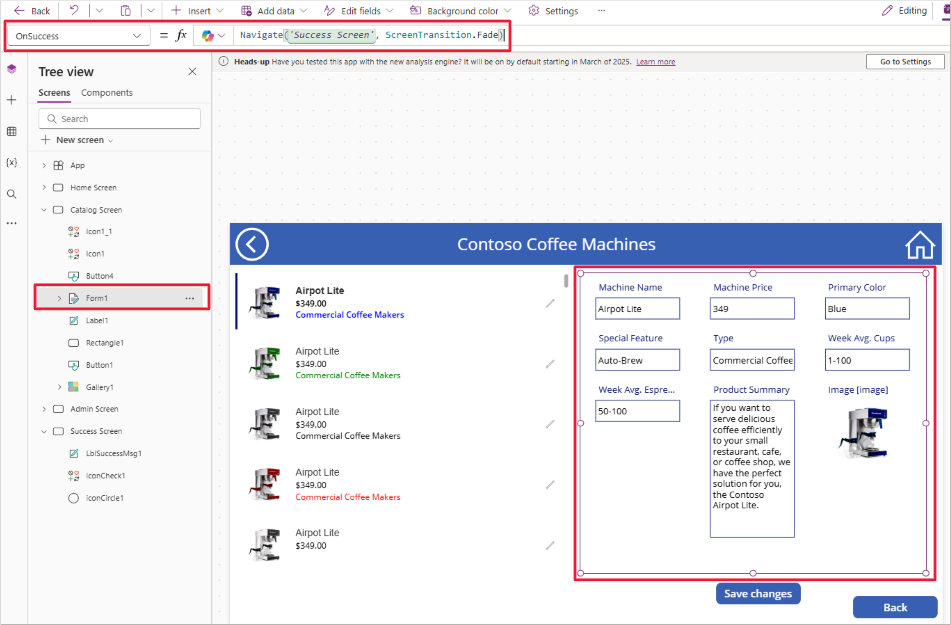
Next, select your form and locate its OnSuccess property. To ensure users only navigate to the Success Screen when data is successfully saved, use the following formula:
Navigate(‘Success Screen’, ScreenTransition.Fade)
This Navigate function triggers only after a successful form submission.
Then, configure a way for users to return to a previous screen. Rather than requiring manual interaction, you can use a Timer control.
OnTimerEnd navigation
A Timer control can automate transitions, such as returning to a catalog or home screen after briefly displaying a success message.
By default, the Timer control:
Is visible when added to the screen.
Has a Duration of 60,000 milliseconds (60 seconds).
Has AutoStart set to false.
You can customize it as follows:
Insert a Timer control on the Success Screen.
Set the AutoStart property to
true.Set the Duration property to
4000(four seconds).Set the OnTimerEnd property to
Navigate('<yourScreenName>').Set the Visible property to
false.
With these settings, the timer begins automatically when the screen loads and navigates the user to another screen after 4 seconds.
OnChange navigation
Another effective navigation technique is to add a menu to your app using a Dropdown control. You can configure this dropdown on one screen and then copy it to other screens in your app for consistency.
A Dropdown control uses a Table as its data source. In the Items property, you can enter a list of your app's screen names like this:
["","Home Screen", "Catalog Screen", "Success Screen"]
This syntax represents a one-column table with the values shown. It's equivalent to:
Table({Value: ""},{Value: "Home Screen"},{Value: "Catalog Screen"}, {Value: "Success Screen"})
The square bracket syntax is a simplified method of entering table data.
The first value, "", is an empty string. You can set this as the control's Default property so no option is preselected.
With the Items property configured, update the control’s OnChange property to handle navigation.
Tip
Be sure to update the OnChange property, not OnSelect. The OnSelect property triggers when a control is clicked, whereas OnChange is used when the selected value changes.
The recommended method is to use a Switch function along with the Self reference to evaluate the selected value and perform navigation. Alternatively, you could use an If statement. Both are conditional logic structures.
For example, in the Contoso Coffee Machines app, you might use the following formula for the OnChange property of a Dropdown control:
Switch(Self.SelectedText.Value,
    "Catalog",Navigate('Catalog Screen',ScreenTransition.Cover),
    "Admin",Navigate('Admin Screen',ScreenTransition.Cover)
);
Reset(Self)
This formula evaluates Self.SelectedText.Value—the selected item in the dropdown. If the value is "Catalog", the app navigates to the Catalog Screen. If the value is "Admin", it navigates to the Admin Screen.
The Switch function is ideal when there are multiple possible outcomes based on a single input.
The final line, Reset(Self), resets the dropdown to its default value (""), which removes the selection.
If you're not fully comfortable with this yet, don't worry. You'll revisit this process in the next unit's exercise.


