重要
2025 年 5 月 1 日より、Azure AD B2C は新規のお客様向けに購入できなくなります。 詳細については、FAQ を参照してください。
開始する前にこのページの上部にある ポリシーの種類 セレクターを使用して、設定するポリシーの種類を選択します。 Azure Active Directory B2C には、ユーザーがアプリケーションを操作する方法を定義する 2 つの方法 (定義済みのユーザー フローを使用する、または完全に構成可能なカスタム ポリシーを使用する) があります。 この記事で必要な手順は、方法ごとに異なります。
Azure Active Directory B2C (Azure AD B2C) が顧客に表示するユーザー インターフェイスのブランド化とカスタマイズは、アプリケーションでシームレスなユーザー エクスペリエンスを提供するのに役立ちます。 これらのエクスペリエンスには、サインアップ、サインイン、プロファイル編集、パスワードのリセットが含まれます。 この記事では、ページ テンプレートと会社のブランドを使用して、Azure AD B2C ページをカスタマイズします。
ヒント
ページ テンプレート、バナー ロゴ、背景画像、または背景色以外のユーザー フロー ページの他の側面をカスタマイズするには、 HTML テンプレートを使用して UI をカスタマイズする方法を参照してください。
[前提条件]
- ユーザーが サインアップしてアプリケーションにサインインできるように、ユーザー フローを作成します。
- Web アプリケーションを登録します。
- 「Active Directory B2C でのカスタム ポリシーの概要」の手順を完了してください。 このチュートリアルでは、Azure AD B2C テナント構成を使用するようにカスタム ポリシー ファイルを更新する方法について説明します。
- Web アプリケーションを登録します。
概要
Azure AD B2C には、ユーザー エクスペリエンス ページをプロフェッショナルな外観にするために選択できる組み込みのテンプレートがいくつか用意されています。 これらのページ テンプレートは、 会社のブランド 化機能を使用して、独自のカスタマイズの開始点としても機能します。
注
クラシック テンプレートでサポートされているブラウザーには、Internet Explorer、Microsoft Edge、Google Chrome、Mozilla Firefox、Safari の最新バージョンと以前のバージョンが含まれます。 Ocean Blue および Slate Gray テンプレートでは、Internet Explorer 11 や 10 などの古いバージョンのブラウザーでサポートが制限されている場合があります。サポートするブラウザーでアプリケーションをテストすることをお勧めします。
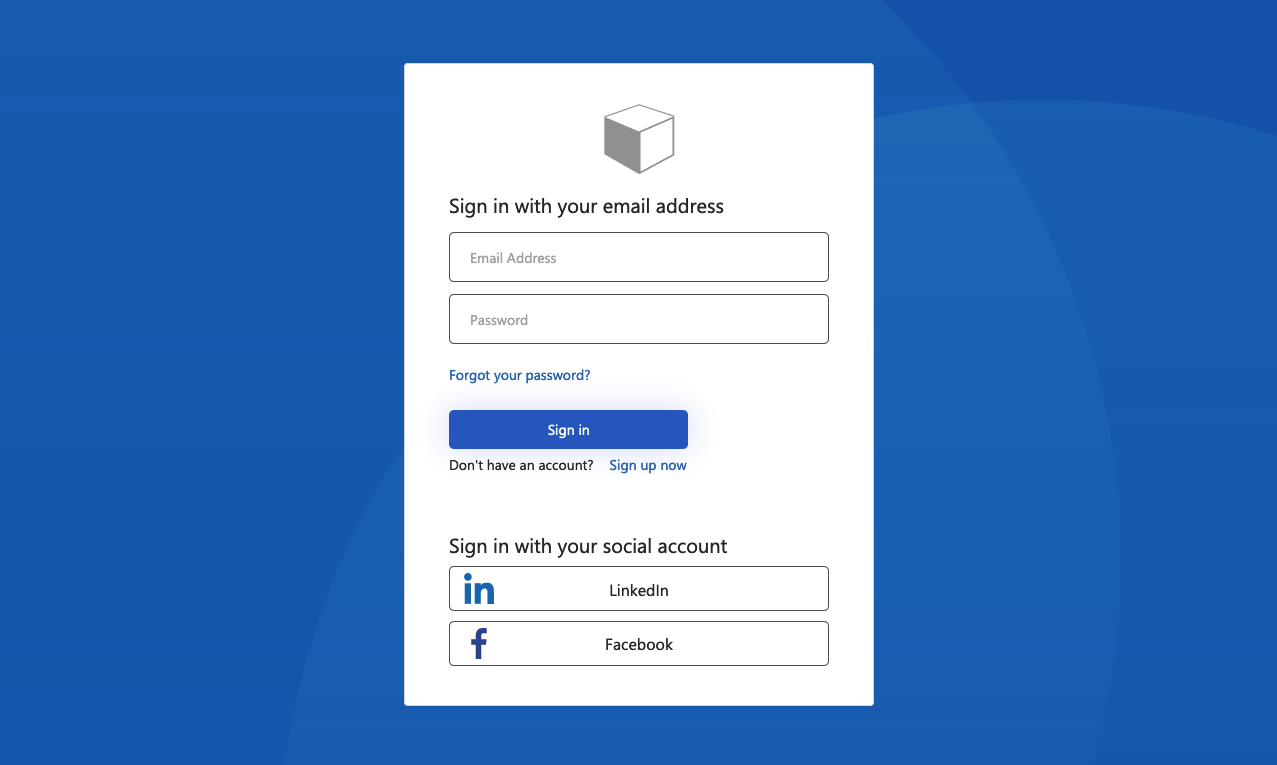
オーシャン ブルー
サインアップとサインイン ページにレンダリングされる Ocean Blue テンプレートの例:
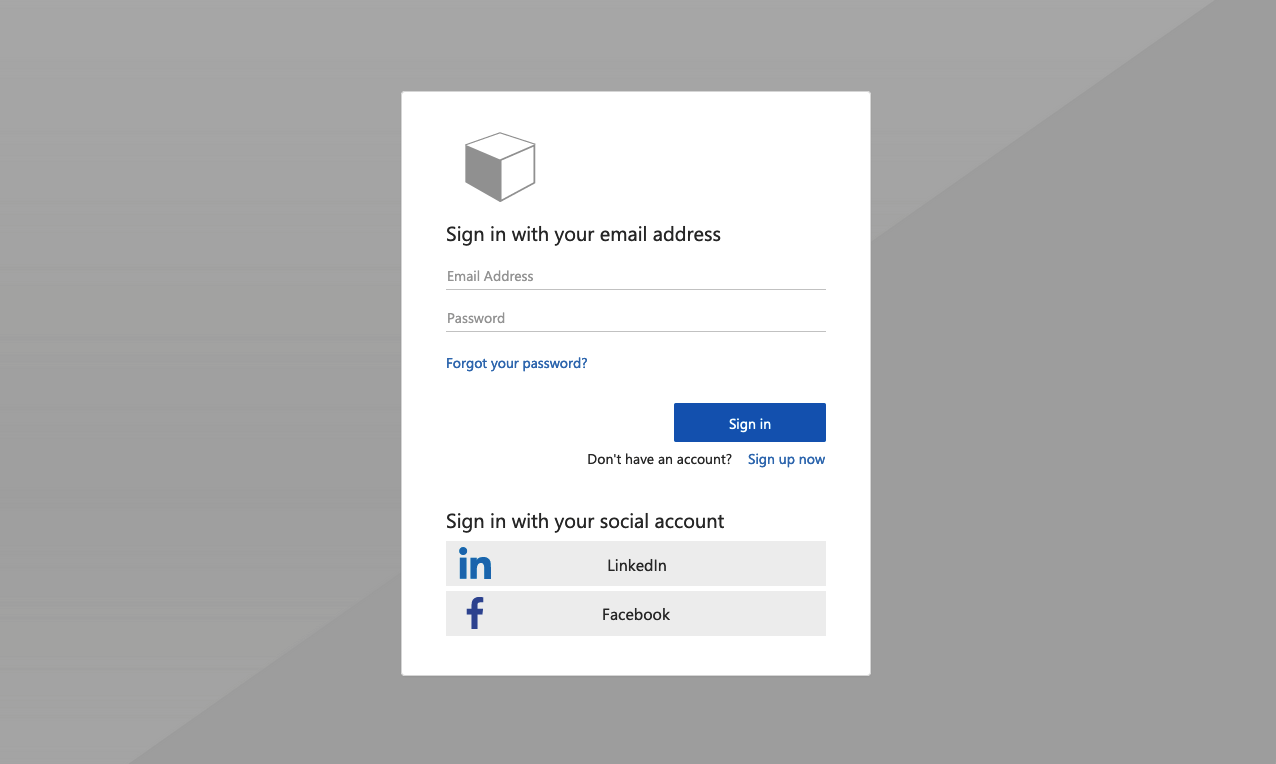
スレートグレー
サインアップ サインイン ページにレンダリングされるスレート グレー テンプレートの例:
クラシック
サインアップ サインイン ページにレンダリングされるクラシック テンプレートの例:

会社のブランド化
Microsoft Entra ID Company ブランドを使用して、バナー ロゴ、背景画像、背景色を含む Azure AD B2C ページをカスタマイズできます。 会社のブランドには、サインアップ、サインイン、プロファイル編集、パスワードのリセットが含まれます。
次の例は、Ocean Blue テンプレートを使用したカスタム ロゴと背景画像を含む サインアップとサインイン ページを示しています。

ページ テンプレートを選択する
- Azure portal にサインインします。
- 複数のテナントにアクセスできる場合、上部のメニューの [設定] アイコンを選択し、[ディレクトリとサブスクリプション] メニューからお使いの Azure AD B2C テナントに切り替えます。
- Azure portal で、 [Azure AD B2C] を検索して選択します。
- ユーザーフローを選択します。
- カスタマイズするユーザー フローを選択します。
- 左側のメニューの [ カスタマイズ ] で、[ ページ レイアウト ] を選択し、[ テンプレート] を選択します。
![Azure portal の [ユーザー フロー] ページの [テンプレートの選択] ドロップダウン](media/customize-ui/select-page-template.png)
テンプレートを選択すると、選択したテンプレートがユーザー フロー内のすべてのページに適用されます。 各ページの URI は、[ カスタム ページ URI ] フィールドに表示されます。
ページ テンプレートを選択するには、LoadUriの要素を設定します。 次の例は、コンテンツ定義識別子と対応する LoadUriを示しています。
オーシャンブルー:
<ContentDefinitions>
  <ContentDefinition Id="api.error">
    <LoadUri>~/tenant/templates/AzureBlue/exception.cshtml</LoadUri>
  </ContentDefinition>
  <ContentDefinition Id="api.idpselections">
    <LoadUri>~/tenant/templates/AzureBlue/idpSelector.cshtml</LoadUri>
  </ContentDefinition>
  <ContentDefinition Id="api.idpselections.signup">
    <LoadUri>~/tenant/templates/AzureBlue/idpSelector.cshtml</LoadUri>
  </ContentDefinition>
  <ContentDefinition Id="api.signuporsignin">
    <LoadUri>~/tenant/templates/AzureBlue/unified.cshtml</LoadUri>
  </ContentDefinition>
  <ContentDefinition Id="api.selfasserted">
    <LoadUri>~/tenant/templates/AzureBlue/selfAsserted.cshtml</LoadUri>
  </ContentDefinition>
  <ContentDefinition Id="api.selfasserted.profileupdate">
    <LoadUri>~/tenant/templates/AzureBlue/selfAsserted.cshtml</LoadUri>
  </ContentDefinition>
  <ContentDefinition Id="api.localaccountsignup">
    <LoadUri>~/tenant/templates/AzureBlue/selfAsserted.cshtml</LoadUri>
  </ContentDefinition>
  <ContentDefinition Id="api.localaccountpasswordreset">
    <LoadUri>~/tenant/templates/AzureBlue/selfAsserted.cshtml</LoadUri>
  </ContentDefinition>
  <ContentDefinition Id="api.phonefactor">
    <LoadUri>~/tenant/templates/AzureBlue/multifactor-1.0.0.cshtml</LoadUri>
  </ContentDefinition>
</ContentDefinitions>
スレート グレー:
<ContentDefinitions>
  <ContentDefinition Id="api.error">
    <LoadUri>~/tenant/templates/MSA/exception.cshtml</LoadUri>
  </ContentDefinition>
  <ContentDefinition Id="api.idpselections">
    <LoadUri>~/tenant/templates/MSA/idpSelector.cshtml</LoadUri>
  </ContentDefinition>
  <ContentDefinition Id="api.idpselections.signup">
    <LoadUri>~/tenant/templates/MSA/idpSelector.cshtml</LoadUri>
  </ContentDefinition>
  <ContentDefinition Id="api.signuporsignin">
    <LoadUri>~/tenant/templates/MSA/unified.cshtml</LoadUri>
  </ContentDefinition>
  <ContentDefinition Id="api.selfasserted">
    <LoadUri>~/tenant/templates/MSA/selfAsserted.cshtml</LoadUri>
  </ContentDefinition>
  <ContentDefinition Id="api.selfasserted.profileupdate">
    <LoadUri>~/tenant/templates/MSA/selfAsserted.cshtml</LoadUri>
  </ContentDefinition>
  <ContentDefinition Id="api.localaccountsignup">
    <LoadUri>~/tenant/templates/MSA/selfAsserted.cshtml</LoadUri>
  </ContentDefinition>
  <ContentDefinition Id="api.localaccountpasswordreset">
    <LoadUri>~/tenant/templates/MSA/selfAsserted.cshtml</LoadUri>
  </ContentDefinition>
  <ContentDefinition Id="api.phonefactor">
    <LoadUri>~/tenant/templates/MSA/multifactor-1.0.0.cshtml</LoadUri>
  </ContentDefinition>
</ContentDefinitions>
クラシック:
<ContentDefinitions>
  <ContentDefinition Id="api.error">
    <LoadUri>~/tenant/default/exception.cshtml</LoadUri>
  </ContentDefinition>
  <ContentDefinition Id="api.idpselections">
    <LoadUri>~/tenant/default/idpSelector.cshtml</LoadUri>
  </ContentDefinition>
  <ContentDefinition Id="api.idpselections.signup">
    <LoadUri>~/tenant/default/idpSelector.cshtml</LoadUri>
  </ContentDefinition>
  <ContentDefinition Id="api.signuporsignin">
    <LoadUri>~/tenant/default/unified.cshtml</LoadUri>
  </ContentDefinition>
  <ContentDefinition Id="api.selfasserted">
    <LoadUri>~/tenant/default/selfAsserted.cshtml</LoadUri>
  </ContentDefinition>
  <ContentDefinition Id="api.selfasserted.profileupdate">
    <LoadUri>~/tenant/default/selfAsserted.cshtml</LoadUri>
  </ContentDefinition>
  <ContentDefinition Id="api.localaccountsignup">
    <LoadUri>~/tenant/default/selfAsserted.cshtml</LoadUri>
  </ContentDefinition>
  <ContentDefinition Id="api.localaccountpasswordreset">
    <LoadUri>~/tenant/default/selfAsserted.cshtml</LoadUri>
  </ContentDefinition>
  <ContentDefinition Id="api.phonefactor">
    <LoadUri>~/tenant/default/multifactor-1.0.0.cshtml</LoadUri>
  </ContentDefinition>
</ContentDefinitions>
会社のブランドの構成
ユーザー フロー ページをカスタマイズするには、まず Microsoft Entra ID で会社のブランドを構成してから、Azure AD B2C のユーザー フローで有効にします。
まず、 会社のブランド内でバナーロゴ、背景画像、背景色を設定します。
- Azure portal にサインインします。
- 複数のテナントにアクセスできる場合、上部のメニューの [設定] アイコンを選択し、[ディレクトリとサブスクリプション] メニューからお使いの Azure AD B2C テナントに切り替えます。
- Azure portal で、 [Azure AD B2C] を検索して選択します。
- [ 管理] で、[ 会社のブランド] を選択します。
- 「組織の Microsoft Entra サインイン ページにブランドを追加する」の手順に従います。
Azure AD B2C で会社のブランドを構成するときは、次の点に注意してください。
- 現在、Azure AD B2C での会社のブランド化は、 背景画像、 バナー ロゴ、 背景色 のカスタマイズに限定されています。 会社のブランド化ウィンドウのその他のプロパティ ( 詳細設定など) はサポートされていません。
- ユーザー フロー ページでは、背景画像が読み込まれる前に背景色が表示されます。 スムーズな読み込みエクスペリエンスのために、背景画像の色と密接に一致する背景色を選択することをお勧めします。
- サインアップ ユーザー フローを開始すると、ユーザーに送信された確認メールにバナー ロゴが表示されます。
ユーザー フロー ページで会社のブランド化を有効にする
会社のブランドを構成したら、ユーザー フローで有効にします。
- Azure portal の左側のメニューで、 Azure AD B2C を選択します。
- [ ポリシー] で、[ ユーザー フロー (ポリシー)] を選択します。
- 会社のブランド化を有効にするユーザー フローを選択します。 会社のブランド化は、標準のサインインと標準プロファイル編集ユーザー フローの種類ではサポートされていません。
- [ カスタマイズ] で、[ ページ レイアウト] を選択し、ブランド化するページを選択します。 たとえば、[ Unified sign up or sign in page]\(統合サインアップまたはサインイン ページ\) を選択します。
- [ページ レイアウトのバージョン (プレビュー)] で、バージョン 1.2.0 以降を選択します。
- 保存 を選択します。
ユーザー フロー内のすべてのページをブランド化する場合は、ユーザー フロー内の各ページ レイアウトのページ レイアウトバージョンを設定します。

カスタム ポリシー ページで会社のブランド化を有効にする
会社のブランドを構成したら、カスタム ポリシーで有効にします。 カスタム ポリシー内のすべてのコンテンツ定義に対して、ページ contract バージョンを使用してページ レイアウト バージョンを構成します。 値の形式には、contract: urn:com:microsoft:aad:b2c:elements:contract:page-name:versionという単語が含まれている必要があります。 古い DataUri 値を使用するカスタム ポリシーでページ レイアウトを指定するには。 詳細については、ページ バージョンを使用 してページ レイアウトに移行する 方法について説明します。
次の例は、対応するページ コントラクトと Ocean Blue ページ テンプレートを含むコンテンツ定義を示しています。
<ContentDefinitions>
  <ContentDefinition Id="api.error">
    <LoadUri>~/tenant/templates/AzureBlue/exception.cshtml</LoadUri>
    <DataUri>urn:com:microsoft:aad:b2c:elements:contract:globalexception:1.2.0</DataUri>
  </ContentDefinition>
  <ContentDefinition Id="api.idpselections">
    <LoadUri>~/tenant/templates/AzureBlue/idpSelector.cshtml</LoadUri>
    <DataUri>urn:com:microsoft:aad:b2c:elements:contract:providerselection:1.2.0</DataUri>
  </ContentDefinition>
  <ContentDefinition Id="api.idpselections.signup">
    <LoadUri>~/tenant/templates/AzureBlue/idpSelector.cshtml</LoadUri>
    <DataUri>urn:com:microsoft:aad:b2c:elements:contract:providerselection:1.2.0</DataUri>
  </ContentDefinition>
  <ContentDefinition Id="api.signuporsignin">
    <LoadUri>~/tenant/templates/AzureBlue/unified.cshtml</LoadUri>
    <DataUri>urn:com:microsoft:aad:b2c:elements:contract:unifiedssp:1.2.0</DataUri>
  </ContentDefinition>
  <ContentDefinition Id="api.selfasserted">
    <LoadUri>~/tenant/templates/AzureBlue/selfAsserted.cshtml</LoadUri>
    <DataUri>urn:com:microsoft:aad:b2c:elements:contract:selfasserted:1.2.0</DataUri>
  </ContentDefinition>
  <ContentDefinition Id="api.selfasserted.profileupdate">
     <LoadUri>~/tenant/templates/AzureBlue/selfAsserted.cshtml</LoadUri>
    <DataUri>urn:com:microsoft:aad:b2c:elements:contract:selfasserted:1.2.0</DataUri>
  </ContentDefinition>
  <ContentDefinition Id="api.localaccountsignup">
     <LoadUri>~/tenant/templates/AzureBlue/selfAsserted.cshtml</LoadUri>
    <DataUri>urn:com:microsoft:aad:b2c:elements:contract:selfasserted:1.2.0</DataUri>
  </ContentDefinition>
  <ContentDefinition Id="api.localaccountpasswordreset">
     <LoadUri>~/tenant/templates/AzureBlue/selfAsserted.cshtml</LoadUri>
    <DataUri>urn:com:microsoft:aad:b2c:elements:contract:selfasserted:1.2.0</DataUri>
  </ContentDefinition>
  <ContentDefinition Id="api.phonefactor">
    <LoadUri>~/tenant/templates/AzureBlue/multifactor-1.0.0.cshtml</LoadUri>
    <DataUri>urn:com:microsoft:aad:b2c:elements:contract:multifactor:1.2.0</DataUri>
  </ContentDefinition>
</ContentDefinitions>
サインアップ フォームで入力フィールドを再配置する
ローカル アカウント フォームのサインアップ ページで入力フィールドを再配置するには、次の手順に従います。
- Azure portal にサインインします。
- 複数のテナントにアクセスできる場合、上部のメニューの [設定] アイコンを選択し、[ディレクトリとサブスクリプション] メニューからお使いの Azure AD B2C テナントに切り替えます。
- Azure portal で、 [Azure AD B2C] を検索して選択します。
- 左側のメニューで、[ ユーザー フロー] を選択します。
- 入力フィールドを再配置するユーザー フロー (ローカル アカウントのみ) を選択します。
- 左側のメニューで、[ページ レイアウト] を選択します
- テーブルで、[ ローカル アカウントのサインアップ] ページの行を選択します。
- [ ユーザー属性] で、並べ替える入力フィールドを選択し、ドラッグ (上または下) して、[上へ 移動 ] または [ 下へ移動 ] コントロールを使用して目的の順序を設定します。
- ページの最上部で [保存] を選択します。
![Azure portal の [ユーザー フロー] ページの [テンプレートの選択] ドロップダウン。](media/customize-ui/portal-02-page-layout-fields.png)
関連コンテンツ
アプリケーションのユーザー インターフェイスをカスタマイズする方法の詳細については、「 Azure Active Directory B2C でアプリケーションのユーザー インターフェイスをカスタマイズする」を参照してください。