Application Insights Profiler for .NET を使用すると、Linux on Azure App Service でホストされているライブ ASP.NET Core Web アプリの各方法で費やされた時間を追跡できます。 この記事では、Linux でホストされている Web アプリに焦点を当てて説明します。 Linux、Windows、Mac の開発環境を使用して実験することもできます。
この記事では、次の内容について説明します。
- Linux でホストされている ASP.NET Core Web アプリケーションを設定してデプロイします。
- Application Insights Profiler を ASP.NET Core Web アプリケーションに追加します。
前提条件
- 最新の .NET Core SDK をインストールします。
- 「作業の開始: Git のインストール」の手順に従って Git をインストールします。
- コンテキストについては、次のサンプルを確認してください。
プロジェクトをローカルで設定する
お使いのコンピューターでコマンド プロンプト ウィンドウを開きます。
ASP.NET Core MVC Web アプリケーションを作成します。
dotnet new mvc -n LinuxProfilerTest作業ディレクトリをプロジェクトのルート フォルダーに変更します。
プロファイラー トレースを収集する NuGet パッケージを追加します。
dotnet add package Microsoft.ApplicationInsights.Profiler.AspNetCore任意のコード エディターで、
Program.csで Application Insights と .NET Profiler を有効にします。 必要に応じて、カスタム プロファイラー設定を追加します。WebAPIの場合:// Add services to the container. builder.Services.AddApplicationInsightsTelemetry(); builder.Services.AddServiceProfiler();Workerの場合:IHost host = Host.CreateDefaultBuilder(args) .ConfigureServices(services => { services.AddApplicationInsightsTelemetryWorkerService(); services.AddServiceProfiler(); // Assuming Worker is your background service class. services.AddHostedService<Worker>(); }) .Build(); await host.RunAsync();変更内容をローカル リポジトリに保存し、コミットします。
git init
git add .
git commit -m "first commit"
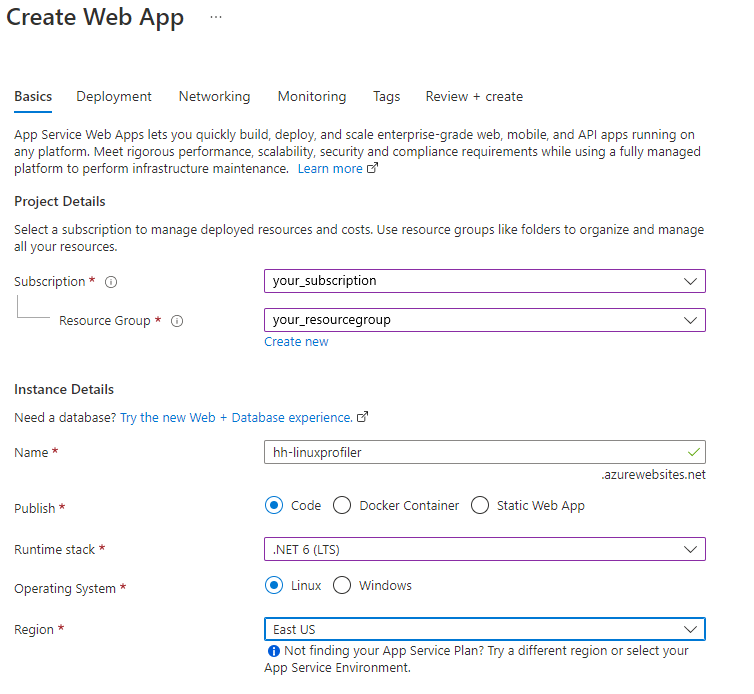
プロジェクトをホストする Linux Web アプリを作成する
Azure portal で、App Service on Linux を使用して Web アプリ環境を作成します。
新しい Web アプリ リソースに移動し、 Deployment Center>FTPS 資格情報 を選択してデプロイ資格情報を作成します。 後で使用するため資格情報をメモしておきます。

[保存] を選択します。
[ 設定] タブを選択します。
ドロップダウンで [ ローカル Git ] を選択し、Web アプリでローカル Git リポジトリを設定します。

[ 保存] を 選択して、Git クローン URI を含む Git リポジトリを作成します。

デプロイ オプションの詳細については、 App Service のドキュメントを参照してください。
プロジェクトのデプロイ
コマンド プロンプト ウィンドウで、プロジェクトのルート フォルダーを参照します。 App Service のリポジトリを指すように Git リモート リポジトリを追加します。
git remote add azure https://<username>@<app_name>.scm.azurewebsites.net:443/<app_name>.git- デプロイ資格情報の作成に使用した ユーザー名 を使用します。
- App Service on Linux を使用して Web アプリを作成するために使用したアプリ 名 を使用します。
Azure に変更をプッシュし、プロジェクトをデプロイします。
git push azure main次の例のような出力が表示されます。
Counting objects: 9, done.
Delta compression using up to 8 threads.
Compressing objects: 100% (8/8), done.
Writing objects: 100% (9/9), 1.78 KiB | 911.00 KiB/s, done.
Total 9 (delta 3), reused 0 (delta 0)
remote: Updating branch 'main'.
remote: Updating submodules.
remote: Preparing deployment for commit id 'd7369a99d7'.
remote: Generating deployment script.
remote: Running deployment command...
remote: Handling ASP.NET Core Web Application deployment.
remote: ......
remote:   Restoring packages for /home/site/repository/EventPipeExampleLinux.csproj...
remote: .
remote:   Installing Newtonsoft.Json 10.0.3.
remote:   Installing Microsoft.ApplicationInsights.Profiler.Core 1.1.0-LKG
...
Application Insights を追加して Web アプリを監視する
Application Insights を Web アプリに追加するには、次の 3 つのオプションがあります。
- Azure portal の [Application Insights ] ウィンドウを使用します。
- Azure portal の [環境変数 ] ウィンドウを使用する。
- [Web アプリの設定] に手動で追加する。
Azure portal の Web アプリで、左側のウィンドウで Application Insights を選択します。
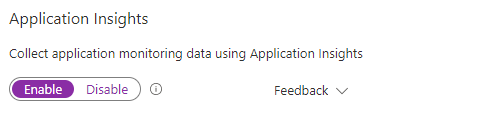
[ Application Insights を有効にする] を選択します。

[Application Insights] で [有効] を選択します。
[ Application Insights リソースへのリンク] で、新しいリソースを作成するか、既存のリソースを選択します。 この例では、新しいリソースを作成します。
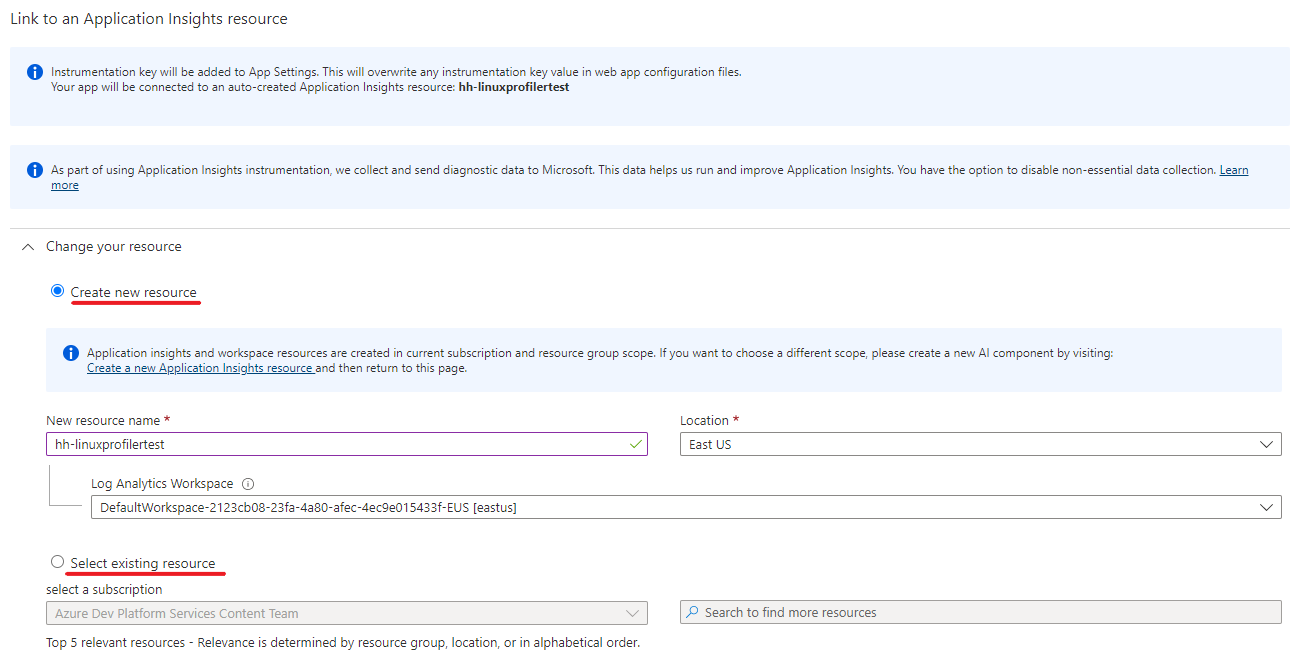
適用>はいを選択して適用を確認します。
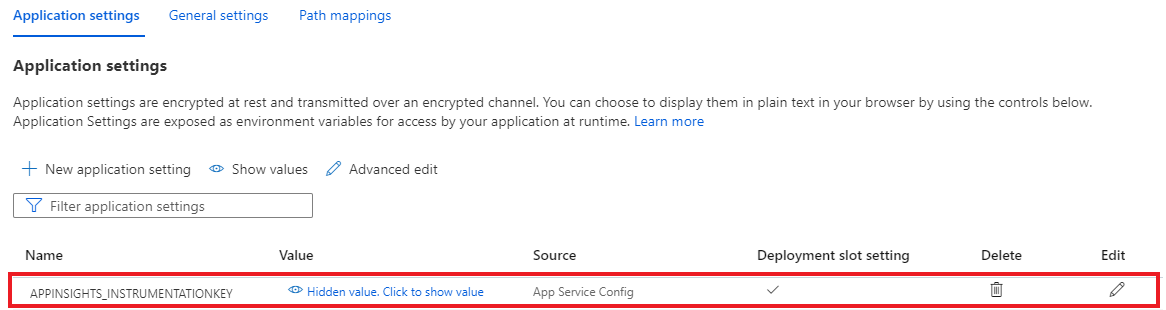
![[環境変数] ウィンドウに新しいアプリケーション設定を追加する方法を示すスクリーンショット。](media/profiler-aspnetcore-linux/new-setting-configuration.png)
![[設定] ウィンドウへの接続文字列の追加を示すスクリーンショット。](media/profiler-aspnetcore-linux/add-connection-string-setting.png)
トラブルシューティング
アプリからトレースが見つからない場合は、この トラブルシューティング ガイドの手順に従ってください。