Azurite 스토리지 에뮬레이터를 사용하여 Azure Blob Storage용 프라이빗 엔드포인트에 대해 자동화된 테스트를 쓰는 방법을 알아봅니다.
로컬 컴퓨터에서 테스트 실행
최신 버전의 Python을 설치합니다.
Azure Storage Explorer를 설치합니다.
Azurite를 설치하고 실행합니다.
옵션 1: npm을 사용하여 설치하고 Azurite를 로컬로 실행합니다.
# Install Azurite
npm install -g azurite

# Create an Azurite directory
mkdir c:\azurite

# Launch Azurite locally
azurite --silent --___location c:\azurite --debug c:\azurite\debug.log
옵션 2: Docker를 사용하여 Azurite를 실행합니다.
docker run -p 10000:10000 mcr.microsoft.com/azure-storage/azurite azurite-blob --blobHost 0.0.0.0Azure Storage Explorer에서 로컬 에뮬레이터에 연결을 선택합니다.
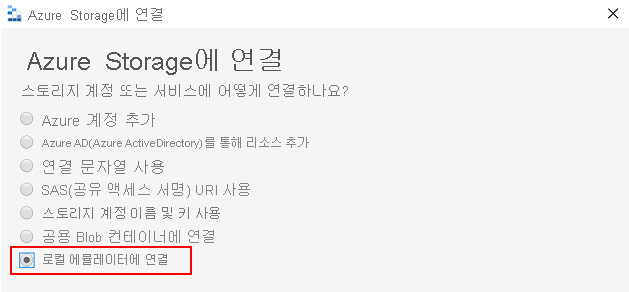
표시 이름 및 Blob 포트 번호를 제공하여 Azurite를 연결하고 Azure Storage Explorer를 사용하여 로컬 Blob 스토리지를 관리합니다.

가상 Python 환경 만들기
python -m venv .venv컨테이너를 만들고 환경 변수를 초기화합니다. PyTestconftest.py 파일을 사용하여 테스트를 생성합니다. 다음은 conftest.py 파일의 예입니다.
from azure.storage.blob import BlobServiceClient
import os

def pytest_generate_tests(metafunc):
   os.environ['AZURE_STORAGE_CONNECTION_STRING'] = 'DefaultEndpointsProtocol=http;AccountName=[name];AccountKey=[key];BlobEndpoint=http://127.0.0.1:10000/devstoreaccount1;'
   os.environ['STORAGE_CONTAINER'] = 'test-container'

   # Create a container for Azurite for the first run
   blob_service_client = BlobServiceClient.from_connection_string(os.environ.get("AZURE_STORAGE_CONNECTION_STRING"))
   try:
      blob_service_client.create_container(os.environ.get("STORAGE_CONTAINER"))
   except Exception as e:
      print(e)
참고 항목
AZURE_STORAGE_CONNECTION_STRING에 표시되는 값은 Azurite의 기본값이며 프라이빗 키가 아닙니다.requirements.txt 파일에 나열된 종속성을 설치합니다.
pip install -r requirements.txt테스트를 실행합니다.
python -m pytest ./tests
테스트를 실행한 후 Azure Storage Explorer를 사용하여 Azurite Blob 스토리지의 파일을 볼 수 있습니다.

Azure Pipelines에서 테스트 실행
테스트를 로컬로 실행한 후에는 테스트가 Azure Pipelines에서 통과하는지 확인합니다. Docker Azurite 이미지를 Azure의 호스트된 에이전트로 사용하거나 npm을 사용하여 Azurite를 설치합니다. 다음 Azure Pipelines 예제에서는 npm을 사용하여 Azurite를 설치합니다.
trigger:
- master

steps:
- task: UsePythonVersion@0
  displayName: 'Use Python 3.7'
  inputs:
    versionSpec: 3.7

- bash: |
    pip install -r requirements_tests.txt
  displayName: 'Setup requirements for tests'

- bash: |
    sudo npm install -g azurite
    sudo mkdir azurite
    sudo azurite --silent --___location azurite --debug azurite\debug.log &
  displayName: 'Install and Run Azurite'

- bash: |
    python -m pytest --junit-xml=unit_tests_report.xml --cov=tests --cov-report=html --cov-report=xml ./tests
  displayName: 'Run Tests'

- task: PublishCodeCoverageResults@1
  inputs:
    codeCoverageTool: Cobertura
    summaryFileLocation: '$(System.DefaultWorkingDirectory)/**/coverage.xml'
    reportDirectory: '$(System.DefaultWorkingDirectory)/**/htmlcov'

- task: PublishTestResults@2
  inputs:
    testResultsFormat: 'JUnit'
    testResultsFiles: '**/*_tests_report.xml'
    failTaskOnFailedTests: true
Azure Pipelines 테스트를 실행한 후 다음과 유사한 출력이 표시됩니다.
