Note
Access to this page requires authorization. You can try signing in or changing directories.
Access to this page requires authorization. You can try changing directories.
Applies to: Azure Logic Apps (Consumption + Standard)
To set up a workflow that can handle data in consecutive or contiguous chunks, start your workflow with the Sliding Window trigger. To start the workflow, you can set a date and time and a time zone. To repeat the workflow, set up the recurrence. If recurrences are missed for any reason, such as disruptions or disabled workflows, this trigger processes those missed recurrences.
For example, to keep data synchronized between your database and backup storage, use the Sliding Window trigger so that the data gets synchronized without incurring gaps.
Here are some patterns that this trigger supports:
- Run immediately and repeat every n number of seconds, minutes, hours, days, weeks, or months.
- Start at a specific date and time, then run and repeat every n number of seconds, minutes, hours, days, weeks, or months. With this trigger, you can specify a start time in the past, which runs all past recurrences.
- Delay each recurrence for a specific duration before running.
For more information about the Schedule built-in triggers and actions, including differences between this trigger and the Recurrence trigger, and about ways to schedule recurring workflows, see Schedules for recurring triggers in Azure Logic Apps workflows.
Prerequisites
An Azure account and subscription. If you don't have a subscription, sign up for a free Azure account.
A logic app resource with a blank workflow.
If you don't have this resource, see the following articles:
Add Sliding Window trigger
In the Azure portal, open your logic app resource, which requires a blank workflow so you can add a trigger.
Based on whether you have a Consumption or Standard logic app, follow the corresponding steps:
Consumption
On the resource sidebar, under Development Tools, select the designer to open the workflow.
On the designer, select Add a trigger.
Standard
On the resource sidebar, under Workflows, select Workflows.
On the Workflows page, select the blank workflow.
On the workflow sidebar, under Tools, select the designer to open the workflow.
On the designer, select Add a trigger.
Follow the general steps to add the Schedule trigger named Sliding Window to your workflow.

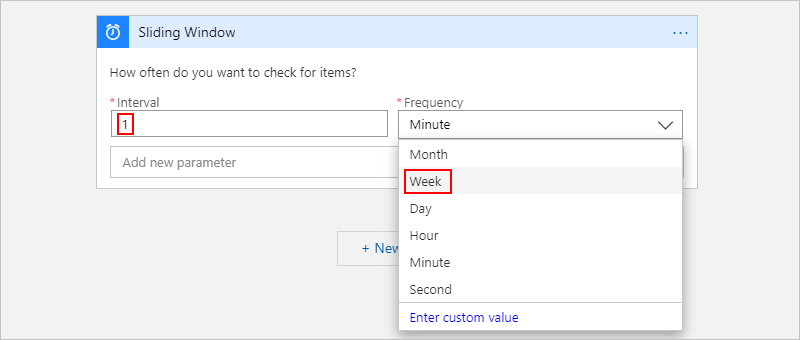
In the How often do you want to check for items? section, enter the interval and frequency for the recurrence. For this example, set these parameters to run your workflow every week.
Parameter JSON name Required Type Description Interval intervalYes Integer An integer that describes how often the workflow runs based on the frequency. Here are the minimum and maximum intervals:
- Month: 1-16 months
- Week: 1-71 weeks
- Day: 1-500 days
- Hour: 1-12,000 hours
- Minute: 1-72,000 minutes
- Second: 1-9,999,999 seconds
For example, if the interval is 6, and the frequency is Month, the recurrence is every six months.Frequency frequencyYes String The unit of time for the recurrence: Second, Minute, Hour, Day, Week, or Month Next to Advanced parameters, select Show all to see available parameters.

Besides Interval and Frequency, this trigger has the following options:
Parameter Required JSON name Type Description Delay No delayString The duration to delay each recurrence using the ISO 8601 date time specification Time zone No timeZoneString Applies only when you specify a start time because this trigger doesn't accept UTC offset. Select the time zone that you want to apply. Start time No startTimeString Provide a start date and time in this format:
YYYY-MM-DDThh:mm:ss if you select a time zone
-or-
YYYY-MM-DDThh:mm:ssZ if you don't select a time zone
For example, if you want September 18, 2025 at 2:00 PM, specify "2025-09-18T14:00:00", and select a time zone such as Pacific Standard Time. Or, specify "2025-09-18T14:00:00Z" without a time zone.
Note: This start time must follow the ISO 8601 date time specification in UTC date time format, but without a UTC offset. If you don't select a time zone, add the letter "Z" at the end without any spaces. This "Z" refers to the equivalent nautical time.
For simple schedules, the start time is the first occurrence, while for advanced recurrences, the trigger doesn't fire any sooner than the start time. See What are the ways that I can use the start date and time?Now build your remaining workflow with other actions.
View workflow definition - Sliding Window
Your logic app's underlying workflow definition uses JSON. To view the Sliding Window trigger definition with the values that you set up, on the designer toolbar, select Code view. To return to the designer, on the code view toolbar, select Designer.
This example shows how a Sliding Window trigger definition might look in an underlying workflow definition if the delay is five seconds for an hourly recurrence:
"triggers": {
   "Recurrence": {
      "type": "SlidingWindow",
      "Sliding_Window": {
         "inputs": {
            "delay": "PT5S"
         },
         "recurrence": {
            "frequency": "Hour",
            "interval": 1,
            "startTime": "2019-05-13T14:00:00Z",
            "timeZone": "Pacific Standard Time"
         }
      }
   }
}