Azure AI Foundry 에이전트 서비스를 사용하면 사용자 지정 지침을 통해 요구 사항에 맞게 조정되고 코드 인터프리터 및 사용자 지정 함수와 같은 고급 도구로 보강된 AI 에이전트를 만들 수 있습니다.
Prerequisites
- Azure 구독 – 무료로 만드세요.
- 계정 및 프로젝트를 만드는 개인이 구독 범위에서 Azure AI 계정 소유자 역할이 있는지 확인합니다. 그러면 프로젝트를 만드는 데 필요한 권한이 부여됩니다.
- 또는 구독 수준에서 기여자 또는 Cognitive Services 기여자 역할을 갖는 경우 프로젝트를 만들 수 있습니다.
- 프로젝트가 만들어지면 프로젝트 내에서 에이전트를 만드는 개인에게 프로젝트 수준에서 Azure AI 사용자 역할이 있는지 확인합니다.
Important
Azure AI Foundry 포털은 현재 기본 에이전트 설정만 지원합니다. 표준 에이전트 설정을 수행하려면 환경 설정 문서를 참조하여 자세한 내용을 알아보세요.
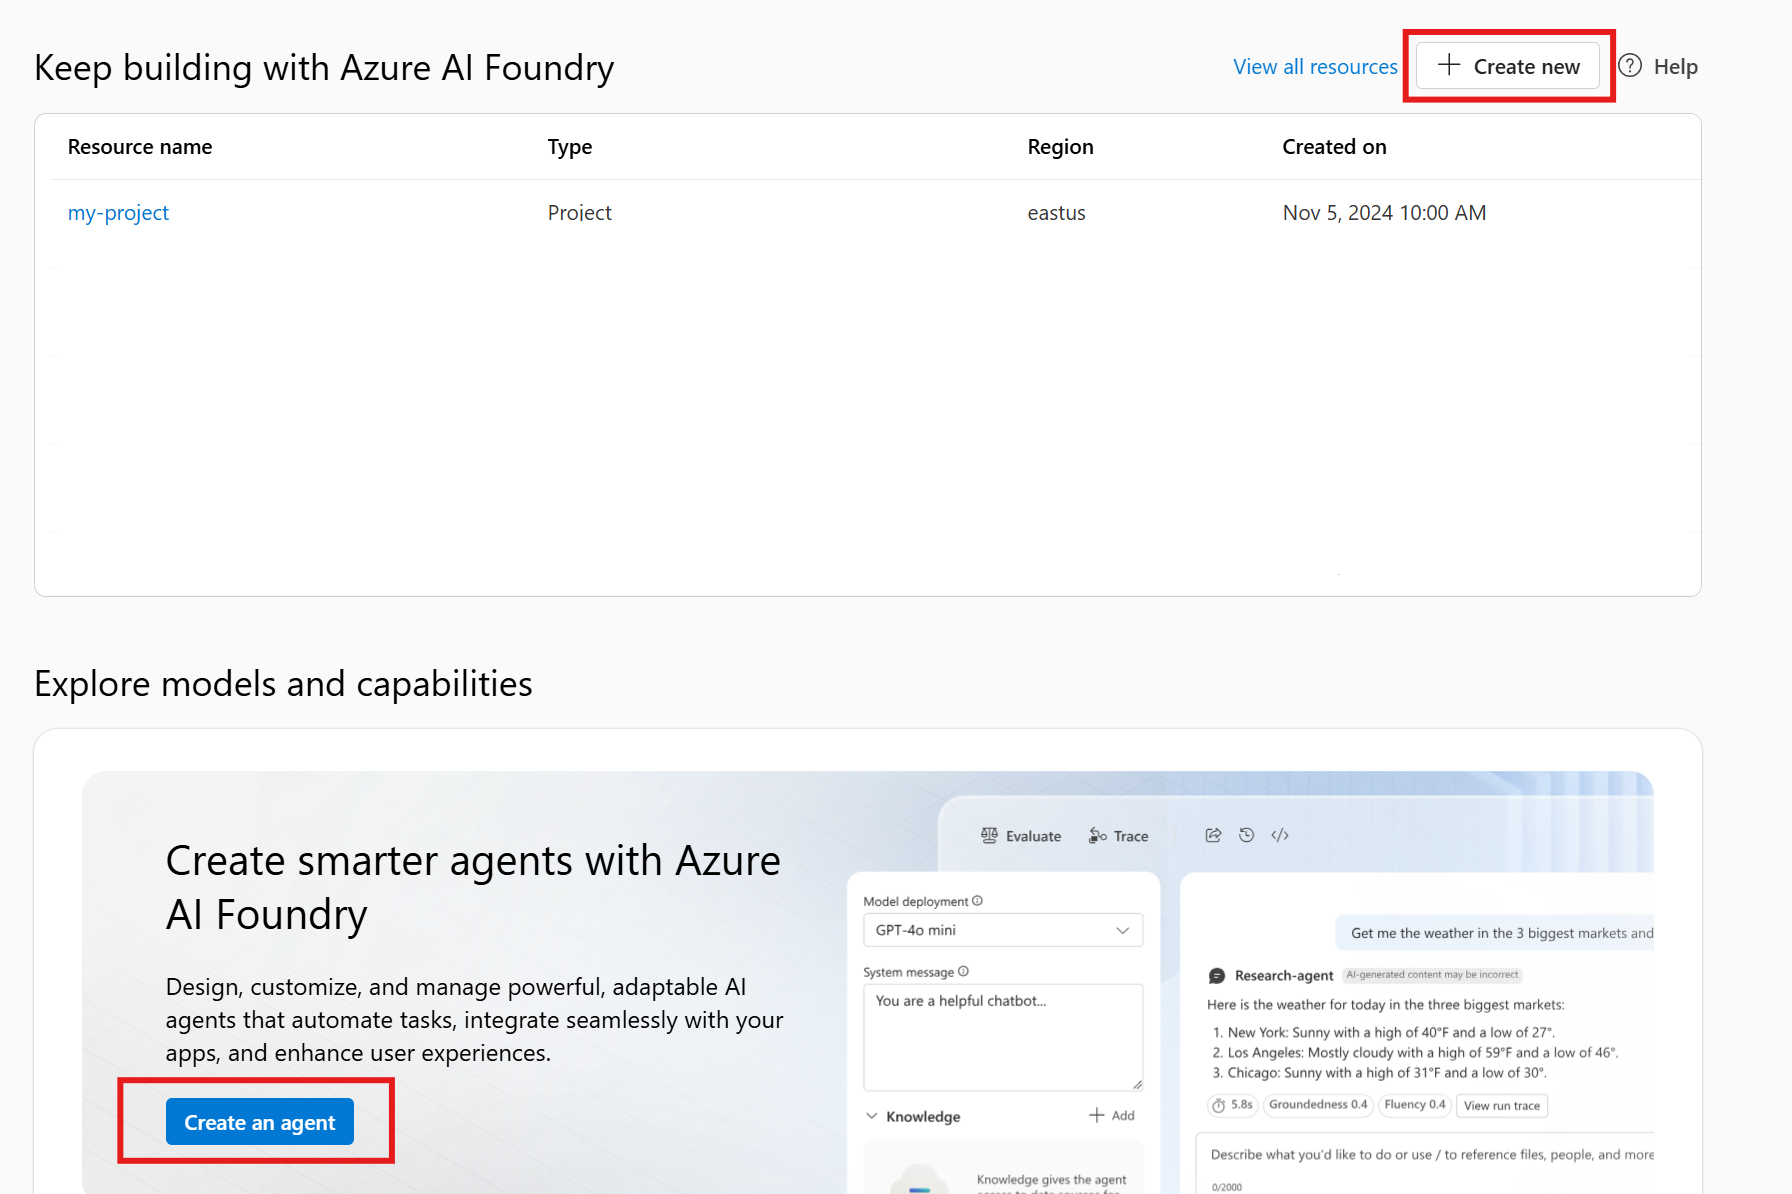
Azure AI Foundry 포털에서 Foundry 계정 및 프로젝트 만들기
Azure AI Foundry에서 계정 및 프로젝트를 만들려면 다음 단계를 수행합니다.
Azure AI 파운드리로 이동합니다. 프로젝트에 참여하고 있다면 페이지 왼쪽 상단에서 Azure AI 파운드리를 선택하여 홈페이지로 이동합니다.
가장 빠른 환경을 위해 에이전트 만들기 시작 흐름을 사용합니다. 에이전트 만들기를 클릭합니다.
프로젝트의 이름을 입력합니다. 기본값을 사용자 지정하려면 고급 옵션을 선택합니다.

선택하고생성합니다.
리소스가 프로비전될 때까지 기다립니다.
- 계정 및 프로젝트(계정의 자식 리소스)가 만들어집니다.
- gpt-4o 모델이 자동으로 배포됩니다.
- 기본 에이전트가 만들어집니다.
완료되면 에이전트 플레이그라운드에 직접 착륙하고 에이전트 만들기를 시작할 수 있습니다. 수행할 작업 및 수행 방법에 대한 에이전트 지침을 제공할 수 있습니다. 예: "당신은 지리에 대한 질문에 대답할 수 있는 유용한 에이전트입니다." 그런 다음 에이전트와 채팅을 시작할 수 있습니다.

Note
에이전트를 구성하거나 만들려고 할 때 사용 권한 오류가 발생하는 경우 프로젝트에 Azure AI 사용자가 있는지 확인합니다.


| 참조 설명서 | 샘플 | 라이브러리 소스 코드 | 패키지(NuGet) |
Prerequisites
- 에이전트 환경 설정
- SDK 또는 에이전트 플레이그라운드를 사용하여 에이전트를 만들거나 편집해야 하는 각 팀 구성원에게 Azure AI 사용자RBAC 역할 할당
- 이 역할은 프로젝트 범위에서 할당해야 합니다.
- 최소 필수 권한: agents/*/read, agents/*/action, agents/*/delete
에이전트 구성 및 실행
.NET 콘솔 프로젝트를 만듭니다.
dotnet new console
프로젝트에 .NET 패키지를 설치합니다. 예를 들어, .NET CLI를 사용하는 경우 다음 명령을 실행합니다.
dotnet add package Azure.AI.Agents.Persistent
dotnet add package Azure.Identity
다음으로, API 요청을 인증하고 프로그램을 실행하려면 az login 명령을 사용하여 Azure 구독에 로그인합니다.
az login
다음 코드를 사용하여 에이전트를 만들고 실행합니다. 이 코드를 실행하려면 프로젝트의 엔드포인트를 가져와야 합니다. 이 문자열의 형식은 다음과 같습니다.
https://<AIFoundryResourceName>.services.ai.azure.com/api/projects/<ProjectName>
Important
2025년 5월부터 Azure AI 에이전트 서비스는 이전에 허브 기반 프로젝트에 사용했던 연결 문자열 대신 Foundry 프로젝트에 엔드포인트를 사용합니다. 허브 기반 프로젝트를 사용하는 경우 SDK 및 REST API의 현재 버전을 사용할 수 없습니다. 자세한 내용은 허브 기반 프로젝트의 SDK 사용량을 참조하세요.
프로젝트에 대한 개요에서 Azure AI Foundry 포털의 라이브러리 아래에서 엔드포인트를 찾을 수 있습니다.

라는 ProjectEndpoint환경 변수에서 이 엔드포인트를 설정합니다.
모델의 배포 이름도 필요합니다. 왼쪽 탐색 메뉴의 모델 + 엔드포인트 에서 찾을 수 있습니다.

모델 배포 이름의 이름을 환경 ModelDeploymentName변수로 저장합니다.
using Azure;
using Azure.AI.Agents.Persistent;
using Azure.Identity;
using System.Diagnostics;

var projectEndpoint = System.Environment.GetEnvironmentVariable("ProjectEndpoint");
var modelDeploymentName = System.Environment.GetEnvironmentVariable("ModelDeploymentName");


//Create a PersistentAgentsClient and PersistentAgent.
PersistentAgentsClient client = new(projectEndpoint, new DefaultAzureCredential());

//Give PersistentAgent a tool to execute code using CodeInterpreterToolDefinition.
PersistentAgent agent = client.Administration.CreateAgent(
    model: modelDeploymentName,
    name: "My Test Agent",
    instructions: "You politely help with math questions. Use the code interpreter tool when asked to visualize numbers.",
    tools: [new CodeInterpreterToolDefinition()]
);

//Create a thread to establish a session between Agent and a User.
PersistentAgentThread thread = client.Threads.CreateThread();

//Ask a question of the Agent.
client.Messages.CreateMessage(
    thread.Id,
    MessageRole.User,
    "Hi, Agent! Draw a graph for a line with a slope of 4 and y-intercept of 9.");

//Have Agent begin processing user's question with some additional instructions associated with the ThreadRun.
ThreadRun run = client.Runs.CreateRun(
    thread.Id,
    agent.Id,
    additionalInstructions: "Please address the user as Jane Doe. The user has a premium account.");

//Poll for completion.
do
{
    Thread.Sleep(TimeSpan.FromMilliseconds(500));
    run = client.Runs.GetRun(thread.Id, run.Id);
}
while (run.Status == RunStatus.Queued
    || run.Status == RunStatus.InProgress
    || run.Status == RunStatus.RequiresAction);

//Get the messages in the PersistentAgentThread. Includes Agent (Assistant Role) and User (User Role) messages.
Pageable<PersistentThreadMessage> messages = client.Messages.GetMessages(
    threadId: thread.Id,
    order: ListSortOrder.Ascending);

//Display each message and open the image generated using CodeInterpreterToolDefinition.
foreach (PersistentThreadMessage threadMessage in messages)
{
    foreach (MessageContent content in threadMessage.ContentItems)
    {
        switch (content)
        {
            case MessageTextContent textItem:
                Console.WriteLine($"[{threadMessage.Role}]: {textItem.Text}");
                break;
            case MessageImageFileContent imageFileContent:
                Console.WriteLine($"[{threadMessage.Role}]: Image content file ID = {imageFileContent.FileId}");
                BinaryData imageContent = client.Files.GetFileContent(imageFileContent.FileId);
                string tempFilePath = Path.Combine(AppContext.BaseDirectory, $"{Guid.NewGuid()}.png");
                File.WriteAllBytes(tempFilePath, imageContent.ToArray());
                client.Files.DeleteFile(imageFileContent.FileId);

                ProcessStartInfo psi = new()
                {
                    FileName = tempFilePath,
                    UseShellExecute = true
                };
                Process.Start(psi);
                break;
        }
    }
}

//If you want to delete your agent, uncomment the following lines:
//client.Threads.DeleteThread(threadId: thread.Id);
//client.Administration.DeleteAgent(agentId: agent.Id);
| 참조 설명서 | 샘플 | 라이브러리 소스 코드 | 패키지(PyPi) |
Prerequisites
- 에이전트 환경 설정
- SDK 또는 에이전트 플레이그라운드를 사용하여 에이전트를 만들거나 편집해야 하는 각 팀 구성원에게 Azure AI 사용자RBAC 역할 할당
- 이 역할은 프로젝트 범위에서 할당해야 합니다.
- 최소 필수 권한: agents/*/read, agents/*/action, agents/*/delete
에이전트 구성 및 실행
다음 명령을 실행하여 Python 패키지를 설치합니다.
pip install azure-ai-projects
pip install azure-identity
다음으로, API 요청을 인증하고 프로그램을 실행하려면 az login 명령을 사용하여 Azure 구독에 로그인합니다.
az login
다음 코드를 사용하여 에이전트를 만들고 실행합니다. 이 코드를 실행하려면 프로젝트의 엔드포인트를 가져와야 합니다. 이 문자열의 형식은 다음과 같습니다.
https://<AIFoundryResourceName>.services.ai.azure.com/api/projects/<ProjectName>
Important
2025년 5월부터 Azure AI 에이전트 서비스는 이전에 허브 기반 프로젝트에 사용했던 연결 문자열 대신 Foundry 프로젝트에 엔드포인트를 사용합니다. 허브 기반 프로젝트를 사용하는 경우 SDK 및 REST API의 현재 버전을 사용할 수 없습니다. 자세한 내용은 허브 기반 프로젝트의 SDK 사용량을 참조하세요.
프로젝트에 대한 개요에서 Azure AI Foundry 포털의 라이브러리 아래에서 엔드포인트를 찾을 수 있습니다.
이 엔드포인트를 PROJECT_ENDPOINT라는 환경 변수로 설정합니다.
모델의 배포 이름도 필요합니다. 왼쪽 탐색 메뉴의 모델 + 엔드포인트 에서 찾을 수 있습니다.
모델 배포 이름의 이름을 환경 MODEL_DEPLOYMENT_NAME변수로 저장합니다.
import os
from pathlib import Path
from azure.ai.projects import AIProjectClient
from azure.identity import DefaultAzureCredential
from azure.ai.agents.models import CodeInterpreterTool

# Create an AIProjectClient from an endpoint, copied from your Azure AI Foundry project.
# You need to login to Azure subscription via Azure CLI and set the environment variables
project_endpoint = os.environ["PROJECT_ENDPOINT"]  # Ensure the PROJECT_ENDPOINT environment variable is set

# Create an AIProjectClient instance
project_client = AIProjectClient(
    endpoint=project_endpoint,
    credential=DefaultAzureCredential(),  # Use Azure Default Credential for authentication
)

code_interpreter = CodeInterpreterTool()
with project_client:
    # Create an agent with the Code Interpreter tool
    agent = project_client.agents.create_agent(
        model=os.environ["MODEL_DEPLOYMENT_NAME"],  # Model deployment name
        name="my-agent",  # Name of the agent
        instructions="You politely help with math questions. Use the Code Interpreter tool when asked to visualize numbers.",  # Instructions for the agent
        tools=code_interpreter.definitions,  # Attach the tool
    )
    print(f"Created agent, ID: {agent.id}")

    # Create a thread for communication
    thread = project_client.agents.threads.create()
    print(f"Created thread, ID: {thread.id}")

    # Add a message to the thread
    message = project_client.agents.messages.create(
        thread_id=thread.id,
        role="user",  # Role of the message sender
        content="Hi, Agent! Draw a graph for a line with a slope of 4 and y-intercept of 9.",  # Message content
    )
    print(f"Created message, ID: {message['id']}")

    # Create and process an agent run
    run = project_client.agents.runs.create_and_process(
        thread_id=thread.id,
        agent_id=agent.id,
        additional_instructions="Please address the user as Jane Doe. The user has a premium account",
    )
    print(f"Run finished with status: {run.status}")

    # Check if the run failed
    if run.status == "failed":
        print(f"Run failed: {run.last_error}")

    # Fetch and log all messages
    messages = project_client.agents.messages.list(thread_id=thread.id)
    for message in messages:
        print(f"Role: {message.role}, Content: {message.content}")

        # Save every image file in the message
        for img in message.image_contents:
            file_id = img.image_file.file_id
            file_name = f"{file_id}_image_file.png"
            project_client.agents.files.save(file_id=file_id, file_name=file_name)
            print(f"Saved image file to: {Path.cwd() / file_name}")

    # Uncomment these lines to delete the agent when done
    # project_client.agents.delete_agent(agent.id)
    # print("Deleted agent")
| 참조 설명서 | 샘플 | 라이브러리 소스 코드 | 패키지(npm) |
Prerequisites
- 에이전트 환경 설정
- SDK 또는 에이전트 플레이그라운드를 사용하여 에이전트를 만들거나 편집해야 하는 각 팀 구성원에게 Azure AI 사용자RBAC 역할 할당
- 이 역할은 프로젝트 범위에서 할당해야 합니다.
- 최소 필수 권한: agents/*/read, agents/*/action, agents/*/delete
에이전트 구성 및 실행
이 코드의 키 개체는 다음과 같습니다.
먼저 다음을 실행하여 새 TypeScript 프로젝트를 초기화합니다.
npm init -y
npm pkg set type="module"
다음 명령을 실행하여 필요한 npm 패키지를 설치합니다.
npm install @azure/ai-agents @azure/identity
npm install @types/node typescript --save-dev
다음으로, API 요청을 인증하고 프로그램을 실행하려면 az login 명령을 사용하여 Azure 구독에 로그인합니다.
az login
다음 코드를 사용하여 수학 질문에 I need to solve the equation '3x + 11 = 14'. Can you help me?대답합니다. 이 코드를 실행하려면 프로젝트의 엔드포인트를 가져와야 합니다. 이 문자열의 형식은 다음과 같습니다.
https://<AIFoundryResourceName>.services.ai.azure.com/api/projects/<ProjectName>
프로젝트에 대한 개요에서 Azure AI Foundry 포털의 라이브러리 아래에서 엔드포인트를 찾을 수 있습니다.
이 엔드포인트를 PROJECT_ENDPOINT 파일에서 .env라는 이름의 환경 변수로 설정합니다.
모델의 배포 이름도 필요합니다. 왼쪽 탐색 메뉴의 모델 + 엔드포인트 에서 찾을 수 있습니다.
모델 배포 이름의 이름을 환경 MODEL_DEPLOYMENT_NAME변수로 저장합니다.
Important
- 이 빠른 시작 코드는 중요한 구성에 환경 변수를 사용합니다.
.env가.env파일에 나열되어 있는지 확인하여.gitignore파일을 버전 제어에 커밋하지 마세요. - 참고: 실수로 중요한 정보를 유출한 경우 해당 자격 증명이 손상된 것으로 간주하고 즉시 회전합니다.
다음 콘텐츠를 사용하여 tsconfig.json 파일을 만듭니다.
{
  "compilerOptions": {
    "module": "nodenext",
    "target": "esnext",
    "types": ["node"],
    "lib": ["esnext"],
    "sourceMap": true,
    "declaration": true,
    "declarationMap": true,
    "noUncheckedIndexedAccess": true,
    "exactOptionalPropertyTypes": true,
    "strict": true,
    "verbatimModuleSyntax": true,
    "isolatedModules": true,
    "noUncheckedSideEffectImports": true,
    "moduleDetection": "force",
    "skipLibCheck": true,
  }
}
다음으로 파일을 만들고 index.ts 다음 코드를 붙여넣습니다.
import { AgentsClient } from "@azure/ai-agents";
import { DefaultAzureCredential } from "@azure/identity";

const projectEndpoint = process.env["PROJECT_ENDPOINT"] || "<project endpoint>";
const modelDeploymentName = process.env["MODEL_DEPLOYMENT_NAME"] || "gpt-4o";

export async function main(): Promise<void> {
  // Create an Azure AI Client
  const client = new AgentsClient(projectEndpoint, new DefaultAzureCredential());

  // Create an agent
  const agent = await client.createAgent(modelDeploymentName, {
    name: "my-agent",
    instructions: "You are a helpful agent specialized in math. When providing mathematical explanations, use plain text formatting with simple characters like +, -, *, / for operations. Do not use LaTeX formatting with backslashes or special notation. Make your explanations clear and easy to read in a terminal.",
  });
  console.log(`Created agent, agent ID : ${agent.id}`);

  // Create a thread
  const thread = await client.threads.create();
  console.log(`Created thread, thread ID : ${thread.id}`);

  // List all threads for the agent
  const threads = client.threads.list();
  console.log(`Threads for agent ${agent.id}:`);
  for await (const t of threads) {
    console.log(`Thread ID: ${t.id} created at: ${t.createdAt}`);
  }

  // Create a message
  const message = await client.messages.create(thread.id, "user", "I need to solve the equation `3x + 11 = 14`. Can you help me?");
  console.log(`Created message, message ID : ${message.id}`);

  // Create and poll a run
  console.log("Creating run...");
  const run = await client.runs.createAndPoll(thread.id, agent.id, {
    pollingOptions: {
      intervalInMs: 2000,
    },
    onResponse: (response): void => {
      const parsedBody =
        typeof response.parsedBody === "object" && response.parsedBody !== null
          ? response.parsedBody
          : null;
      const status = parsedBody && "status" in parsedBody ? parsedBody.status : "unknown";
      console.log(`Received response with status: ${status}`);
    },
  });
  console.log(`Run finished with status: ${run.status}`);

  const messagesIterator = client.messages.list(thread.id);
  console.log("\n\n========================================================");
  console.log("=================== CONVERSATION RESULTS ===================");
  console.log("========================================================\n");

  // Collect all messages first
  const messages = [];
  for await (const m of messagesIterator) {
    messages.push(m);
  }

  // Reverse the order of messages (or sort by timestamp if available)
  messages.reverse();

  // Display messages in the new order
  for (const m of messages) {
    if (m.role === "user") {
      console.log(`\n❓ USER QUESTION: ${
        Array.isArray(m.content) && m.content[0]?.type === "text" && 'text' in m.content[0]
          ? m.content[0].text.value
          : JSON.stringify(m.content)
      }`);
    } else if (m.role === "assistant") {
      console.log("\n🤖 ASSISTANT'S ANSWER:");
      console.log("--------------------------------------------------");

      // Extract and print the text content in a more readable format
      if (m.content && Array.isArray(m.content)) {
        for (const content of m.content) {
          if (content.type === "text" && 'text' in content) {
            console.log(content.text?.value);
          } else {
            console.log(content);
          }
        }
      } else {
        console.log(JSON.stringify(m.content, null, 2));
      }
      console.log("--------------------------------------------------\n");
    }
  }

  console.log("\n========================================================");
  console.log("====================== END OF RESULTS ======================");
  console.log("========================================================\n");

  // Clean up
  await client.threads.delete(thread.id);
  await client.deleteAgent(agent.id);
}

main().catch((err) => {
  console.error("The sample encountered an error:", err);
});
를 사용하여 코드를 실행합니다 npx tsx -r dotenv/config index.ts. 이 코드는 질문에 I need to solve the equation '3x + 11 = 14'. Can you help me?대답합니다. 응답은 결정적이지 않으며 출력은 아래 출력과 유사합니다.
Created agent, agent ID : asst_X4yDNWrdWKb8LN0SQ6xlzhWk
Created thread, thread ID : thread_TxqZcHL2BqkNWl9dFzBYMIU6
Threads for agent asst_X4yDNWrdWKb8LN0SQ6xlzhWk:
...
Created message, message ID : msg_R0zDsXdc2UbfsNXvS1zeS6hk
Creating run...
Received response with status: queued
Received response with status: in_progress
Received response with status: completed
Run finished with status: completed


========================================================
=================== CONVERSATION RESULTS ===================
========================================================


❓ USER QUESTION: I need to solve the equation `3x + 11 = 14`. Can you help me?

🤖 ASSISTANT'S ANSWER:
--------------------------------------------------
Certainly! Let's solve the equation step by step:

We have:
3x + 11 = 14

### Step 1: Eliminate the constant (+11) on the left-hand side.
Subtract 11 from both sides:
3x + 11 - 11 = 14 - 11
This simplifies to:
3x = 3

We have:
3x + 11 = 14

### Step 1: Eliminate the constant (+11) on the left-hand side.
Subtract 11 from both sides:
3x + 11 - 11 = 14 - 11
This simplifies to:
3x = 3

### Step 2: Solve for x.
Divide both sides by 3:
3x / 3 = 3 / 3
This simplifies to:
x = 1

### Final Answer:
x = 1
--------------------------------------------------


========================================================
====================== END OF RESULTS ======================
========================================================
전체 샘플 소스 코드를 사용할 수 있습니다.
| 참조 설명서 | 샘플 | 라이브러리 소스 코드 | 패키지(Maven) |
Prerequisites
- 에이전트 환경 설정
- SDK 또는 에이전트 플레이그라운드를 사용하여 에이전트를 만들거나 편집해야 하는 각 팀 구성원에게 Azure AI 사용자RBAC 역할 할당
- 이 역할은 프로젝트 범위에서 할당해야 합니다.
- 최소 필수 권한: agents/*/read, agents/*/action, agents/*/delete
에이전트 구성 및 실행
먼저 새 Java 콘솔 프로젝트를 만듭니다. 코드를 실행하려면 다음 종속성이 필요합니다.
<dependencies>
    <dependency>
        <groupId>com.azure</groupId>
        <artifactId>azure-ai-agents-persistent</artifactId>
        <version>1.0.0-beta.2</version>
    </dependency>
    <dependency>
        <groupId>com.azure</groupId>
        <artifactId>azure-identity</artifactId>
        <version>1.17.0-beta.1</version>
    </dependency>
</dependencies>
다음으로, API 요청을 인증하고 프로그램을 실행하려면 az login 명령을 사용하여 Azure 구독에 로그인합니다.
az login
다음 코드를 사용하여 에이전트를 만들고 실행합니다. 이 코드를 실행하려면 프로젝트의 엔드포인트를 가져와야 합니다. 이 문자열의 형식은 다음과 같습니다.
https://<AIFoundryResourceName>.services.ai.azure.com/api/projects/<ProjectName>
Important
2025년 5월부터 Azure AI 에이전트 서비스는 이전에 허브 기반 프로젝트에 사용했던 연결 문자열 대신 Foundry 프로젝트에 엔드포인트를 사용합니다. 허브 기반 프로젝트를 사용하는 경우 SDK 및 REST API의 현재 버전을 사용할 수 없습니다. 자세한 내용은 허브 기반 프로젝트의 SDK 사용량을 참조하세요.
프로젝트에 대한 개요에서 Azure AI Foundry 포털의 라이브러리 아래에서 엔드포인트를 찾을 수 있습니다.
라는 PROJECT_ENDPOINT환경 변수에서 이 엔드포인트를 설정합니다.
모델의 배포 이름도 필요합니다. 왼쪽 탐색 메뉴의 모델 + 엔드포인트 에서 찾을 수 있습니다.
모델 배포 이름의 이름을 환경 MODEL_DEPLOYMENT_NAME변수로 저장합니다.
코드 예제
package com.example.agents;

import com.azure.ai.agents.persistent.MessagesClient;
import com.azure.ai.agents.persistent.PersistentAgentsAdministrationClient;
import com.azure.ai.agents.persistent.PersistentAgentsClient;
import com.azure.ai.agents.persistent.PersistentAgentsClientBuilder;
import com.azure.ai.agents.persistent.RunsClient;
import com.azure.ai.agents.persistent.ThreadsClient;
import com.azure.ai.agents.persistent.models.CodeInterpreterToolDefinition;
import com.azure.ai.agents.persistent.models.CreateAgentOptions;
import com.azure.ai.agents.persistent.models.CreateRunOptions;
import com.azure.ai.agents.persistent.models.MessageImageFileContent;
import com.azure.ai.agents.persistent.models.MessageRole;
import com.azure.ai.agents.persistent.models.MessageTextContent;
import com.azure.ai.agents.persistent.models.PersistentAgent;
import com.azure.ai.agents.persistent.models.PersistentAgentThread;
import com.azure.ai.agents.persistent.models.RunStatus;
import com.azure.ai.agents.persistent.models.ThreadMessage;
import com.azure.ai.agents.persistent.models.ThreadRun;
import com.azure.ai.agents.persistent.models.MessageContent;
import com.azure.core.http.rest.PagedIterable;
import com.azure.identity.DefaultAzureCredentialBuilder;
import java.util.Arrays;

public class AgentSample {

    public static void main(String[] args) {
        // variables for authenticating requests to the agent service
        String projectEndpoint = System.getenv("PROJECT_ENDPOINT");
        String modelName = System.getenv("MODEL_DEPLOYMENT_NAME");

        // initialize clients to manage various aspects of agent runtime
        PersistentAgentsClientBuilder clientBuilder = new PersistentAgentsClientBuilder()
            .endpoint(projectEndpoint)
            .credential(new DefaultAzureCredentialBuilder().build());
        PersistentAgentsClient agentsClient = clientBuilder.buildClient();
        PersistentAgentsAdministrationClient administrationClient = agentsClient.getPersistentAgentsAdministrationClient();
        ThreadsClient threadsClient = agentsClient.getThreadsClient();
        MessagesClient messagesClient = agentsClient.getMessagesClient();
        RunsClient runsClient = agentsClient.getRunsClient();


        String agentName = "my-agent"; // the name of the agent
        CreateAgentOptions createAgentOptions = new CreateAgentOptions(modelName)
            .setName(agentName)
            .setInstructions("You are a helpful agent") // system insturctions
            .setTools(Arrays.asList(new CodeInterpreterToolDefinition()));
        PersistentAgent agent = administrationClient.createAgent(createAgentOptions);

        PersistentAgentThread thread = threadsClient.createThread();
        ThreadMessage createdMessage = messagesClient.createMessage(
            thread.getId(),
            MessageRole.USER,
            "I need to solve the equation `3x + 11 = 14`. Can you help me?"); // The message to the agent

        try {
            //run the agent
            CreateRunOptions createRunOptions = new CreateRunOptions(thread.getId(), agent.getId())
                .setAdditionalInstructions("");
            ThreadRun threadRun = runsClient.createRun(createRunOptions);
            // wait for the run to complete before printing the message
            waitForRunCompletion(thread.getId(), threadRun, runsClient);
            printRunMessages(messagesClient, thread.getId());
        } catch (InterruptedException e) {
            throw new RuntimeException(e);
        } finally {
            //cleanup - uncomment these lines if you want to delete the agent
            //threadsClient.deleteThread(thread.getId());
            //administrationClient.deleteAgent(agent.getId());
        }
    }

    // A helper function to print messages from the agent
    public static void printRunMessages(MessagesClient messagesClient, String threadId) {

        PagedIterable<ThreadMessage> runMessages = messagesClient.listMessages(threadId);
        for (ThreadMessage message : runMessages) {
            System.out.print(String.format("%1$s - %2$s : ", message.getCreatedAt(), message.getRole()));
            for (MessageContent contentItem : message.getContent()) {
                if (contentItem instanceof MessageTextContent) {
                    System.out.print((((MessageTextContent) contentItem).getText().getValue()));
                } else if (contentItem instanceof MessageImageFileContent) {
                    String imageFileId = (((MessageImageFileContent) contentItem).getImageFile().getFileId());
                    System.out.print("Image from ID: " + imageFileId);
                }
                System.out.println();
            }
        }
    }

    // a helper function to wait until a run has completed running
    public static void waitForRunCompletion(String threadId, ThreadRun threadRun, RunsClient runsClient)
        throws InterruptedException {

        do {
            Thread.sleep(500);
            threadRun = runsClient.getRun(threadId, threadRun.getId());
        }
        while (
            threadRun.getStatus() == RunStatus.QUEUED
                || threadRun.getStatus() == RunStatus.IN_PROGRESS
                || threadRun.getStatus() == RunStatus.REQUIRES_ACTION);

        if (threadRun.getStatus() == RunStatus.FAILED) {
            System.out.println(threadRun.getLastError().getMessage());
        }
    }
}
| 참조 설명서 |
Prerequisites
- 에이전트 환경 설정
- SDK 또는 에이전트 플레이그라운드를 사용하여 에이전트를 만들거나 편집해야 하는 각 팀 구성원에게 Azure AI 사용자RBAC 역할 할당
- 이 역할은 프로젝트 범위에서 할당해야 합니다.
- 최소 필수 권한: agents/*/read, agents/*/action, agents/*/delete
에이전트 구성 및 실행
API 요청을 인증하려면 az login 명령을 사용하여 Azure 구독에 로그인합니다.
az login
다음으로, API 호출에 대한 권한 부여로 제공하려면 Entra ID 토큰을 가져와야 합니다. CLI 명령을 사용하여 토큰을 가져옵니다.
az account get-access-token --resource 'https://ai.azure.com' | jq -r .accessToken | tr -d '"'
액세스 토큰을 AGENT_TOKEN이라는 환경 변수로 설정합니다.
Azure AI Foundry 에이전트 서비스에 대한 REST API 호출을 성공적으로 수행하려면 프로젝트의 엔드포인트를 사용해야 합니다.
https://<your_ai_service_name>.services.ai.azure.com/api/projects/<your_project_name>
예를 들어 엔드포인트는 다음과 같이 표시됩니다.
https://exampleaiservice.services.ai.azure.com/api/projects/project
이 엔드포인트를 AZURE_AI_FOUNDRY_PROJECT_ENDPOINT라는 환경 변수로 설정합니다.
Note
- 매개 변수의 경우
api-versionGA API 버전은2025-05-01최신 미리 보기 API 버전입니다2025-05-15-preview. 미리 보기에 있는 도구에 미리 보기 API를 사용해야 합니다. - API 버전을 환경 변수(예: .)로
$API_VERSION만드는 것이 좋습니다.
에이전트 만들기
Note
Azure AI 에이전트 서비스를 사용하면 model 매개 변수에 모델 배포 이름이 필요합니다. 모델 배포 이름이 기본 모델 이름과 다른 경우 코드를 .로 조정합니다 "model": "{your-custom-model-deployment-name}".
curl --request POST \
  --url $AZURE_AI_FOUNDRY_PROJECT_ENDPOINT/assistants?api-version=2025-05-01 \
  -H "Authorization: Bearer $AGENT_TOKEN" \
  -H "Content-Type: application/json" \
  -d '{
    "instructions": "You are a helpful agent.",
    "name": "my-agent",
    "tools": [{"type": "code_interpreter"}],
    "model": "gpt-4o-mini"
  }'
스레드 만들기
curl --request POST \
  --url $AZURE_AI_FOUNDRY_PROJECT_ENDPOINT/threads?api-version=2025-05-01 \
  -H "Authorization: Bearer $AGENT_TOKEN" \
  -H "Content-Type: application/json" \
  -d ''
스레드에 사용자 질문 추가
curl --request POST \
  --url $AZURE_AI_FOUNDRY_PROJECT_ENDPOINT/threads/thread_abc123/messages?api-version=2025-05-01 \
  -H "Authorization: Bearer $AGENT_TOKEN" \
  -H "Content-Type: application/json" \
  -d '{
      "role": "user",
      "content": "I need to solve the equation `3x + 11 = 14`. Can you help me?"
    }'
스레드 실행
curl --request POST \
  --url $AZURE_AI_FOUNDRY_PROJECT_ENDPOINT/threads/thread_abc123/runs?api-version=2025-05-01 \
  -H "Authorization: Bearer $AGENT_TOKEN" \
  -H "Content-Type: application/json" \
  -d '{
    "assistant_id": "asst_abc123",
  }'
실행 상태 검색
curl --request GET \
  --url $AZURE_AI_FOUNDRY_PROJECT_ENDPOINT/threads/thread_abc123/runs/run_abc123?api-version=2025-05-01 \
  -H "Authorization: Bearer $AGENT_TOKEN"
에이전트 응답 검색
curl --request GET \
  --url $AZURE_AI_FOUNDRY_PROJECT_ENDPOINT/threads/thread_abc123/messages?api-version=2025-05-01 \
  -H "Authorization: Bearer $AGENT_TOKEN"
다음 단계
웹 액세스, 접지 정보 제공 등 에이전트의 기능을 확장하는 데 사용할 수 있는 도구 에 대해 알아봅니다.