Note
Access to this page requires authorization. You can try signing in or changing directories.
Access to this page requires authorization. You can try changing directories.
Applies to: Azure Logic Apps (Consumption + Standard)
To start any workflow in Azure Logic Apps, always add a trigger as the first step. You then continue the workflow by adding an action. The trigger specifies either the schedule to use or a condition to meet for your workflow to run.
Following the trigger, you have to add one or more subsequent actions so that your workflow performs the tasks that you want. The trigger and actions work together to define your workflow's logic and structure.
This guide shows how to add a trigger and action for Consumption and Standard logic app workflows.
Prerequisites
An Azure account and subscription. If you don't have an Azure subscription, sign up for a free Azure account.
A logic app resource and workflow, based on whether you want to add a trigger or an action:
Add a Prerequisite Trigger You have to start with a logic app resource and a blank workflow. Action You have to start with a logic app resource and a workflow with the trigger at least. You can use any trigger that fits your specific scenario. For more information, see the following documentation:
Create an example Consumption logic app workflow in the Azure portal
Create an example Standard logic app workflow in the Azure portal
Although this guide's examples use the Azure portal, you can also use Visual Studio Code to build a logic app workflow. For more information, see the following documentation:
Add a trigger to start your workflow
In the Azure portal, open your Consumption logic app resource and blank workflow in the designer.
On the designer, select Add a trigger, if not already selected.
The Add a trigger pane opens and shows the available operation collections and connectors that provide triggers, for example:
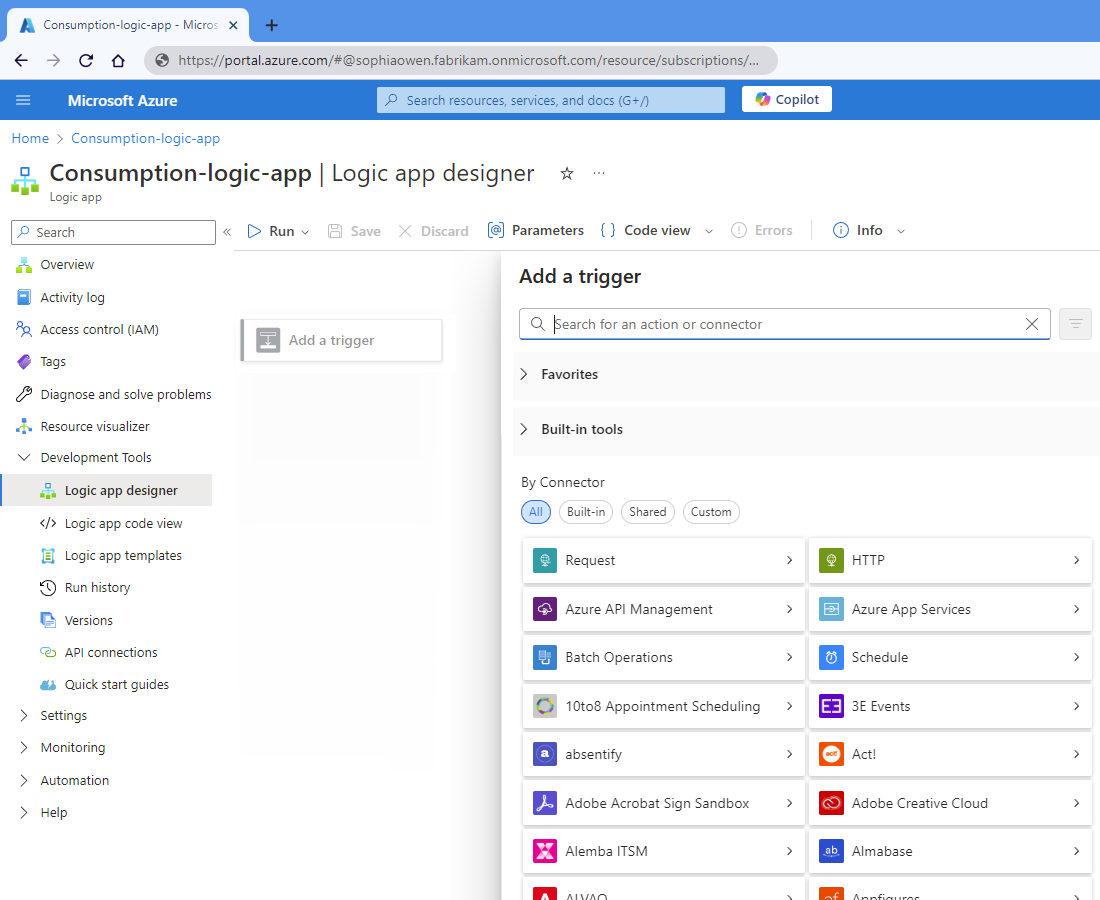
Choose either option:
Filter by Steps and description By name In the search box, enter the name for the connector, operation collection, or trigger that you want, for example:
- Outlook.com: A connector that includes various triggers for working with your Outlook account.
- Schedule: An operation collection that includes triggers such as Recurrence and Sliding Window.
- When a new email arrives: A trigger that starts the workflow when a new message arrives in the specified email account.By runtime ___location Under By Connector, select one of the following options:
- Built-in: Operation collections with triggers that run directly and natively with the Azure Logic Apps runtime.
- Shared: Connectors with triggers that are Microsoft-managed, hosted, and run in multitenant Azure. This group combines the legacy Standard and Enterprise groups in earlier designer versions.
- Custom: Any connectors with triggers that you created and installed.The following example shows the blank workflow designer with the opened Add a trigger pane and the selected Built-in option. The list shows the available operation collections, which appear in a specific order.

The following example shows the blank workflow designer with the opened Add a trigger pane open and the selected Shared option. The list shows the available connectors, which appear in a specific order.

From the triggers list, select the trigger that you want. If more triggers exist than are shown, select See more.
If the Create connection pane appears, provide the required connection information, which differs based on the connector. When you're done, select Sign in or Create new to complete the connection.
After the trigger information box appears, provide the information for the selected trigger.
Save your workflow. On the designer toolbar, select Save.


Add an action to run a task
In the Azure portal, open your Consumption logic app resource and workflow in the designer.
On the designer, choose either option:
To add the action under the last step in the workflow, select the plus sign (+), and then select Add an action.
To add the action between existing steps, select the plus sign (+) on the connecting arrow, and then select Add an action.
The Add an action pane opens and shows the available connectors that provide actions, for example:
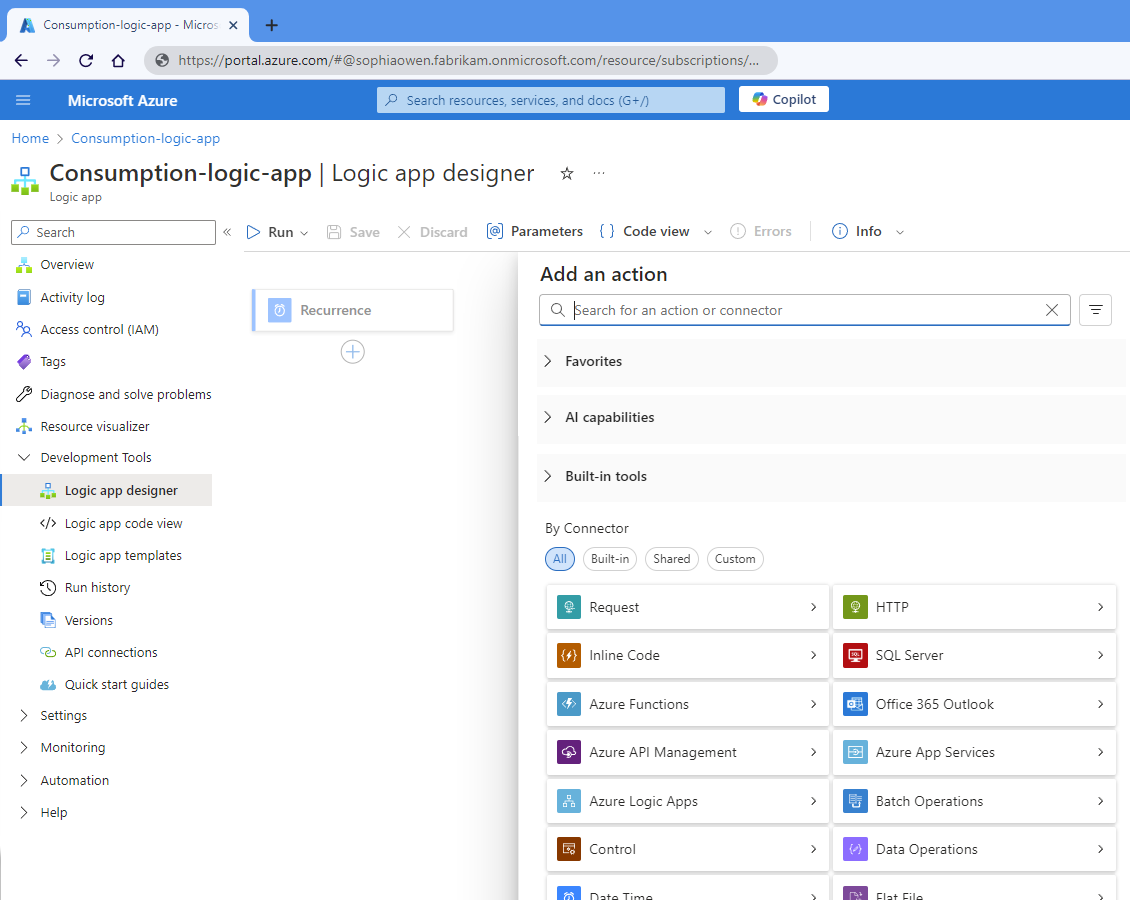
Choose either option:
Filter by Steps and description By name In the search box, enter the name for the connector, operation collection, or action that you want, for example:
- Outlook.com: A connector that includes various actions for working with your Outlook account.
- Control: An operation collection that includes actions such as Condition and For each.
- Send an email (V3): An action that sends a message to the specified email account.By runtime ___location Under By Connector, select one of the following options:
- Built-in: Operation collections with actions that run directly and natively with the Azure Logic Apps runtime.
- Shared: Connectors with actions that are Microsoft-managed, hosted, and run in multitenant Azure. This group combines the legacy Standard and Enterprise groups in earlier designer versions.
- Custom: Any connectors with actions that you created and installed.The following example shows the workflow designer with the opened Add an action pane and the selected Built-in option. The list shows the available operation collections, which appear in a specific order.

The following example shows the workflow designer with the opened Add an action pane and the selected Shared option. The list shows the available connectors, which appear in a specific order.

From the actions list, select the action that you want. If more actions exist than are shown, select See more.
If the Create connection pane appears, provide the required connection information, which differs based on the connector. When you're done, select Sign in or Create new to complete the connection.
After the action information box appears, provide the information for the selected action.
Save your workflow. On the designer toolbar, select Save.


Connectors, triggers, and actions in the designer
In the workflow designer, you can select from 1,400+ connector triggers and actions, collectively called operations. Azure Logic Apps organizes operations into either collections such as Schedule and Data Operations, or as connectors such as Azure Blob Storage and SQL Server. Collections and connectors can include triggers, actions, or both.
When the Add a trigger or Add an action pane opens, the gallery lists the available collections and connectors from left to right, based on popularity. After you select a collection or connector, the available triggers or actions appear in alphabetically in ascending order.
Built-in operations
The following Standard workflow example shows the Built-in operation collections and connectors when you add a trigger:

After you select a collection or connector, triggers appear based on the collection or connector name.
The following example shows the selected Schedule collection and its triggers:

The following example shows the Built-in collections and connectors when you add an action:

The following example shows the selected Azure Queue Storage connector and its actions:

Shared (Azure) operations
The following Standard workflow example shows the Shared connectors gallery when you add a trigger:

After you select a collection or connector, triggers appear based on the collection or connector name.
The following example shows the selected 365 Training connector and its triggers:

The following example shows the Shared connectors gallery when you add an action:

The following example shows the selected 365 Training connector and its actions:

For more information, see the following documentation:
- Built-in operations and connectors in Azure Logic Apps
- Microsoft-managed connectors in Azure Logic Apps
- Custom connectors in Azure Logic Apps
- Billing and pricing for operations in Consumption workflows
- Billing and pricing for operations in Standard workflows